
This Kitchen Makeover’s Color Palette Was Inspired by a Bottle of Wine — and They Nailed It
Design inspiration can come from anywhere, and in Megan’s (@pearlsandpints) kitchen makeover, color inspo came from a wine bottle. “I had been really drawing a blank on where to begin,” Megan says. While pouring a glass from her favorite local vendor on a cold winter night, she had an “aha moment.”
Megan; her husband, Morgan; and their 2-year-old son moved from New York City to Chicago. The couple loved their new apartment’s historic oak paneling, pedestal sinks, and more, but “the kitchen, not so much,” Megan says.
“It was all very DIY and not in a good way,” she adds. Someone had painted the walls around the appliances but not behind them; the cabinets had trim and paint added to them, but they didn’t close properly; the countertops were formica that had been “sloppily” tiled over, and the miniblinds were covered in years of grease and residue.
“I’ve done my fair share of DIY projects in rentals throughout the years, [but] this is the first home that I’ve owned, and that means ‘doing it right’ as opposed to simply ‘getting it done,’” Megan says. For her kitchen transformation, she went the DIY route, but she was extra-intentional about research and the products she bought. “It really wasn’t any harder, just a bit longer!” she says.


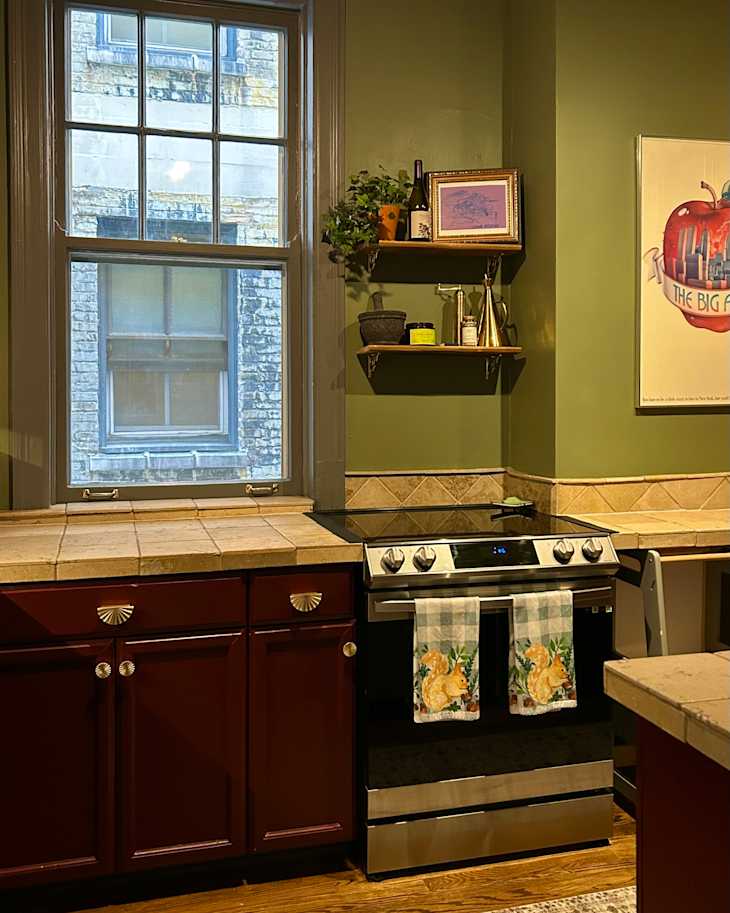
The walls got a coat of green paint.
Megan painted the walls in one weekend; those are now a vibrant green (Behr’s Ecological). “When we moved in, it was stark white and soulless,” Megan says of the kitchen, and the green added instant personality, as did a vintage-looking vinyl floor mat from Food52.
“We had just finished a 12-week construction project that left our apartment looking, essentially, the same,” Megan says. (It was a burst pipe repair job, meaning the time and money went toward the inside of the walls.) “Having gone through that, we wanted to keep things small-scale in terms of life disruption while still getting a big impact,” she says.


Painting the cabinets made the biggest difference.
Paint gave Megan and Morgan the most bang for their buck, and it was Megan’s first foray into painting cabinetry. She used a deep burgundy (Behr’s Divine Wine) for the lower cabinets, and she chose to stick with the previous color for the uppers; she just color-matched it in a Behr paint.
“Painting cabinets looks so good when it’s done right, and so crappy when it’s done wrong,” Megan says. Her advice is to spend the extra $50 on quality paint and supplies.
“The cabinets had been painted by the previous owner, and they were streaky with brush marks with inconsistencies in the sheen, and the paint peeled off with the smallest scrape,” she describes of the before.
After, “as soon as the first bottom doors dried and went back up, I couldn’t stop smiling,” she says. “The finish is smooth as can be and hard as a rock.”


The hardware on the cabinets is also a major upgrade.
Megan says the new quiet-close cabinet hinges have also made a big difference in her day-to-day. “The old ones were such a mess — so broken and corroded — that I had to get them off any way I could,” she says. “I was lucky that the new ones lined up with the same holes the old ones had left behind.”
She gives a special shoutout to her Kreg door-mounting jig that held and leveled the cabinet doors while she screwed them back in, and she says the hard work was worth it. “Seeing the doors all line up perfectly, close without scraping on each other, and the silent swoosh they make? Chef’s kiss.” she says. Her wavy knobs and drawer pulls are from Amazon.


The countertop and backsplash are a better fit now.
Megan says in a dream world (with a dream budget), she would do a complete demo of the kitchen with the appliances in better places, a pantry addition, and new countertops.
“I hated my countertops; however, changing them wasn’t something we wanted to take on right now,” she says. “With a 2-year-old we need a functional kitchen 24/7. While I still wish I could change them, I hate them so much less now that they work more cohesively in the space.”
In the future, she says she might try a countertop epoxy DIY project, but for now she’s happy with the money she spent and where she spent it.

The kitchen makeover totaled under $500.
The biggest splurge in the space was on the brass shelf brackets, but the reclaimed wood for the shelves only cost $5. “We love working with our local salvage yards,” Megan says. “Over the past two years, we’ve gotten light fixtures, faucets, door hardware, and so much more.”
New under-cabinet lighting cost about $30, and the paint for the kitchen cost $150 and made the biggest difference. Megan loves the new color scheme now. “The kitchen really is the little jewel box of a moody, cozy space I wanted,” she says. “Sipping wine and listening to French jazz while cooking on a weeknight feels right in this space.”
Inspired? Submit your own project here.