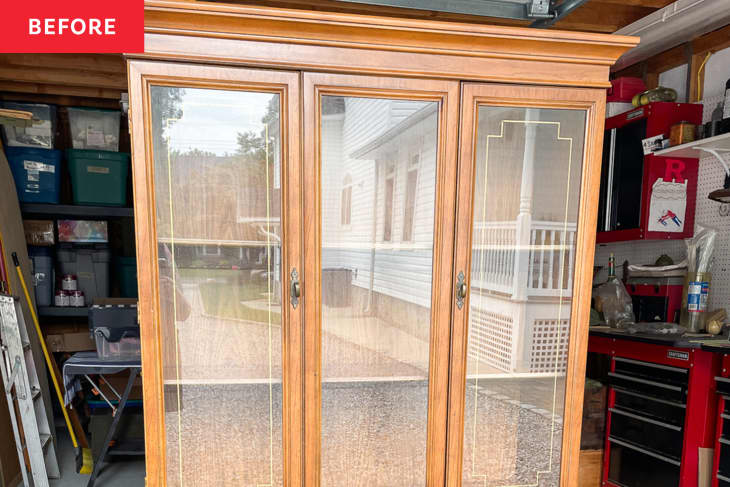
Before and After: A Cheery $230 Redo Turns a Free Hutch into One Renter’s Favorite Piece of Furniture

If your home has a distinct style, it’s probably easy to tell when a piece of furniture is just meant to be in your home — perhaps you’ve experienced an instant add-to-cart or pull-over-to-the-curb-and-throw-it-in-the-trunk kind of moment to score that special piece for your place.
Other items might need a bit of TLC before they work in your super colorful, minimalist, retro, boho, biophilic, or insert any given aesthetic here home, but that’s where the power of DIY comes in. Rachel Mae Smith (@thecraftedlife), for instance, made this free Facebook Marketplace hutch a showstopper of her surroundings, where there’s not much brown wood to be found.
“Overall the piece was in okay shape, a few scratches, so I didn’t have to do anything structurally; it just needed a colorful makeover to fit in,” Rachel explains. She adds on her blog that she felt comfortable painting the piece because it wasn’t an antique or made of high-quality, solid wood. The before was “sitting in someone’s garage, covered in spiders and all,” so Rachel and her husband, Ryan, put a lot of work into the prep.
First, they gave it a good cleaning, removed all of the hardware, filled in holes and dings with wood filler, and then sanded it. “I used a hand sander for the larger, smoother pieces and then sanded the details by hand,” Rachel writes on her blog. “This is such an important step because it gives the primer something to grip to. It also helps smooth out any uneven surfaces and makes flaws less noticeable.”
Next, she primed (using Zinsser BIN Primer) and painted the piece a vibrant green (using Benjamin Moore’s Amazon Moss). “I’m most proud of the smooth finish!” Rachel says. “The paint job has also held up very nicely.”
Her best DIY advice? “Be sure to take your time with painting,” she says. “The goal should be quality over speed!”
For the finishing touches, she added new hardware to the bottom of the piece. She kept the original hardware up top, but she polished it so it was shinier, brassier, and like-new. On the inside, she decided to add Rifle Paper Co.’s Hawthorne Rose wallpaper. “Since I can’t justify wallpapering the walls in our rental, this was the perfect opportunity to use it,” Rachel writes on her blog. “The flowers and the gold detailing are the perfect combination!”
(And speaking of flowers and gold detailing, the new knobs Rachel went with on the cabinet doors are brass flower-shaped pieces from Anthropologie.) Her total cost for the green cabinet makeover was about $230.
“Overall, it’s been the perfect piece to store my glass and dish collection,” Rachel says. “This hutch is my favorite piece of furniture in our home. It has so much more meaning to it knowing that my husband and I worked together to make it something that was us. I wouldn’t change a thing.”
Inspired? Submit your own project here.
