
Before and After: A “Junk Room” Home Office Gets a Jaw-Dropping Transformation for $1,000
In small (or even large!) spaces, rooms often have to serve multiple purposes: Maybe you have a bedroom-meets-home gym, a living room-meets-home office, a kitchen-meets-homework spot, you get the idea. The problem with multipurpose or hybrid spaces is that they can quickly become a little too multipurpose. To prevent clutter, circle back to the original purpose(s) of the space. What do you want the room to feel like, look like, and accomplish for you?
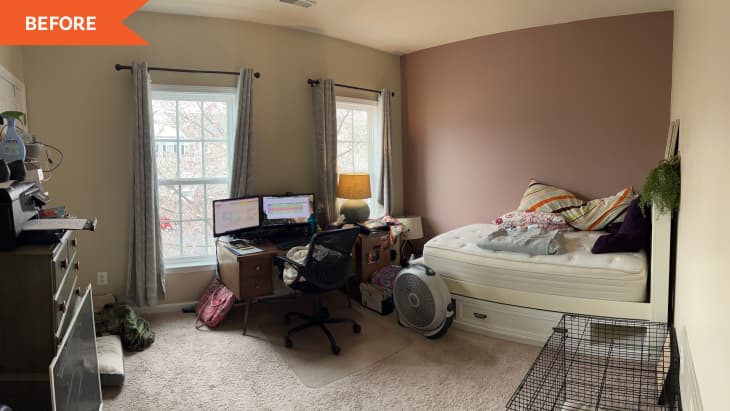
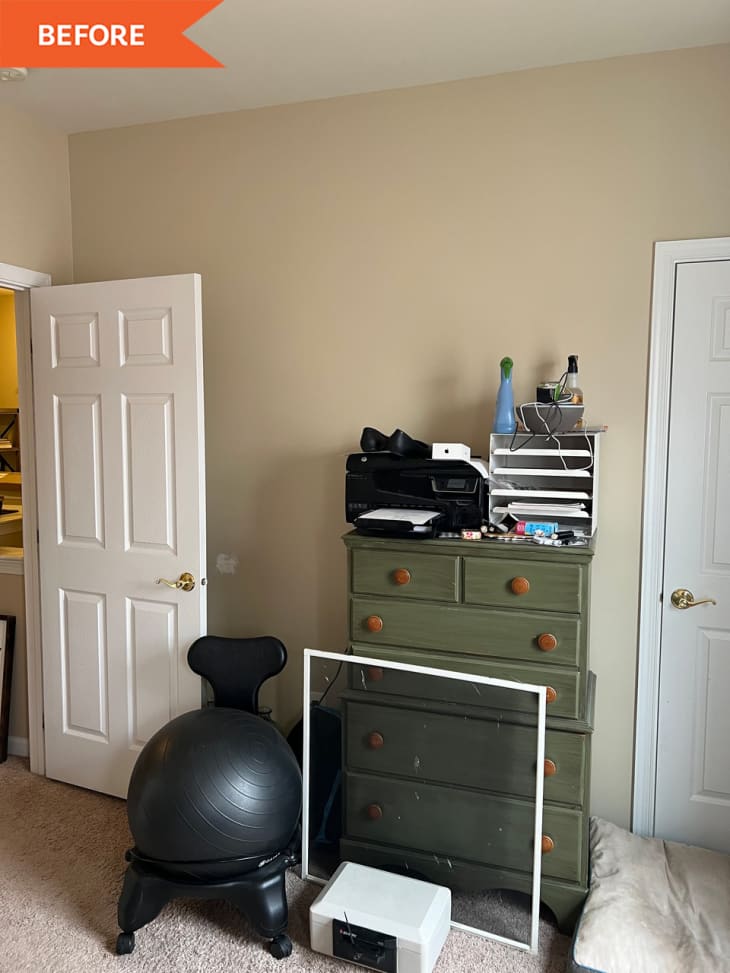
Emily Huxford’s (@happilyhuxford) home office was one of those spaces that was taking on too many responsibilities. It also had a bed in it, and also a dog crate, and also exercise equipment, and also random boxes, and a ton of miscellaneous odds and ends.
“My office has always been more of a ‘junk room’ than an actual home office,” Emily says. “We jokingly called my office the Room of Requirement (from Harry Potter) because if anything ever went missing, it would probably turn up in that room at some point.”
In addition to the junk, Emily thought the mauve accent wall had to go. She got to work on streamlining the space during the Spring 2022 One Room Challenge, “powered with ambition, a great vision, and YouTube tutorials,” she says.
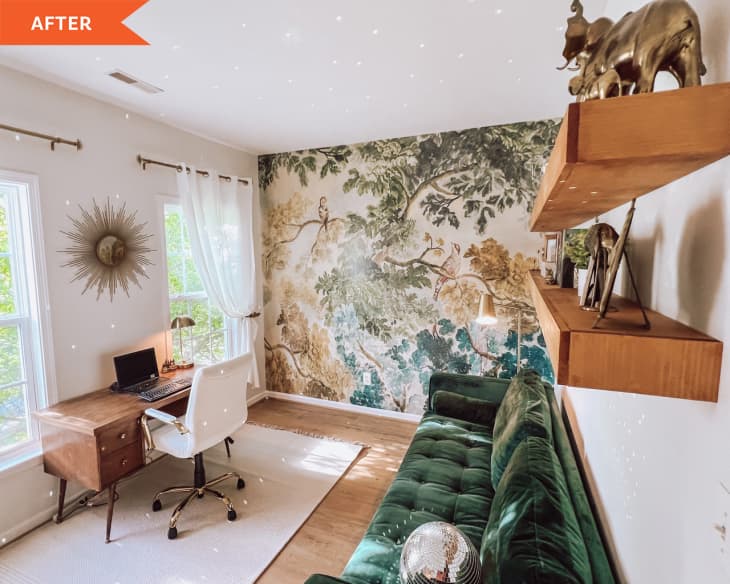
During the eight-week redo, she ripped up the carpet; painted the walls, ceiling, and trim; installed LVP flooring; hung wallpaper; moved in new (to her) furniture; built and installed floating shelves; and decorated — all for a stylish (but still multifunctional!) result.
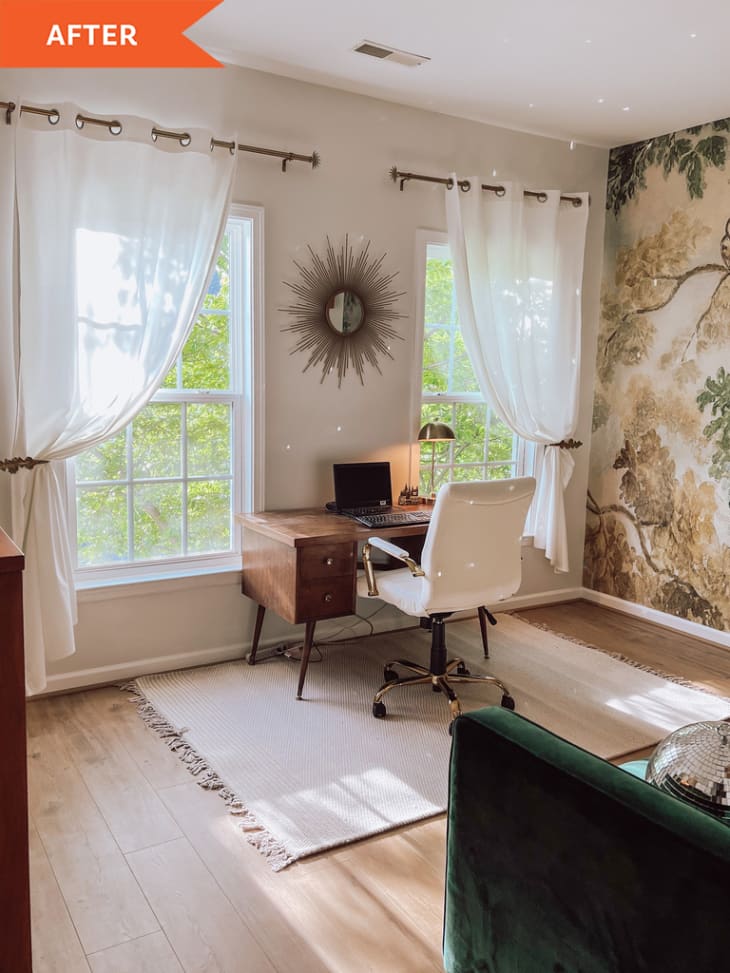
The hardest part? Building those shelves that run over 8 feet long. “I spent three of our eight weeks working on the shelves,” she says. “I was so hyped up over the flooring and had watched hours and hours of YouTube tutorials but walked in blind in regards to the floating shelves. If I had been prepared and done my homework on how to build them, it would have been a much less stressful project. And I would have shed fewer tears in the middle of the Lowe’s lumber aisle.”
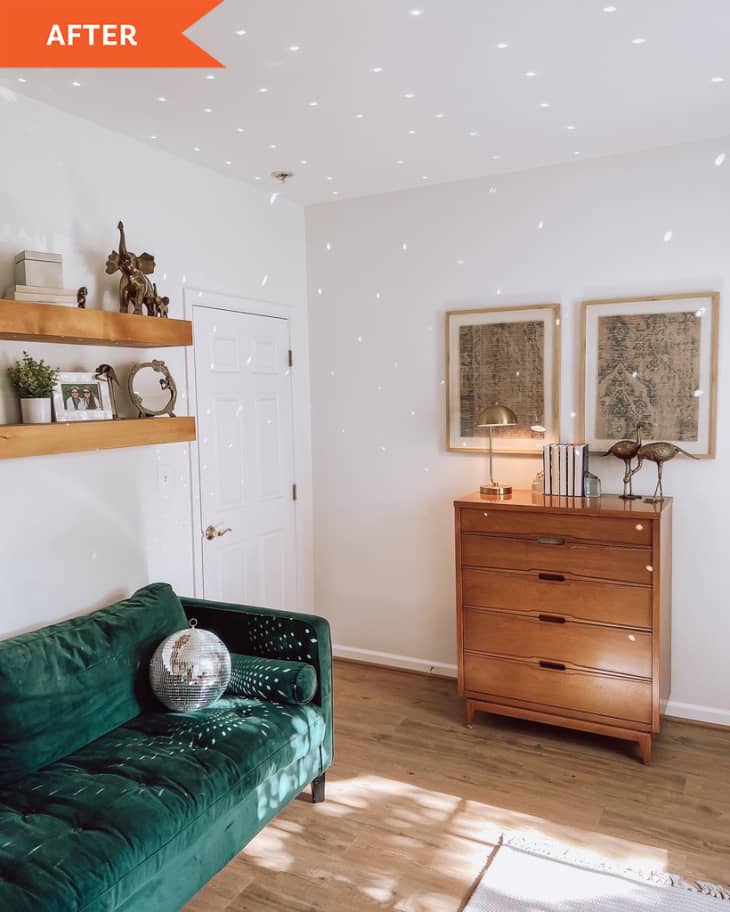
Emily says, in the end, several friends and DIYers came to the rescue with advice and help, and the shelves were worth the sweat equity and tears in the long run. “I’m a better DIYer because of them,” she says. “I really ‘earned my stripes’ on those shelves.”
Three steps that were easier than expected? Ripping up the carpet (it took her three hours when she’d allotted three days), laying the new imitation oak floors (with the right tools, it’s quite beginner-friendly to do, she says), and adding her feature wall. The latter made the biggest difference in transforming the space, she says.
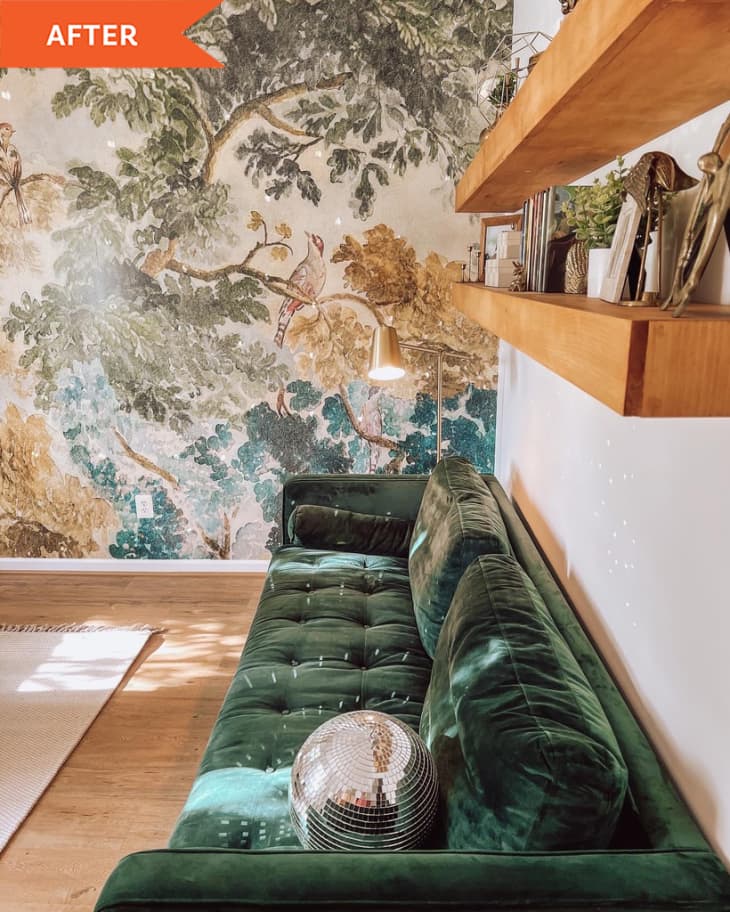
“It’s hard not to be madly in love with the mural wall,” she says. “I was originally going to put a piece of furniture on that wall but couldn’t bear to cover up any of the mural. It’s stunning!” (It’s a paneled peel-and-stick option from Anthro that you can get here.)
Finally, Emily filled in her space with secondhand furniture largely from Facebook Marketplace. “The desk and dresser are vintage mid-century modern pieces,” she says. “The sofa is a Magnolia Home velvet sofa that I scored for $150. All of the decor is curated vintage finds, except for the mirror.” (That sunburst mirror was about $60 from Amazon.)
Her project total was about $1,000, she says.
Emily’s DIY advice is to do your research, then jump in. “I wish I had done this project years ago, but I let fear and a lack of confidence in my own abilities hold me back,” she says. “I just needed a push to get it done. Now that I’ve done it, I want to do more rooms.”
Go get ’em, Emily! And go forth and conquer, future DIYers!
This project was completed for the Spring 2022 One Room Challenge, in partnership with Apartment Therapy. See even more of the One Room Challenge before and afters here.
Inspired? Submit your own project here.