
Before and After: 5 DIY Projects Totaling $2,500 Give a Dark 2010s Kitchen a Fresh New Look
While in the 2000s and 2010s it might have been popular to leave a bit of space above kitchen cabinets (with room to display trays and dishes and vases), these days, the trend is for kitchen cabinets to stretch all the way to the ceiling; this both elongates the room and maximizes storage.
If you’re looking to bring the modernized look to your own home, take tips and inspiration from homeowner Astin Hancock (@yourlifeiswhatyoumakeit). With the help of her husband, Tyler, and her daughter, Mia, Astin gave her 2011 kitchen a much more contemporary look without having to install all new cabinetry.
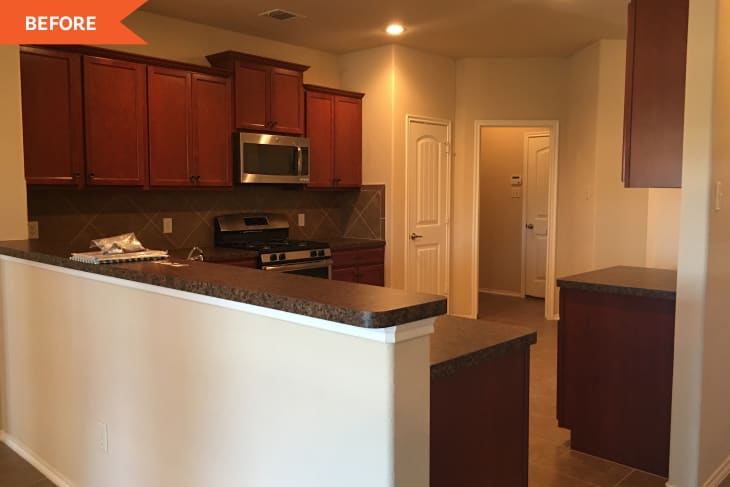
Astin’s kitchen started out with a quintessential 2010s look — dark wood cabinets, dark tile backsplash, and a dark stone-look counter. It was all in good shape, but everything just looked, well… dark. There were some stylistic features that weren’t doing any favors for the space, either, like a split-level countertop that had limited usable square footage for eating and meal prep.

But one of the biggest things that needed changing, of course, was that space above the cabinets. “It’s easier than you think to fill it in with additional cabinet boxes,” Astin writes on TikTok. She pulled off the project with plywood and framing lumber. (And if you don’t have any woodworking skills or power tools, check out these 8 DIY projects or these 10 decorating ideas to fill in that awkward upper space.)
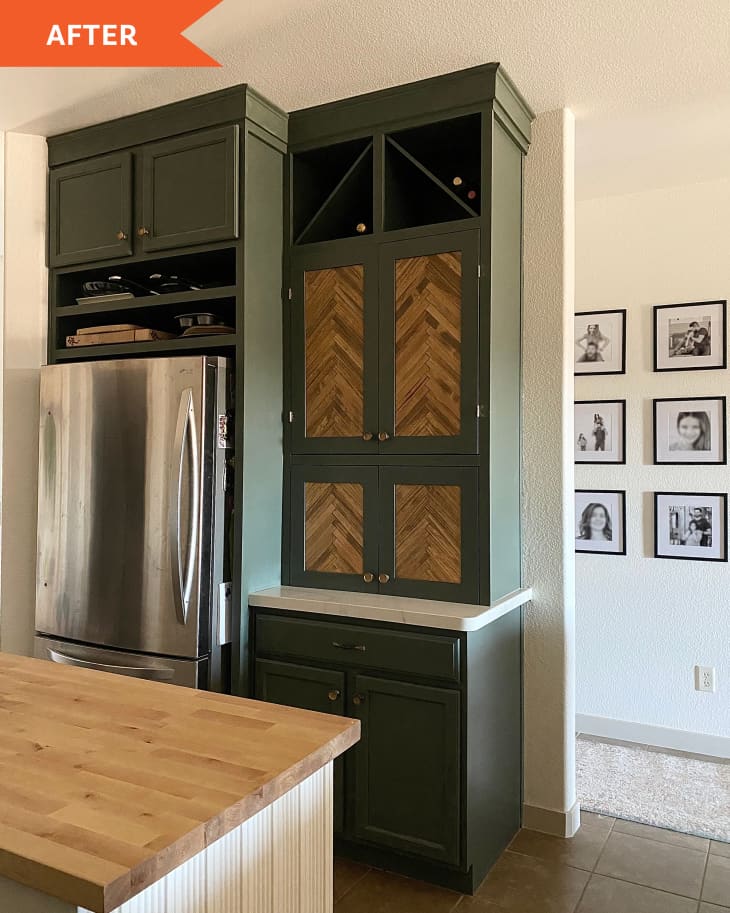
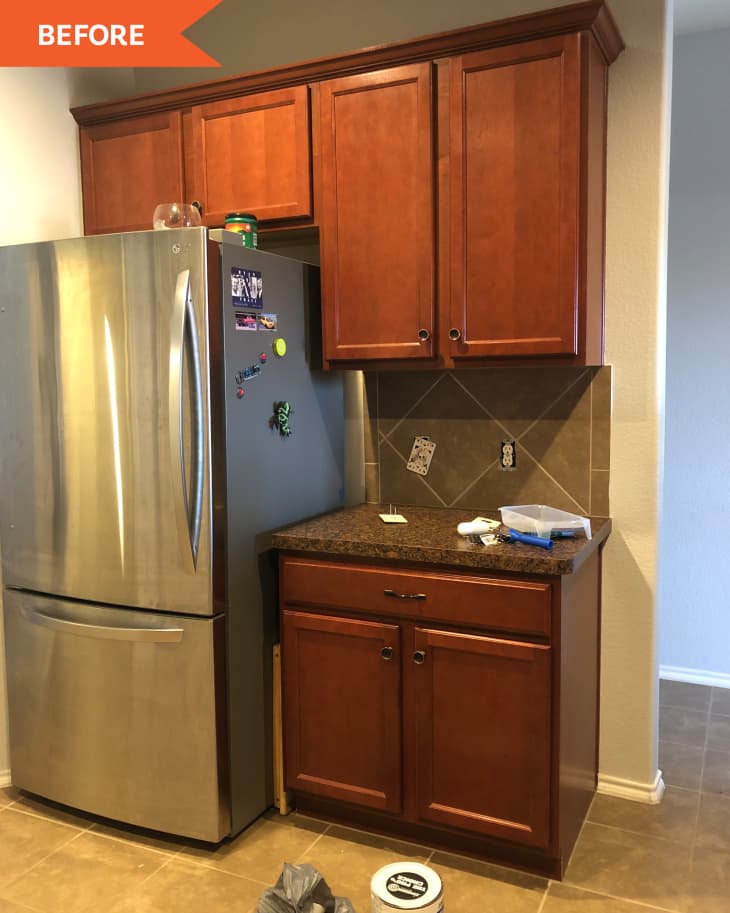
For her kitchen’s fridge wall, Astin totally took out her upper cabinets and built brand new ones with more shelving. She primed and painted those and the existing cabinets Sherwin-Williams’ Pewter Green, and she says she loves the new color. As for the chevron cabinet fronts? Those are made from paint stirrers laid out in a chevron pattern against a thin wood backing. The variable wood color adds a rustic touch to the cabinet fronts for not much money.
Astin’s favorite DIY the space, though, is the stone ledger and grout backsplash she installed. It’s brighter than the old dark tile and has a charming old-school farmhouse quality.
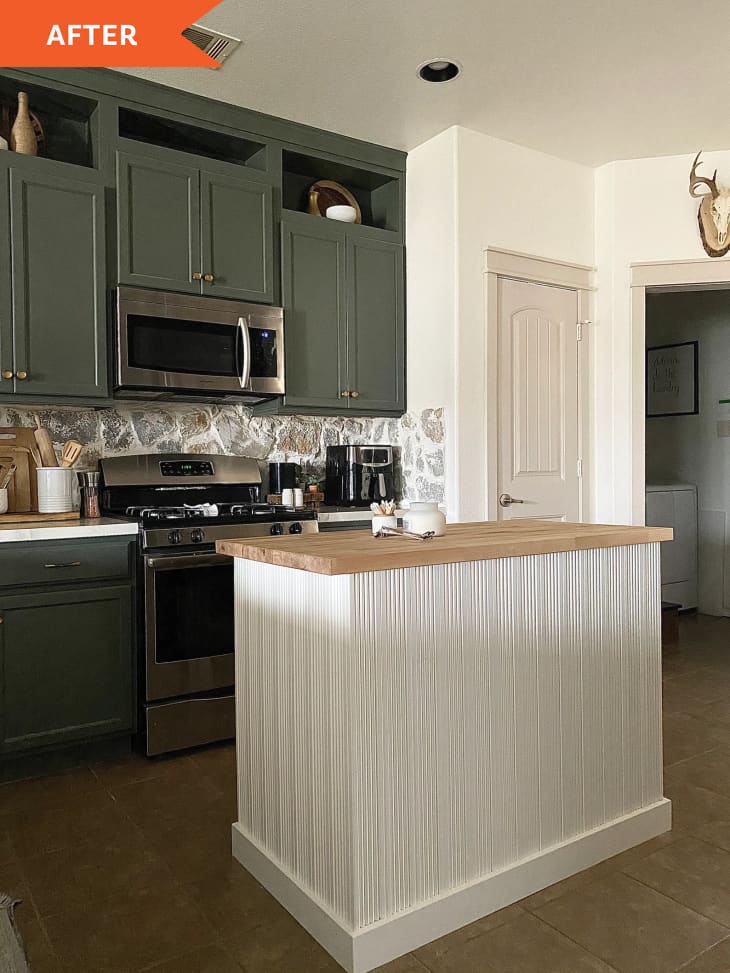
For the counter space, Astin built an expandable island from scratch. She wrapped the island in classic beadboard — also used on the back of the kitchen’s bar — for a vintagey cottage look.
Astin also lowered the existing bar to countertop level, and then she and Tyler painted and epoxied the countertops. “The paint and epoxy on the countertops is just temporary,” she says. “We will eventually replace them with quartz or white granite. If I did anything different, I’d probably use a countertop refinishing kit instead of the paint and epoxy, or do more research into epoxies that aren’t supposed to yellow as the epoxy has yellowed a bit.”
Her DIY-filled kitchen redo cost a grand total of about $2,500. “I’m most proud that we did this all ourselves and saved so much money!” she says.
Inspired? Submit your own project here.