
How to Clean a Keurig Coffee Maker
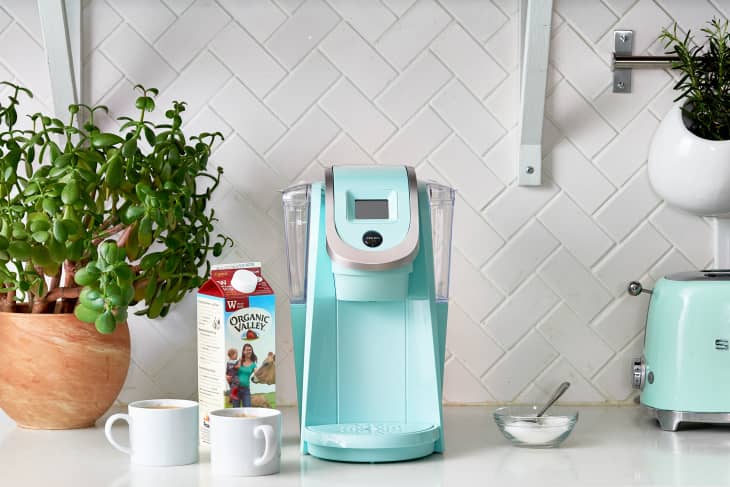
Around 40 percent of U.S. households own a single-cup brewing system, according to Statista, and it makes sense why. They make your morning coffee in a flash with basically no cleanup, you can choose from dozens of flavors of coffee, and they’re perfect for when you want a single cup without dirtying an entire pot. Like any good kitchen device, though, a Keurig needs regular TLC to keep it running smoothly and brewing delicious coffee.
Before You Start: There’s a Difference Between Cleaning and Descaling
There are two parts to maintaining your Keurig: general cleaning and descaling. Over time, deposits of calcium—or “scale”—build up inside your coffee maker. You’ll know you have buildup when you notice white residue begin to show, especially if you have hard water, which has a higher mineral content than soft water. When left unattended, these mineral deposits can impart an off taste to your coffee and also affect how well your machine functions.
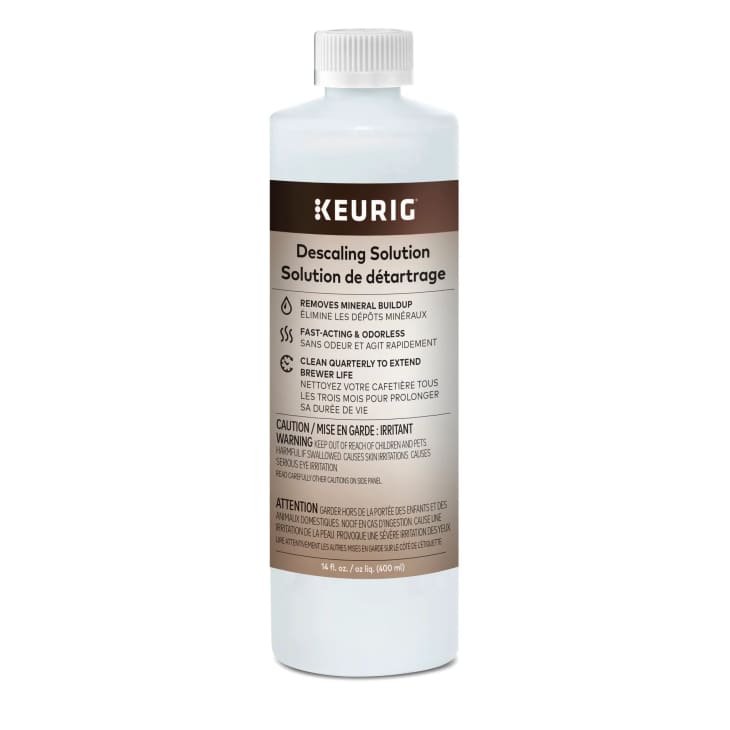
According to Keurig, the only company-approved way to descale a Keurig coffee machine is by using the brand’s own descaling solution. However, experts say you can also use vinegar to descale your coffee maker just as effectively.
What’s the Best Way to Clean a Keurig Coffee Maker?
“If you do not clean it frequently, your Keurig can develop an odor, mold, germs, and bacteria,” says Val Oliveira, founder of Val’s Services cleaning company in Chicago.
Here’s how to clean the machine:
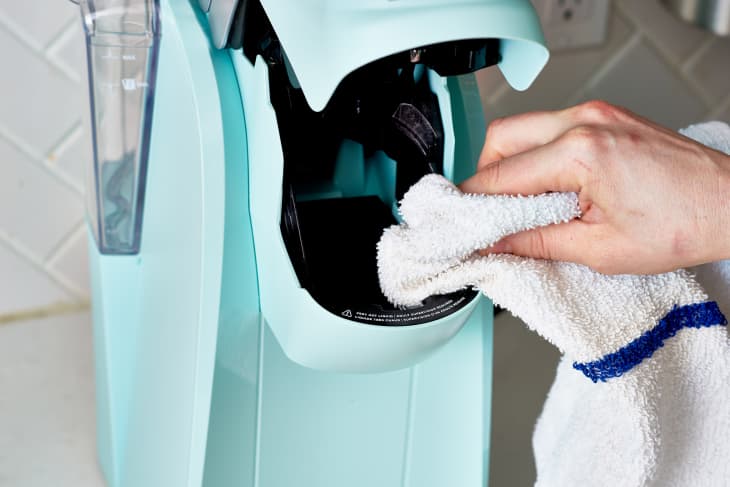
1. Prepare the machine
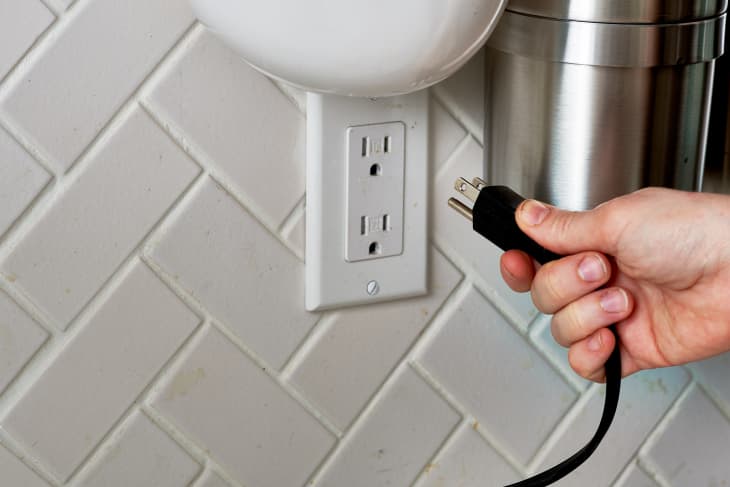
First things first: Take out any old pods remaining in the basket, says Alex Azoury, founder and CEO of Home Grounds, a resource site for home baristas. And it goes without saying, but electricity and water do not mix, so be sure your machine is unplugged before washing in step two.
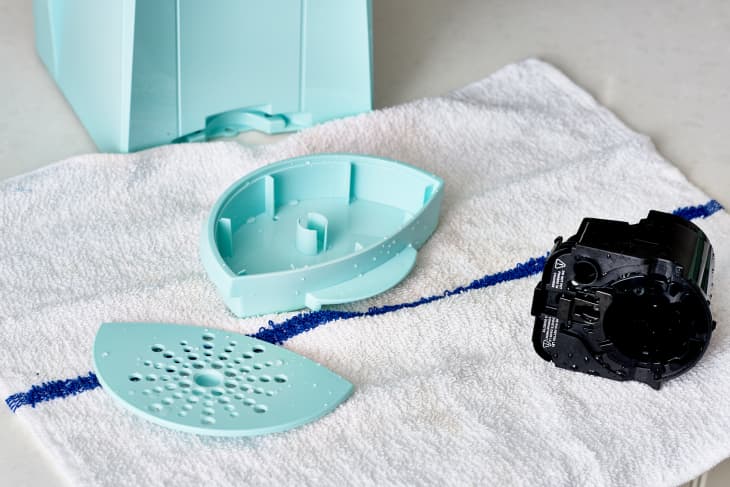
2. Wash all parts with soap and water
With your machine off, remove all parts that you can (water reservoir, mug stand, K-cup holder) and wash by hand in hot, soapy water says Oliveira. Use a soft sponge like you would with normal dishes, but be especially careful, as parts like the needle of the Keurig can be delicate.
Clean the needle with a paper towel, as you don’t want to get any cloth fibers caught on this piece. For the filter, coffee dispenser and water tray, you may need to use a small brush to scrub away extra residue. Do not put any of the pieces in the dishwasher, says Azoury.
Dry all the parts you washed with a paper towel or set them out to air dry on a dish rack.
3. Clean the outside of the machine with soap and water
Wipe down the entire coffee maker using warm water and soap, then use a microfiber cloth to go over it again, removing any excess soap. Dry it off with a clean cloth or paper towel before reassembling the parts.
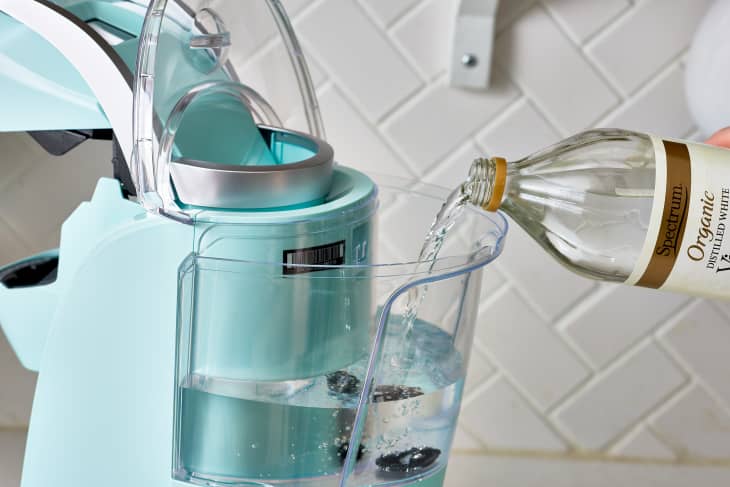
4. Descale
Now that it’s clean, it’s time to descale. Fill the water reservoir halfway with descaling solution or vinegar, top off with water, and run the machine (without a pod) as normal, says Azoury. Keep running cycles until the reservoir is empty.
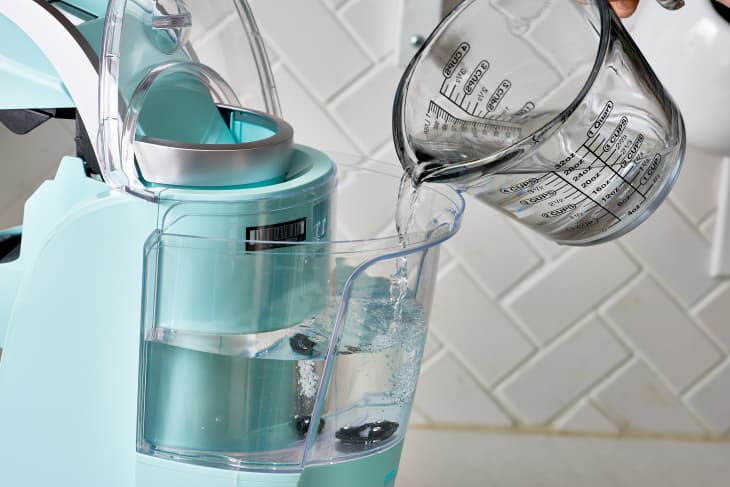
5. Do a final internal rinse
Fill the water reservoir again with only water this time, and run through cycles (without a pod) until empty to flush out any remaining solution. Now you’re ready to refill with water a final time and brew.
Can You Clean a Keurig Coffee Maker Without Vinegar?
You can clean a Keurig without vinegar (using only hot soapy water), but you cannot fully descale the system without using some kind of descaling solution or vinegar. “Water alone will not give you a thorough clean,” says Azoury.
What’s the Best Way to Clean a Keurig Mini?
Cleaning a Keurig Mini is nearly the same as cleaning a regular Keurig—except there are fewer detachable parts, says Azoury.
After you remove and clean all parts that do come off in hot soapy water, following the same steps as above, descale the inside of your Keurig Mini by filling up the water reservoir ⅓ of the way with either descaling solution or vinegar, then topping off with water. Plug in your machine and run enough cycles (without pods) to empty the reservoir completely. Then, refill the reservoir with only water and run through cycles to empty it again. Refill with more water, and you’re ready to make coffee.
How Often Should You Clean Your Keurig?
You should try to wipe down the outside of your Keurig after every use, says Oliveira. If you’re using your Keurig every day, consider deep cleaning it following the steps above once a week or so, which will help maintain the taste of your coffee. “My recommendation is to put a cleaning day on your calendar, or set up an alarm on your phone as a reminder,” says Oliveira. If you’re not using your machine frequently, empty the water reservoir to avoid residue and mold buildup.
You can be a little more lax on descaling, says Azoury, doing so every few months—or whenever you notice your Keurig become slower to drip coffee. This happens because minerals accumulate and solidify in various parts of the machine and can create clogs, preventing the coffee from coming out smoothly. Doing a thorough clean and descaling before you notice this problem, however, will ensure all the minerals are flushed out and help optimize the flavor of your K-pods.