
How To Make a Painted Faux Marble Table Top

Yesterday I showed you the “before” condition of this poor little table, which was used outside by its previous owner and left to rot and weather. Today I’m showing you how to paint faux marble to use as a replacement table top for any project you have in the works. This is a very easy technique that takes hardly any time or money to do.
What You Need
Materials
- Round wooden top or decorators table
- Black paint
- White paint
- Sealer
Tools
- Regular paint brush
- Sea sponge
- Small feather
Instructions
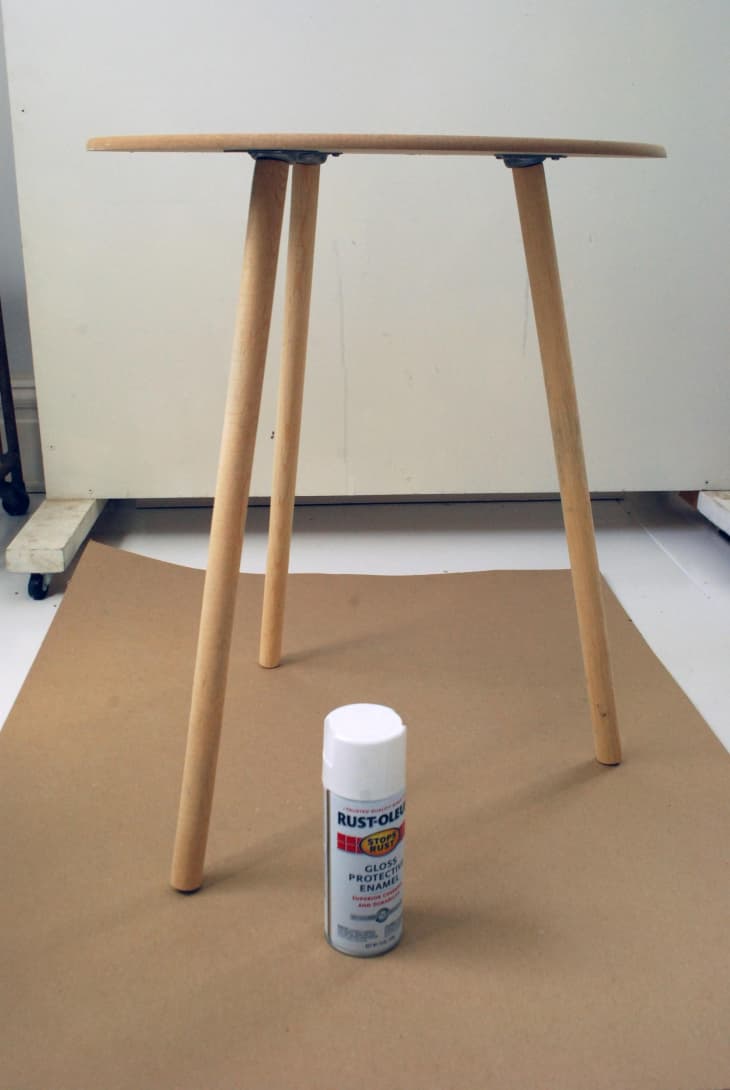
1. Assemble your decorators table. (You don’t have to do this, but having the top on raised legs makes it easier to paint.
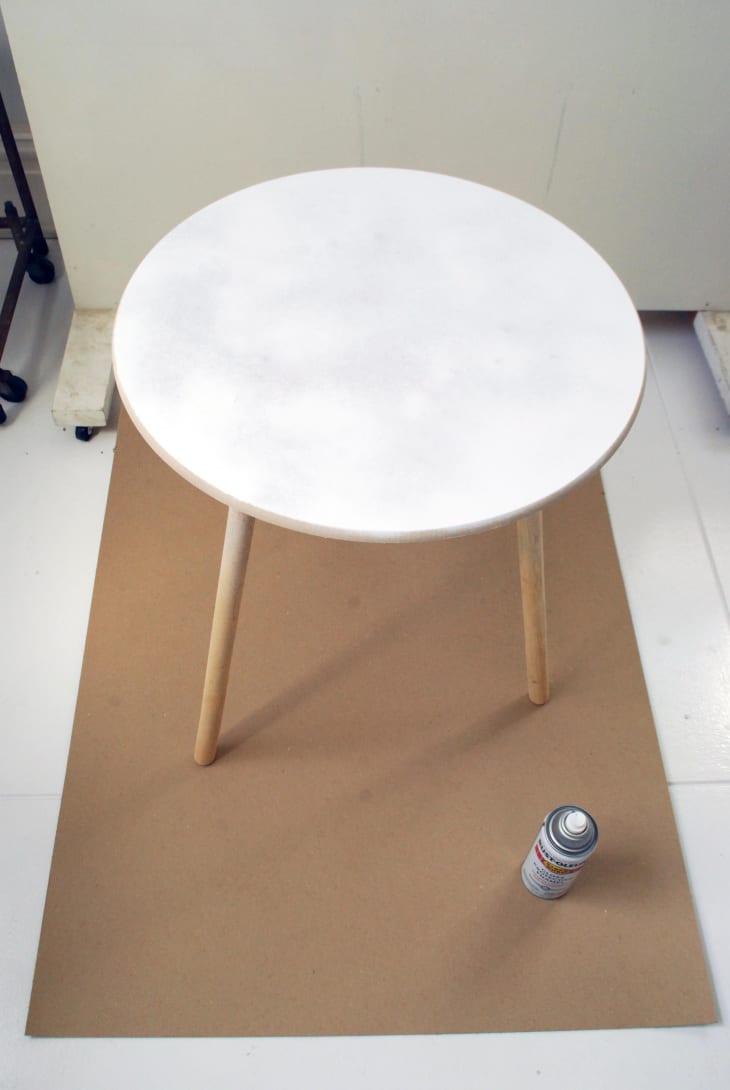
2. Paint the wood top several coats of white paint.
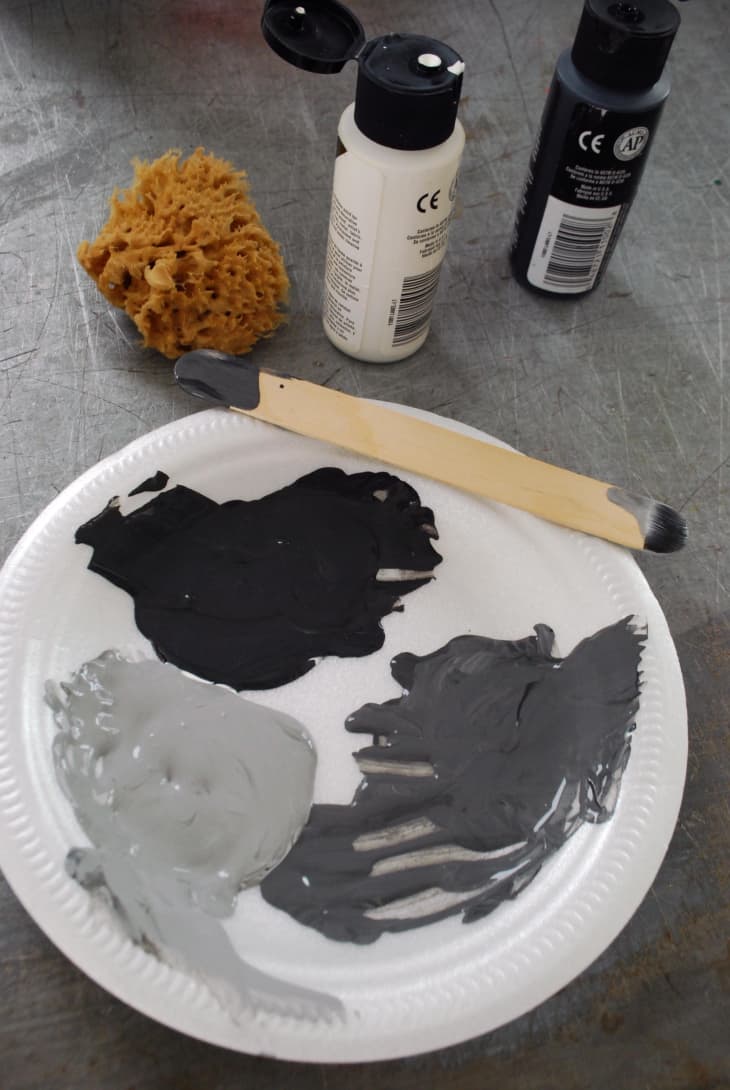
3. Mix up at least three shades of gray from your black and white paint. (If I were to do this table again, I would go even lighter than the shades above.)
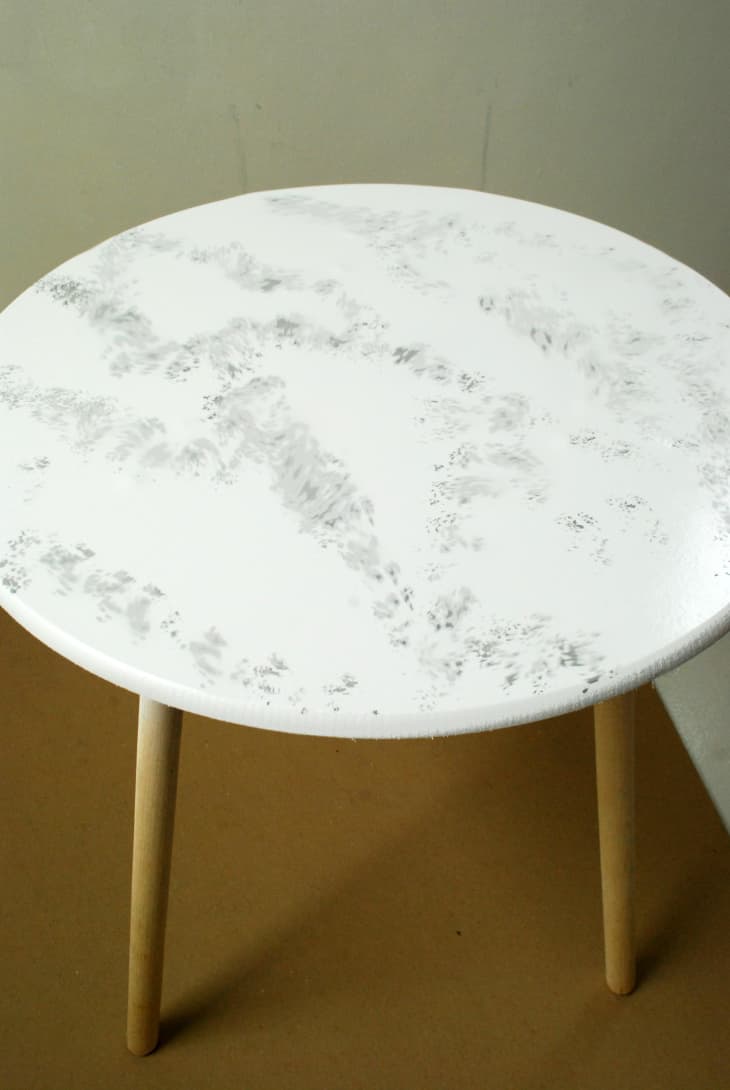
4. Using the sea sponge, start lightly dabbing paint in a random pattern around the surface. And when I say lightly, I mean really, really lightly. Repeat with a slightly darker gray, so there is some color variation in the design.
Tip: Subtlety is the most difficult and most important thing about this project, so it might take some practice to make it look perfectly imperfect. If something looks too “pat” feel free to go over it again with another brush to mess it up a little.
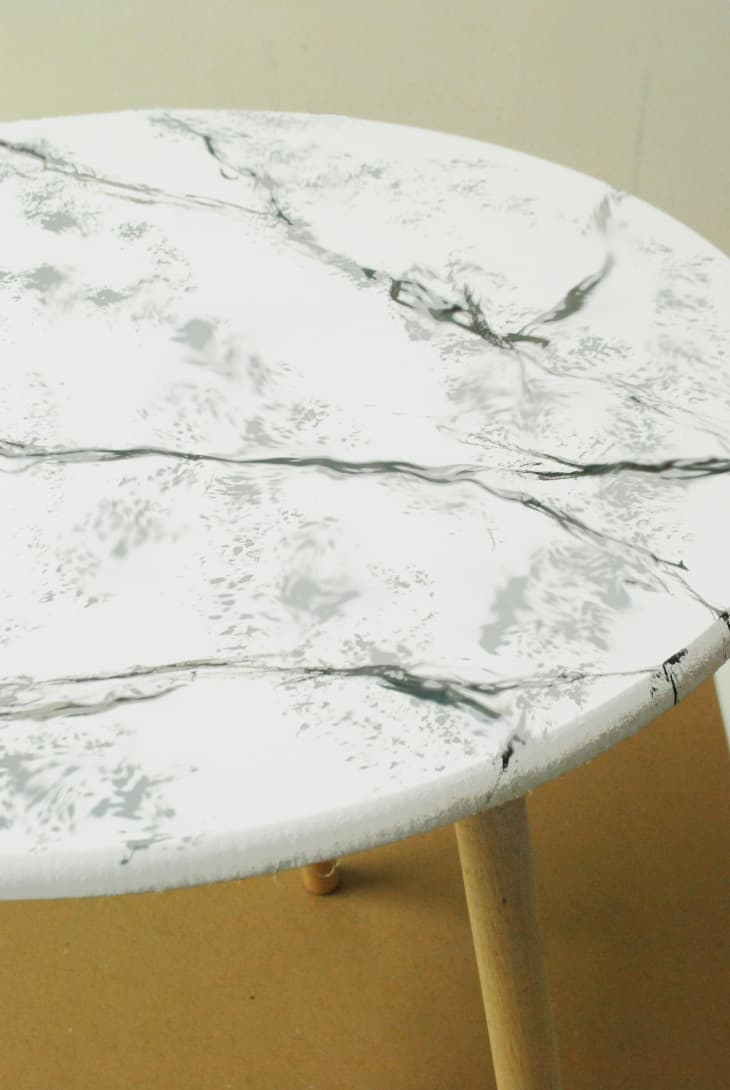
5. Next, dip the tip of your feather in one of the darker gray shades and slowly drag it across the surface, wiggling as you go. You are mimicking the veins here, so don’t go for straight lines; it should look organic and almost blurry looking.
6. Continue tweaking the paint job until you are happy, then seal. If it’s a countertop, consider a heavy-duty epoxy to finish it off.
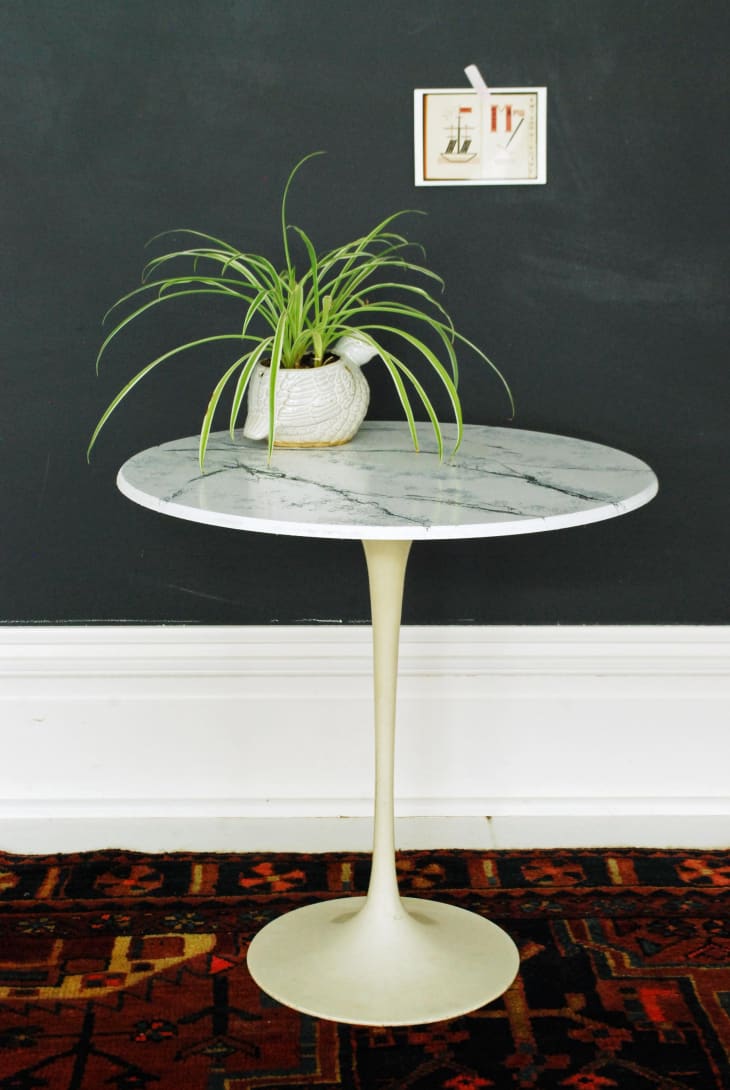
7. Secure the new top onto your existing table base, and you are all finished! Not too shabby for five minutes and $10.
Have a really great DIY project or tutorial that you want to share with others? Let us know! We love checking out what you’re making these days, and learning from our readers. When you’re ready, click here to submit your project and photos.