
How To Remove Wallpaper (Even When You Really, Really Dread It)
Removing wallpaper is a massive job —many how-tos begin with “you can do this” and other encouraging words— but with the following steps, you really can do the job and do it well. Patience, persistence, time, and upper body strength are the major requirements, and a bucket, sponge, and scraper are really the only tools you really need. I’ll say it again: you can do this.
Before you get started, take a look at the wallpaper and figure out what you’re dealing with. If your wallboard wasn’t properly prepared before the wallpaper was applied, it will be difficult to remove and should be left to the professionals. Martha Stewart advises, “If you don’t know whether your wallboard was coated, remove a small section of wallpaper in an inconspicuous area. If the surface behind the paper is light grayish-brown, it likely has not been primed. You’ll want to consult with a professional before going any further.
Materials:
- Pump or Mist Sprayer
- Wide Putty Knife
- Drop Cloth
- Trash Bags
- Large Sponge
- Ladder or Step Stool
- Screwdriver
For particularly difficult wallpaper these items may also be helpful:
- Scoring Device
- Fabric Softener
- Wallpaper Steamer
Before You Get Started
- Remove as much furniture as you can from the room, and cover the rest with plastic sheeting.
- Cover the floor with plastic sheets—taping them to the baseboards—as well as drop cloths.
- Turn off the room’s power! You’ll be getting the walls wet, and water and electricity aren’t friends.
- Remove the light switch and outlet plates.
- Cover openings with plastic.
- Cover your hands with rubber gloves.
- Keep kids and pets out of the work area. According to SF Gate, “Old wallpaper glue may contain toxic fungicides.”
Instructions

Strip Off What You Can
- If you can find loose edges—or start loose edges with a putty knife—strip away all the wallpaper you can.
- Family Handyman recommends this step: “The point is to remove the top layer of paper and leave the backing on the wall. That way, the backing will easily soak up water,” making the next steps easier.
Score It
- Run a scoring tool all over your walls in a random pattern. Bob Vila says, “This will allow your wallpaper stripper to seep in and soften the glue.”
- Some tutorials omit this step—or only recommend it for metallic wallpapers—but since a scoring tool is less than $10, and since the process doesn’t sound unpleasant, I say go for it.
- Don’t score too hard and damage the wall surface.

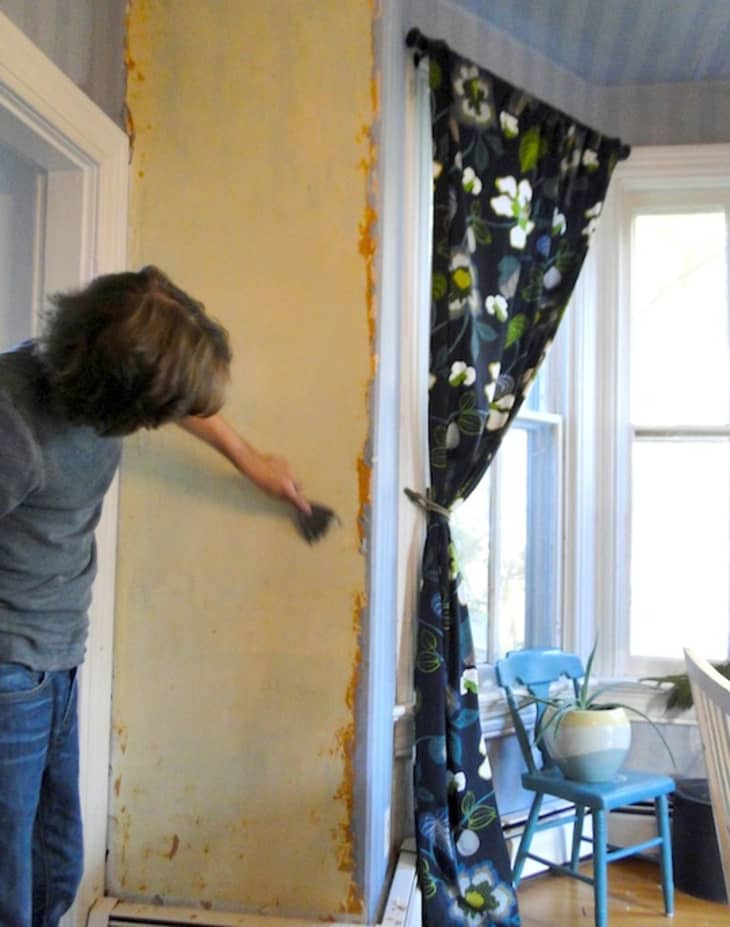
Spray It
- Heat water in a kettle on the stove. Fill a bucket or pump sprayer (if you have one) halfway with hot water from the sink and the other half with boiling water from the kettle.
- Work in sections, spraying and scraping as you go.
- Martha Stewart recommends you “mist it on from a 2-gallon garden sprayer in thin, even coats,” while Family Handyman says you can use a sponge or mop.
- Let water soak in for 15 minutes or until the wallpaper begins to bubble.
- Test wallpaper for readiness: Martha Stewart says to “scratch it with a fingernail. If it comes off easily, it is ready to scrape. If not, respray the surface and wait.”
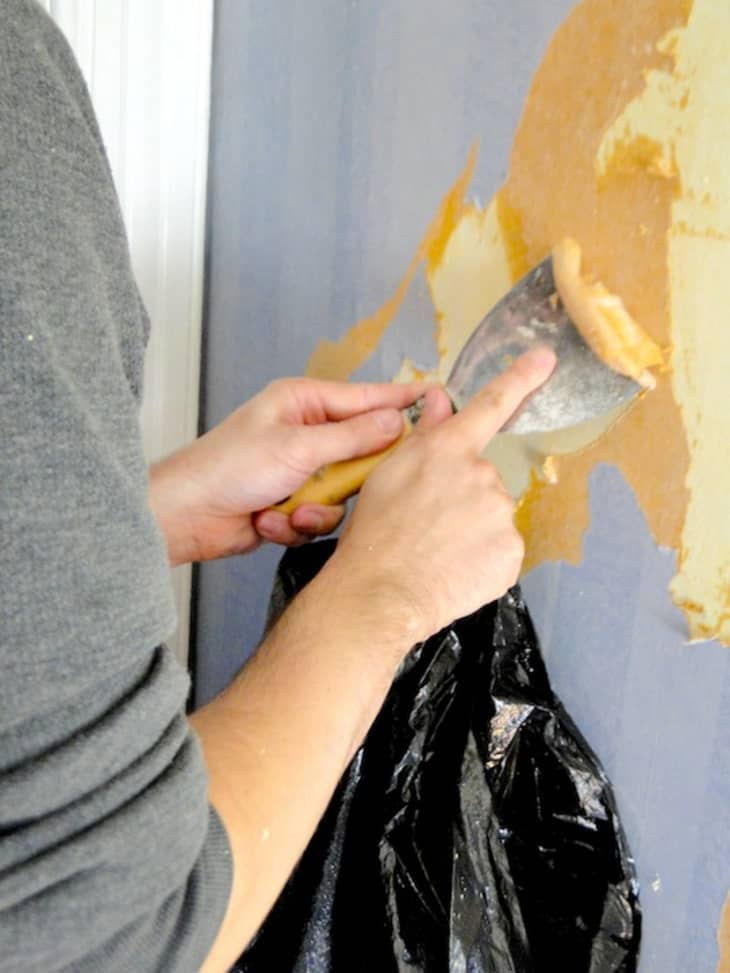
Scrape It
- Use a rounded putty knife, wallpaper scraper, paint scraper, or flexible metal spatula to scrape away wallpaper.
- Be careful not to dig into the softened drywall as you work!
Repeat
- Keep spraying and scraping until all wallpaper (both facing and backing) is removed.
- This is a rigorous job, so take breaks and stretch as needed. And stay hydrated!
Alternate Removal Methods
- For particularly difficult wallpaper, you may also want to add fabric softener to the hot water used to spray/steam the wallpaper. In this case use a 1:1 mixture of hot/boiling water and fabric softener.
- Add vinegar to the hot water mix. Apparently the hot water loosens the wallpaper glue, while the vinegar helps dissolve it.
- While removing wallpaper definitely requires elbow grease, there are times to let the machines win. As Martha Stewart recommends: “Consider using a steamer, which can be rented from a hardware store for about $40 per day, instead of a sprayer. It will produce steam from a hot plate and force moisture through the paper.” Once the paper and glue are moistened, scrape as you did before.
How To Clean Walls After Removing Wallpaper
- If there’s still glue on the walls—there probably will be—you’ll want to gradually increase the aggressiveness of your removal efforts. Be sure to examine the walls thoroughly before you declare the walls clean. According to Family Handyman, “Paste has a dark sheen to it and the wall will still feel sticky.”
- Method #1: Combine hot water and dish soap, sponge the mix onto the walls, and when the glue softens, wipe it off with a rag.
- Method #2: Try with mix hot water, dish soap, and baking soda or fabric softener.
- Method #3: Try with mix hot water, dish soap, baking soda, and vinegar (one cup per gallon of water).
- Method #4: Use gel stripper to remove every last bit of glue.
- Once you’re absolutely sure all the glue is removed, wash the walls with rags and hot water.
- Rub your fresh clean walls down with a soft towel.
- Allow walls to completely dry for a few days before commencing any painting or wallpaper projects.
More Resources
- How To Remove Wallpaper by The Family Handyman
- How To Remove Wallpaper by Bob Vila
- How To Remove Wallpaper Glue by Bob Vila
- The Right Tools to Remove Wallpaper Without a Fight by Martha Stewart
- How To Remove Wallpaper Glue Residue by SF Gate
- How To Remove a Wallpaper Border from Drywall by Martha Stewart
- How To Remove Wallpaper Using Solvents of Steam by DIY Network