
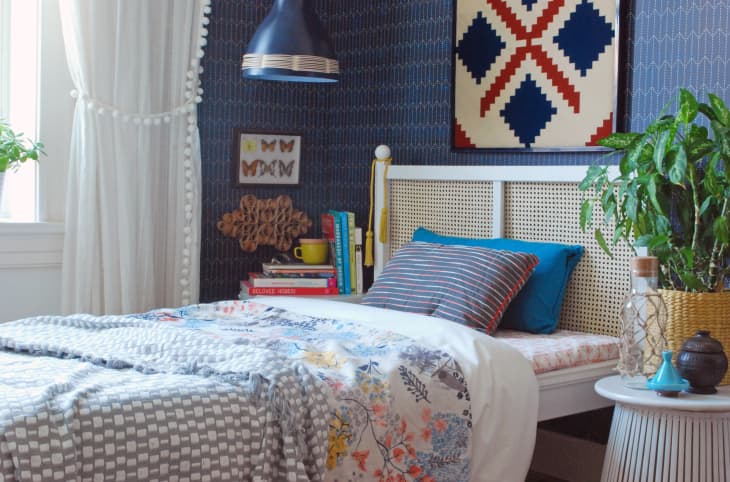
How To (Seriously!) Upgrade a Basic $40 IKEA FJELLSE Twin to a Beautiful Cane Bed
What You Need
Materials
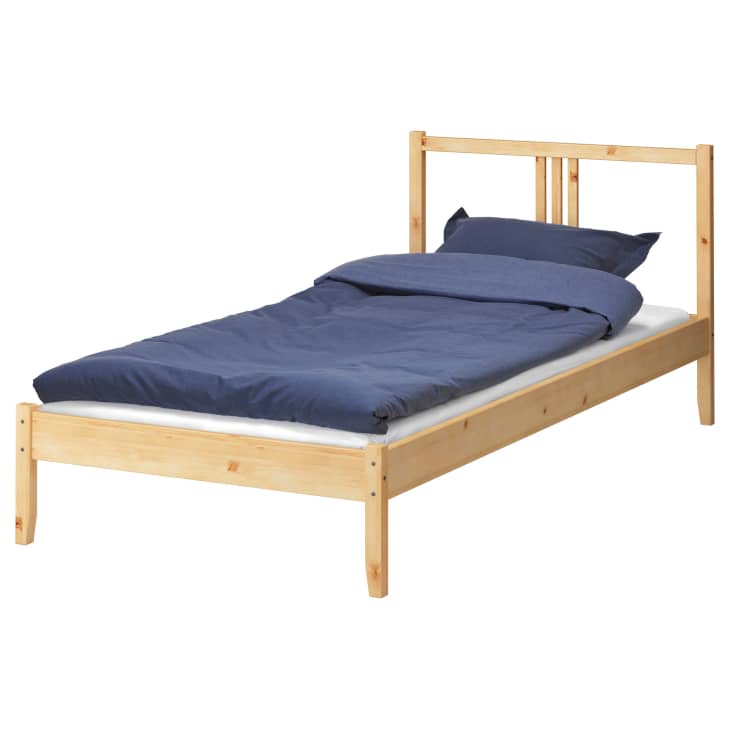
- IKEA FJELLSE Bed (I only had space for a single, but go for the queen!)
- Molding of your choosing (I used two of these from Home Depot)
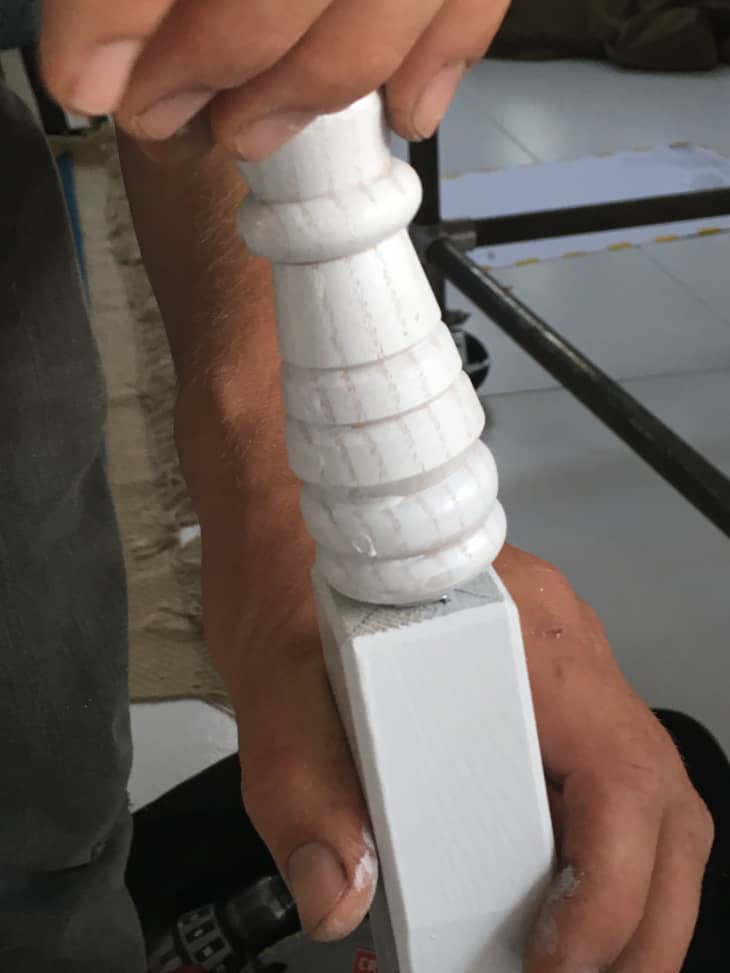
- Set of IKEA VÄSENTLIG Curtain Finials
- White Spray Paint
- Set of Table Legs (I used these from Lowe’s)
- 2 Tee Nuts (make sure the thread size matches your table legs)
- 24″ Open Cane Webbing
- Wood Glue
Tools
- Saw
- Hammer
- Clamps
- Staplegun
Instructions
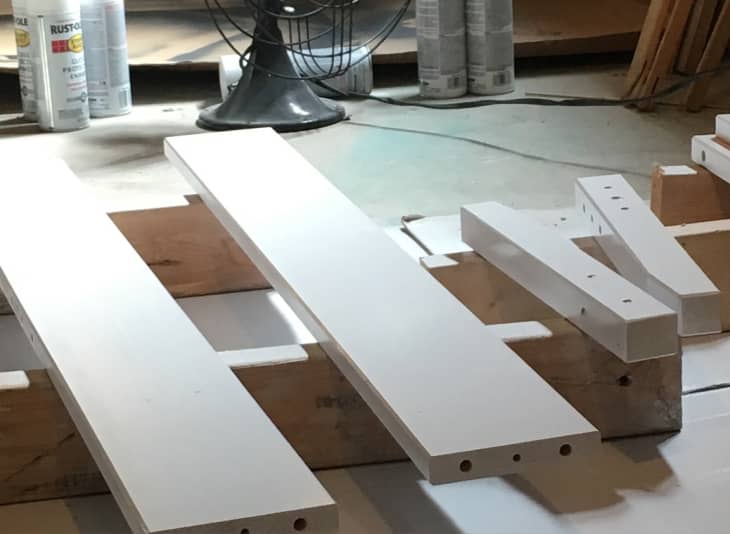
1. Spray paint all the pieces before you get started.
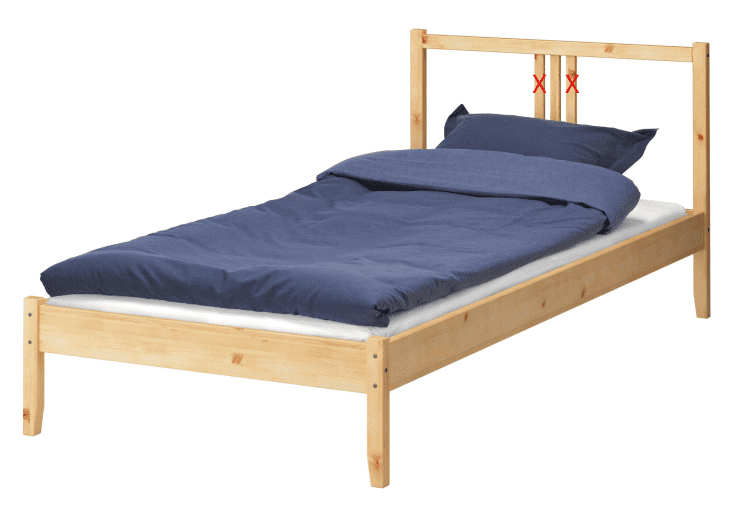
2. Assemble the headboard section of the bed, as instructed, but omit two of the vertical slats. There should just be one remaining slat in the middle.
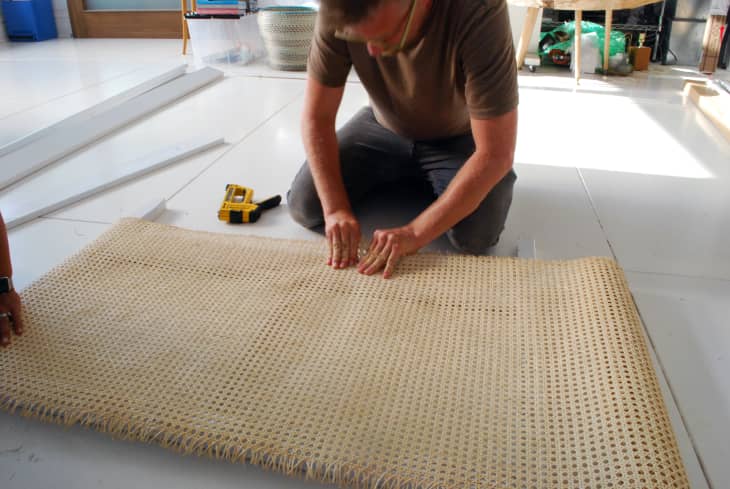
3. Flip the bed over and stretch out the cane so it cover the entire headboard. It helps to have a second set of hands to help you while you stretch the cane across the frame.
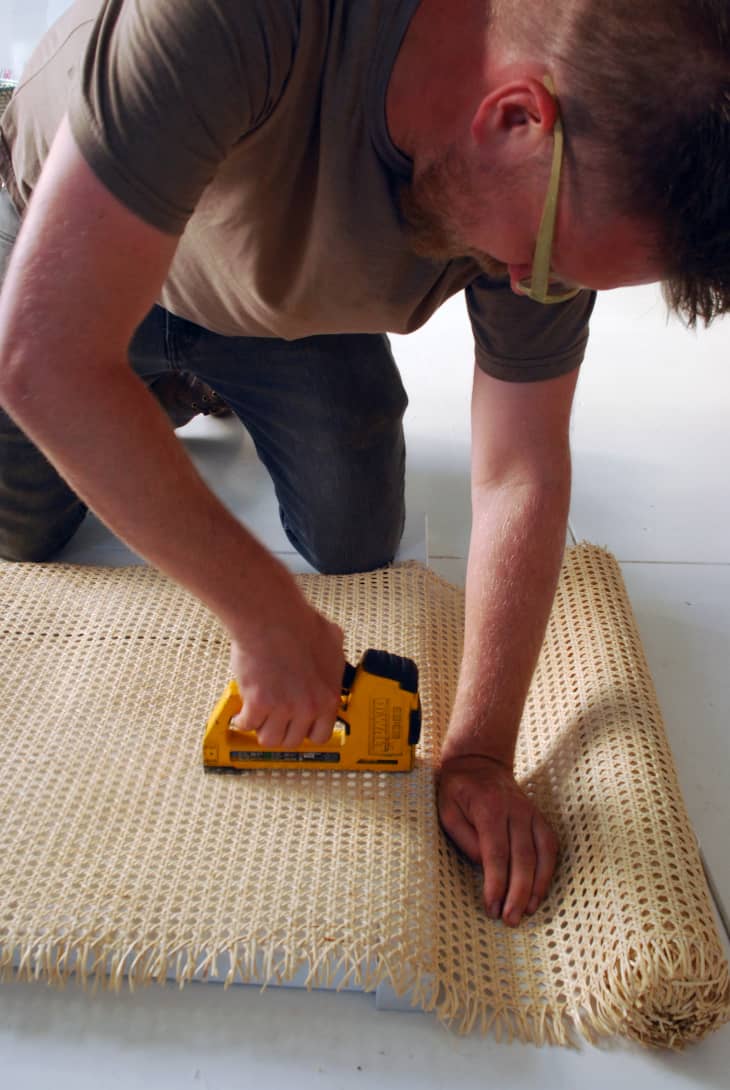
4. Staple the cane to the wooden frame, making sure that the cane stays taut and smooth. Trim off an excess trim.
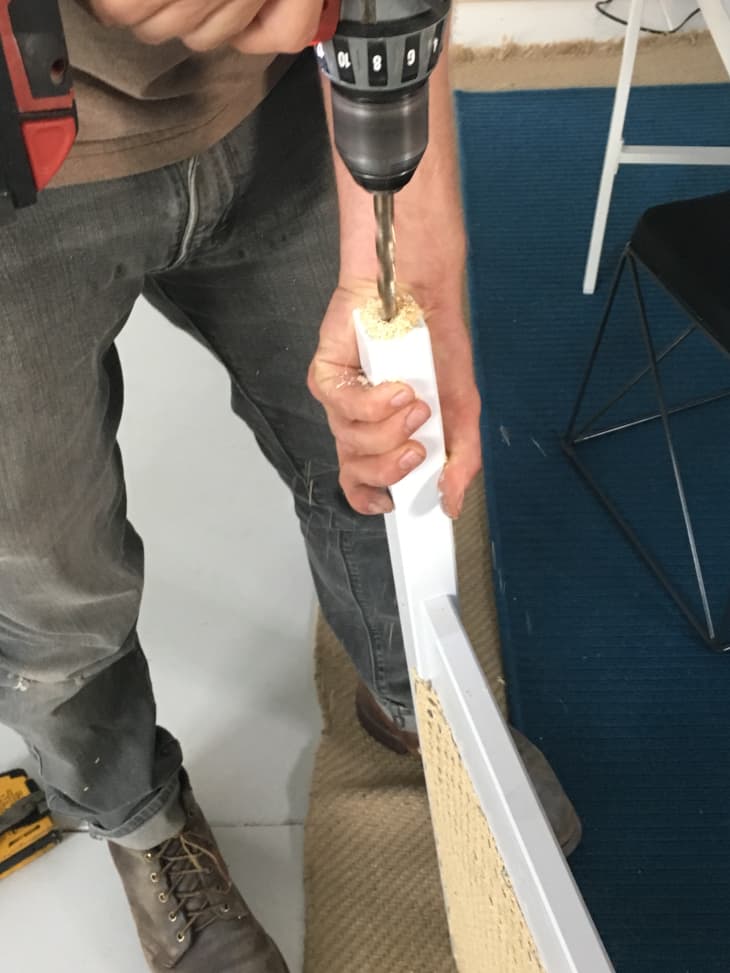
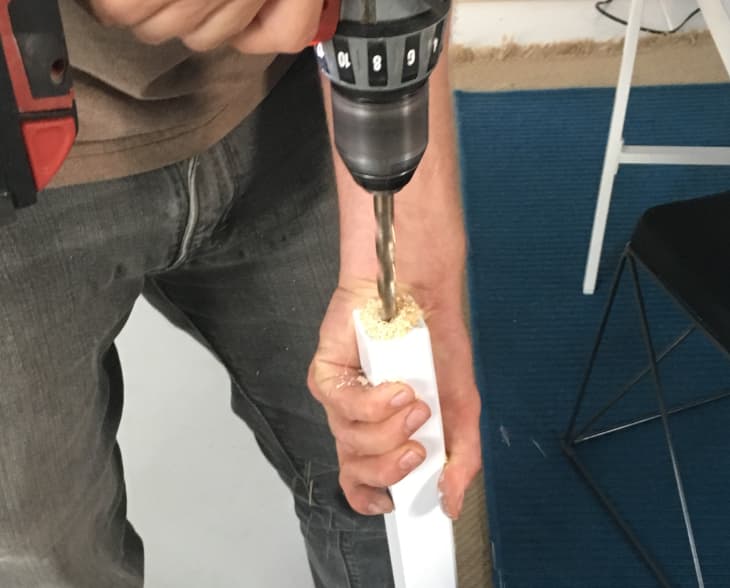
5. Optional: If you want to raise the bed a little bit, and add another detail, drill a hole in the bottom of each leg for decorative feet.
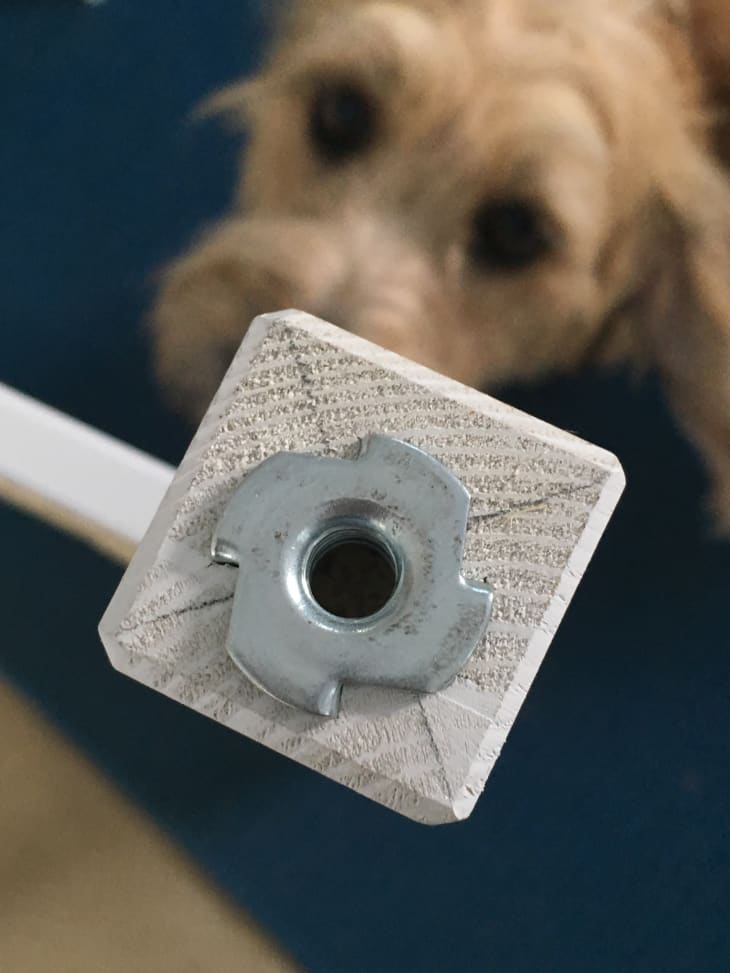
6. Put a little wood glue in the hole, then tap in the tee nut. Say hi to my dog Grim who is watching you right now.
7. Screw in the legs.

8. Assemble the rest of the bed as instructed.
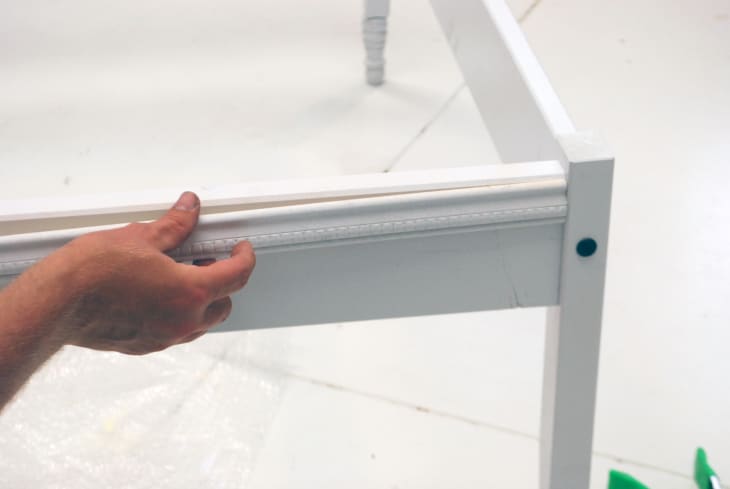
9. Measure and cut the molding to fit the bed side rails, then use wood glue to attach them to the bed.
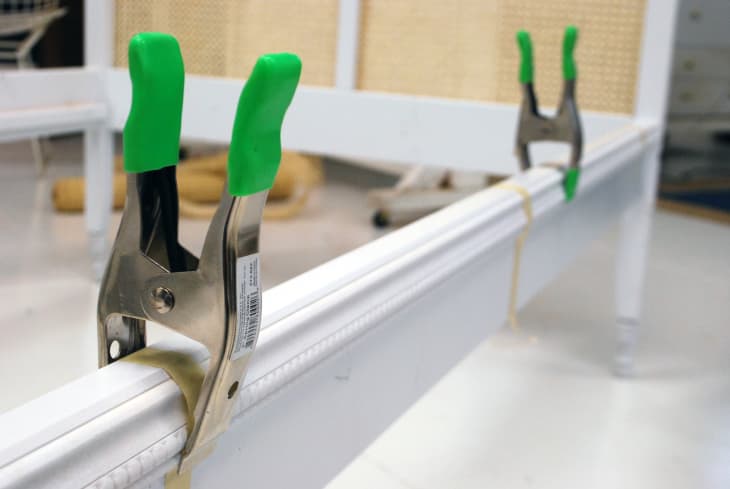
7. Clamp or tape them in place and let dry completely.
8. To add finials, drill holes into the top of the headboard posts, add some wood glue, then screw in the finials.

9. And lastly, if they bother you, camouflage the black screws with a little white paint.
Have a really great DIY project or tutorial that you want to share with others? Let us know! We love checking out what you’re making these days, and learning from our readers. When you’re ready, click here to submit your project and photos.