
Before and After: A $150 DIY Gives This IKEA KALLAX a Luxe, Clutter-Concealing Look
Almost everyone’s been there: You see a piece of furniture you love only to learn it’s way out of your budget. But a too-high price point doesn’t have to mean the end of your perfect furniture dreams. Try searching for lookalikes (or sometimes the same exact piece) elsewhere online by typing in the serial number, check to see if there’s one available at an outlet version of the store, or, if you’re feeling ambitious, DIY it. This Anthro-inspired DIY vanity, this Jonathan Adler-inspired console, and this Montana Mini-inspired nightstand all prove that it’s possible to create strikingly similar looks (with your own twist) for much, much less.
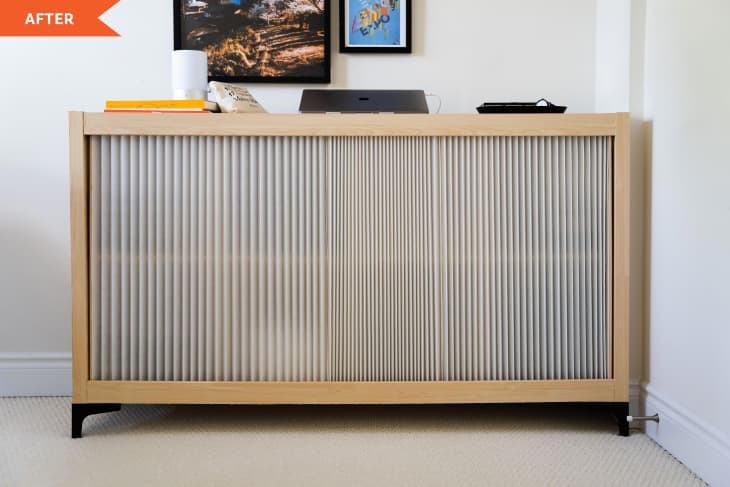
When Matt Tran (@cha.siuu on TikTok) saw this pleated cabinet, he knew he wanted something similar, but there was a waitlist for the product — and it was $3,000.
So he decided to convert his IKEA KALLAX to get the look, and all it took was oak wood vinyl, a couple of dowels, and pleated curtains, about $150 all together.
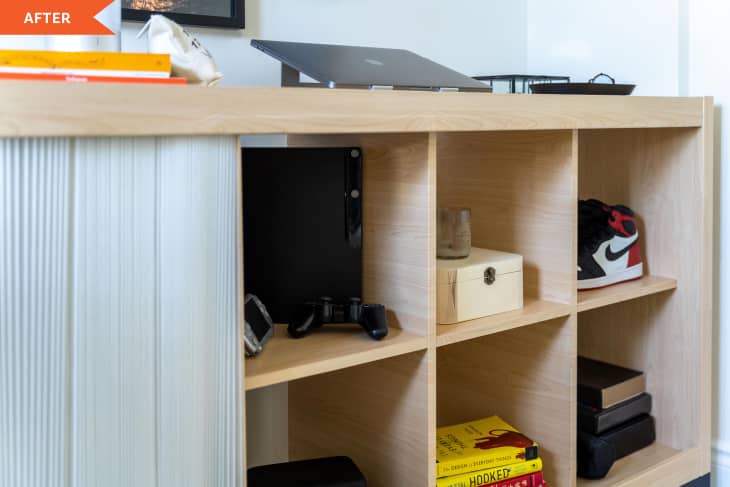
“I began the process for the conversion by wrapping all the faces in oak wood vinyl,” Matt says. “From there I pushed the interior shelves back about 2 inches, and then I added a lip using dowels to the face, which then allowed me to install the curtains.”
The project took him about two days to complete.
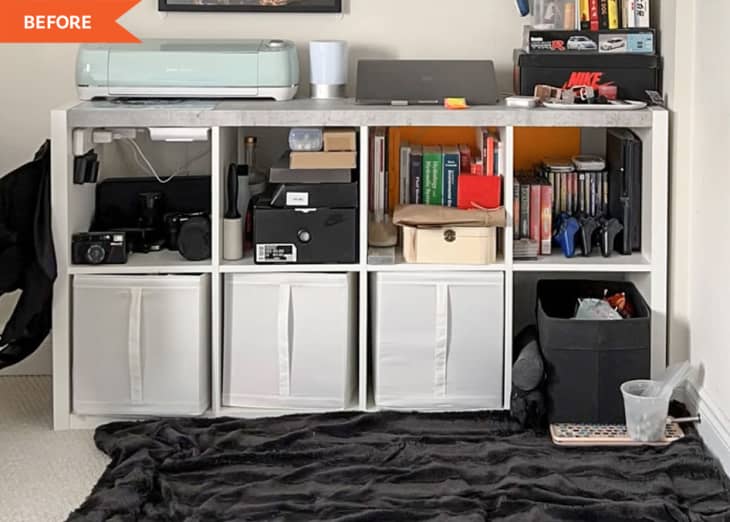
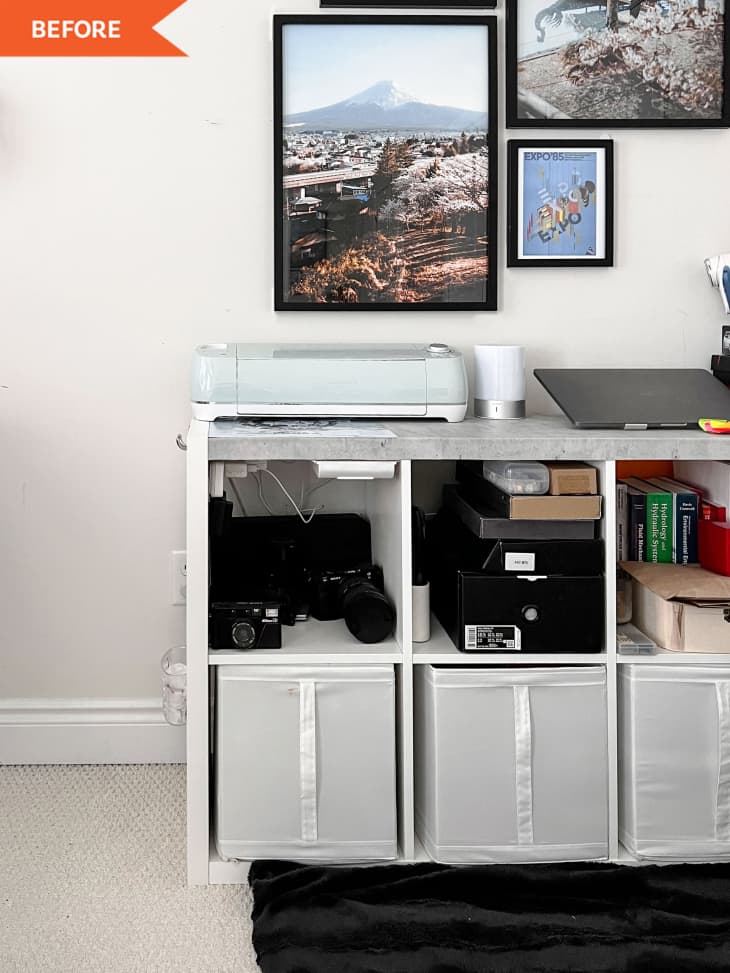
Matt says the curtain is great because it allows him to conceal the “giant dump of miscellaneous objects — books, camera gear, cleaning supplies, etc.” that were on his open-faced KALLAX before.
“The pleated curtains are just so much nicer to look at throughout the day,” he says. And a bonus? He used leftovers to create a lampshade, too.
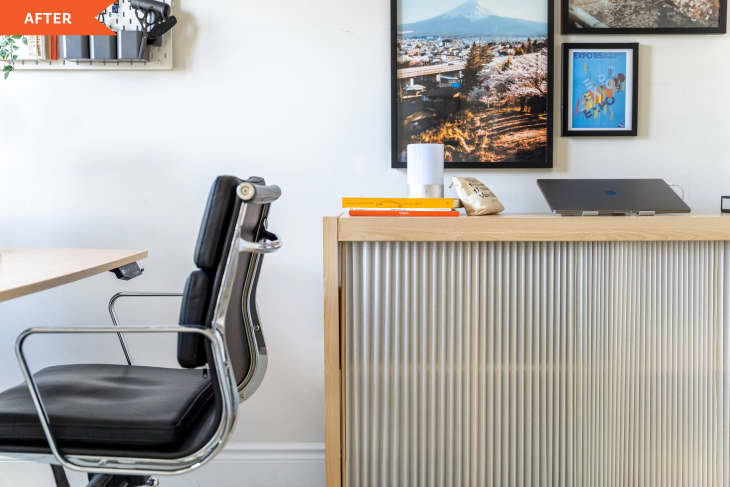
Now, his workspace in his bedroom is sleek, clutter-free, and stylish to boot. “I put a lot of time and effort into my desk setups, and I wanted the furniture in my room to feel more cohesive,” he says. Mission accomplished!
Inspired? Submit your own project here.