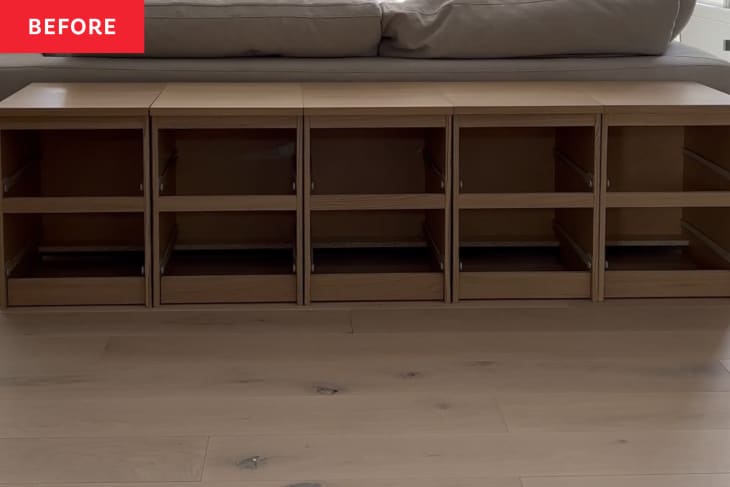
Before and After: $90 IKEA MALMs Form the Foundation of This Luxe-Looking Storage

Some of the best IKEA hacks are the ones that take the retailer’s most affordable, unassuming pieces and use them as a foundation for a furniture project that looks like it has a price tag in the thousands. That’s exactly what Annie Williams (@champagne.chaos) did here: Using five IKEA MALMs, which retail for $90 each, Annie created a long, luxe-looking table behind her sofa with storage galore.
“We needed a piece of furniture in this spot but didn’t have the budget to buy the white oak pieces that we wanted,” Annie explains. “The furniture pieces we were looking to buy cost $3,000 to $5,000, and they were still a little smaller than we wanted. By using the IKEA nightstands, I was able to get the custom size I wanted.”
In order to make this project work, Annie needed to connect the nightstands in a way that made them convincingly look like one undivided unit. To do that, she inserted small pieces of trim in the gaps between the MALMs to allow them to be screwed together. Then she used peel-and-stick veneer to cover the top of all the nightstands, making those look like one long, seamless piece of wood. Annie also used an iron-on veneer for the same seamless effect on the front portions.
If you’re using veneer on your own projects, Annie suggests cutting the piece a little larger than you need initially and trimming it down later, which helps keep edges super neat. Be sure to apply lots of pressure to smooth the veneer down flat, she says, and let the veneer cure for three days or more before adding any sealant.
In addition to the peel-and-stick, Annie also used white oak plywood “to build up the sides and top to get the height [she] wanted,” she explains. Annie says the plywood was a bit pricier than she expected (although still cheaper than actual white oak lumber) and chipped more easily than she wanted — but it was easy to work with, as she was able to get it pre-cut at the lumber yard. Because Annie was working with pre-made, all-uniform nightstands, “there wasn’t any room for error with measurements,” she says.
Of the two materials, Annie recommends using the white oak lookalike plywood over the peel-and-stick, which she noted could bubble a bit in application. That said, Annie chose to use it for the tops of the nightstands because it cost less than plywood and wouldn’t be fully exposed anyway.
Annie notes that if she could change one thing about the project, she’d add trim pieces to the back of the nightstands, too, and a thin piece of plywood underneath the entire thing. “That’s what would be needed to move this piece of furniture to a new house or to a new level,” Annie explains. “As-is, I can slide the piece around but can’t lift it to move it far.”
Once her piece was covered head-to-toe in the faux white oak plywood, Annie sealed it with a protective coat of polyurethane. Annie’s project cost about $900 total, but “it looks SO expensive,” she says — not to mention, it hides all of her kids’ toys in the living room. “I am absolutely in love with the finished product,” Annie says. “It’s the first thing you see when you walk in our front door, and it makes such a statement.”
Inspired? Submit your own project here.
