
I Wish I Would’ve Tried This Space-Dividing IKEA Hack in My Studio Apartment (It Only Cost $200!)
When journalist Christina Ruffini moved into a 900-square-foot studio apartment in Washington, D.C., she didn’t expect to stay that long. Although the apartment was over her budget, the incredible landlord, balcony, and neighbors kept her renting it.
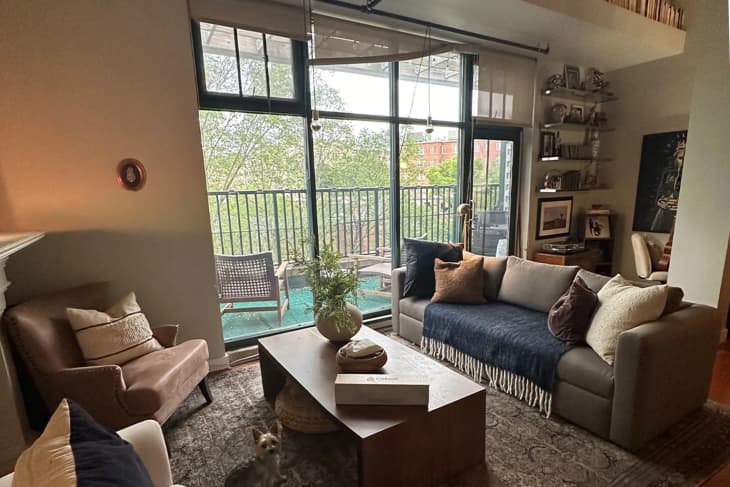
It’s been five years since moving in, and while it’s likely been a wonderful time, Christina still had to think outside the box regarding her studio apartment’s open floor plan. “When I first moved in, all the furniture kind of faced the same way,” she explained at the time of the tour. “But then the [COVID-19] pandemic hit, and I was here all the time and realized I needed zones.”
Christina’s office was one of the spaces she likely wanted to separate from the rest of the home. Studio living means that, inevitably, spaces might bleed into each other. Even though Christina has an office nook, originally, it was smack dab up against the dining room. Experts say that working from your bed is a no-no, and I imagine that, in its initial state, it would be hard to switch off mentally.
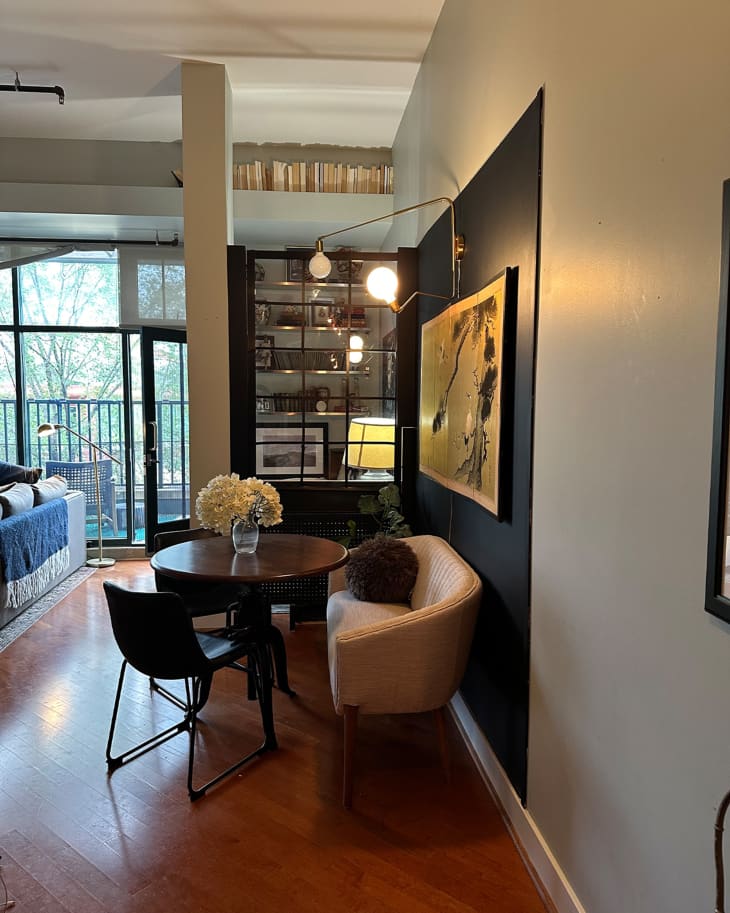
That is, until Christina came up with a renter-friendly solution. “That wall that divides the dining room and the office did not exist,” she shared at the time of the tour. “It was just an open space with an awkward column. If I owned the place, I would have had a steel and glass one installed, but I don’t. So I faked it.”
Instead of purchasing a traditional room divider and breaking up her space (potentially losing some natural light), she looked to IKEA. It took a few attempts, but Christina was determined. On the first try, a bookcase held up a wardrobe door, but it “looked terrible,” she admits.
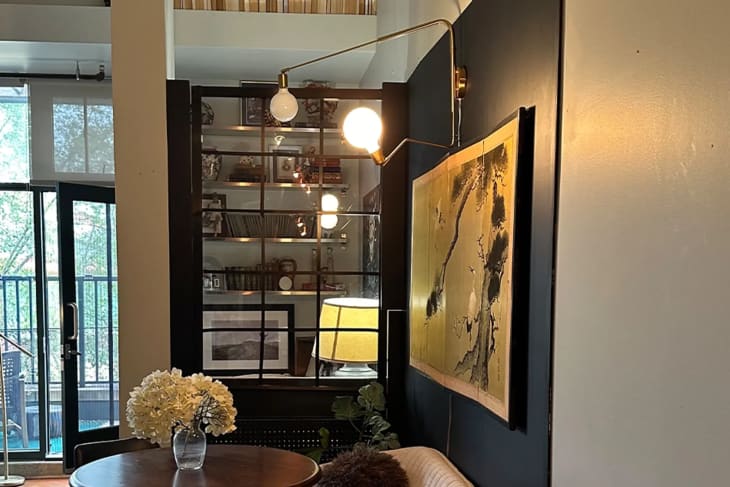
Next, she found a picture ledge in her closet and attached it to the wall with three nails. For the actual wall, she used a SKYTTA sliding door frame and plexiglass from IKEA picture frames. Electrical tape was used to create the look of the panels.
“The bottom part is zip-tied to a $40 metal desk from Amazon. I filled the gaps with padded panels I had left over from another project — also giving me a little memo board,” she says. “Alas, I ordered a second picture ledge for the other side, but it wasn’t long enough, so if you look closely, you can see a gap, and that part of the edges is actually painted cardboard! Shhh!!”
It cost around $200 to complete the project and made a huge difference in her space. Working as a freelance journalist, Christina believes it is important to have a dedicated office space. “This solution has, so far, been great,” she admits.
It’s her proudest DIY project, and it’s understandable to see why. As someone who’s lived in a studio apartment before, I wish I had thought of this transparent way to delineate spaces. And this isn’t the only gorgeous change she’s made in her apartment. To see more, visit the full home tour.