
Before and After: A $46 Refresh Gives “Cheap-Looking” 1990s Interior Doors a Hint of Vintage Charm
Beautiful interior doors (think: big, brass knobs, cool paneling, inset windows or mirrors) are some of the building blocks that make up beautiful homes. But even if your house or apartment doesn’t start with great doors, that doesn’t mean you can’t zhuzh them up and make them look a little fancier. You can paint, add trim, add wallpaper, add a decorative film, or even add fabric to boring doors if you choose.
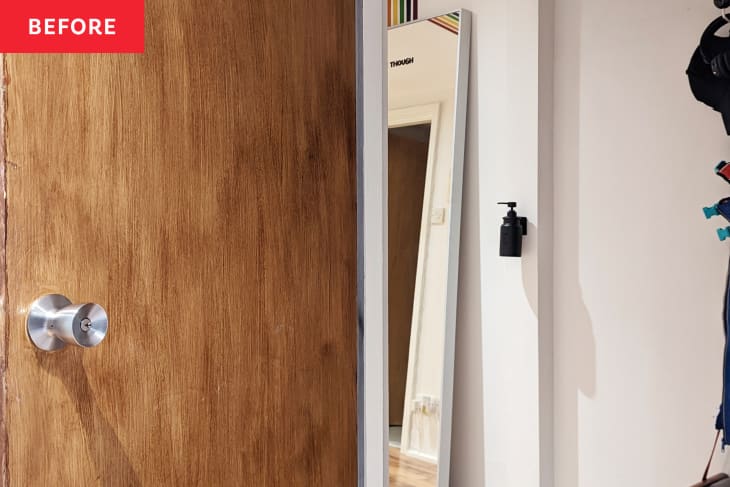
Take a cue from homeowner Becky Colley (@mymanchome), who spruced up her interior doors — four of them, totaling $185, or about $46 per door — in her home using moulding, glue, and paint. Before, if Becky described her doors to you while you were closing your eyes, you could probably picture them: They “were all cheap-looking, brown, and very ’90s (and not in a good way),” she says — a familiar sight to many who live in homes built or renovated in the 1990s.

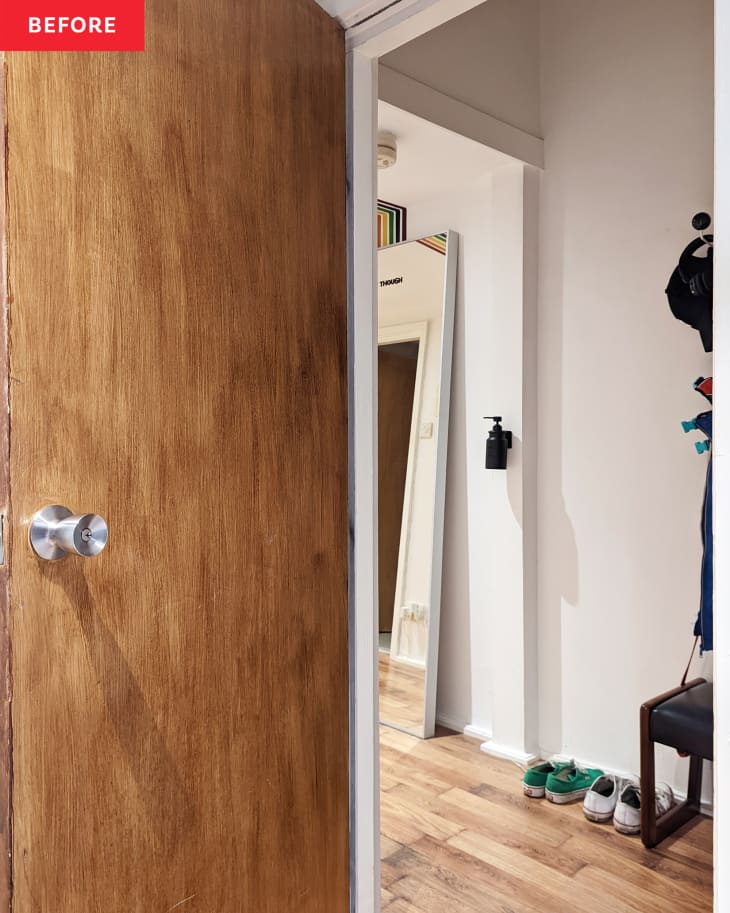
Becky’s doors were really cramping her apartment’s style. She says they made her hallways, which already get very little natural light, feel darker, plus “they also didn’t feel very respectful of the building’s Victorian heritage,” Becky says. (Her home was originally a merchants’ warehouse building, completed around 1895, then converted into apartments in 1996.) “I’m lucky to have some amazing original features, like an exposed brick wall and cast-iron columns, and the doors felt really out of place,” she adds.
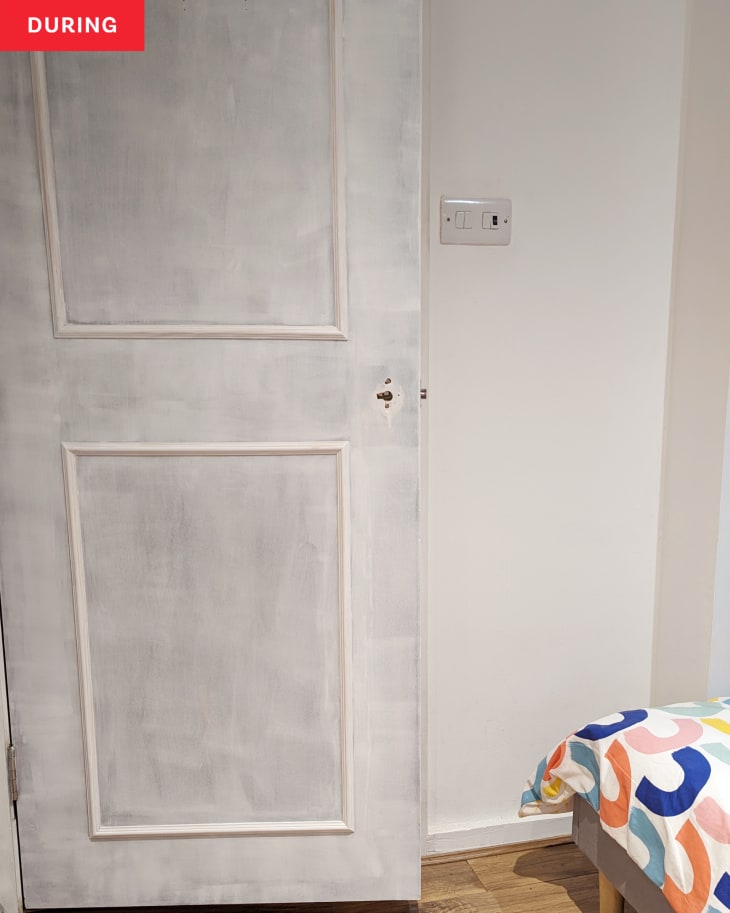
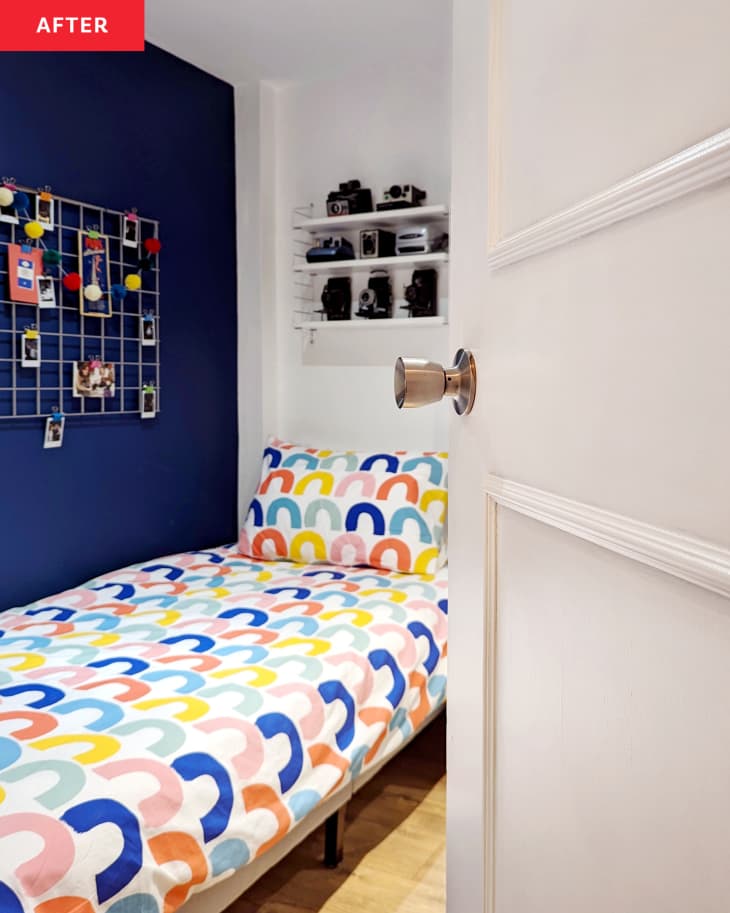
To give her doors a little historic charm, Becky decided to give them a facelift. First, she primed each door, then trimmed the moulding to size and applied it with adhesive (she used No More Nails). Once dry, she gave the whole door two coats of paint. Becky used Zinsser’s 1-2-3 primer and Johnstone’s satin paint in Brilliant White for the doors; the new color brightened not just the doors, but also the hallways and rooms the the doors belonged to.
“It sounds simple and is definitely an easy DIY, but it took a lot longer than expected!” Becky says. “There was a lot of measuring and sawing. I’d estimate each door took around a day, allowing for drying time between coats of primer and paint.”
Becky’s learnings are that she didn’t necessarily need to sand each door before priming — she did for the first one but skipped for the next three — and that priming with a paintbrush worked better for her than a roller. But most importantly, she learned that you should always double-check your moulding measurements twice before you cut. “I accidentally sawed pieces at the wrong angle twice and just got lucky that I could re-use those bits,” she says, adding that “measuring the wood so that hardly any went to waste was tricky but totally worth it.”
Now, Becky has doors that she loves. “The doors now look so much brighter and more appropriate to the age of the building,” she says. “I wanted them to look fresh but like they’ve always been there, which hopefully I’ve achieved.” In the end, her project was incredibly easy on the wallet, especially compared to the cost of replacing all the doors.
“I decided to try sprucing up the existing doors because every door is a different size so it would’ve been near impossible to find matching Victorian-era replacement doors to fit, I wasn’t sure if old doors would meet modern fire standards, it’s better for the environment than replacing doors that there wasn’t anything wrong with (even if they were ugly!), and I wanted a new project and to learn something new,” she says. “If you’re considering replacing doors anyway, just give it a go — if it doesn’t work out you’ve learned new skills and were going to replace them anyway.”
Inspired? Submit your own project here.