This One (Nearly Free, Basically Magic) Trick Can Fix Your Home’s Biggest Eyesore

Muralists like Racheal Jackson of Banyan Bridges and Mila Moraga-Holz of Jest Cafe have been showing home enthusiasts just how transformational a mural can be when combined with interior design. Creative shapes and playful hues inject unique personality into otherwise basic rooms — but even just an accent wall in a bold color can add some oomph.
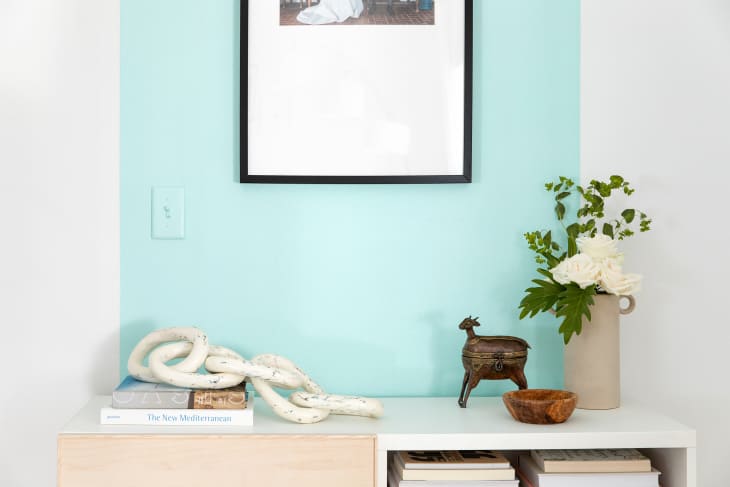
I haven’t worked my way up to a full-blown mural in my own home yet, but I have dipped my toe into painted accents. In our home’s entryway, I painted a neat strip of turquoise that extends from the baseboards onto the ceiling; in our bedroom, I painted a black-green band that wraps around the desk. I loved the way the bold colors defined the spaces — but the standard, white light switches and outlets stood out against the fresh colors like a dirty sock in the middle of a clean room.
So I did what any color-loving DIYer would do: I painted them. (You can see — or not see — my handiwork above.)
My husband and I have been living with our painted switches and outlets for a year now in high-touch areas (hello, entryway) and they’ve been holding up great — no flaking, no peeling, no sticking. The key is proper prep and to take your time painting around the switches. Here’s how I did it.
What you’ll need:
- 400 grit sandpaper
- Tack cloth
- Painter’s tape
- Primer
- Paint roller
- Small paintbrush
- Wall paint
Before beginning, prep your space.
Safety first: Cut the power before getting anywhere near the light switch with a paintbrush. Remove the switch plate if you’re using the original fixture and set it aside. Tape over the electric box leaving just the switch exposed. (Note: if you’ve recently painted the wall around the light switch or outlet, make sure the wall has had enough cure time so the painter’s tape doesn’t take off the wall paint.)
Make sure the paint can stick.
Rough up the light switch, switch plate, and screws with 400-grit sandpaper. This will give the primer and paint more texture to grab on to. Remove sanding dust with the tack cloth, which will pick up fine particles better than a plain old towel.
Next, apply a thin coat of primer to the switch and screws with the small paintbrush and let dry completely. Take your time here to remove any excess primer with the brush to prevent buildup. This is how you’ll prevent the switch from sticking! Flip the switch to the other position and repeat. Prime the switch plate with a roller to match the wall finish and let dry completely.
Paint carefully.
Prop your switch plate and screws up on scrap cardboard so that the sides of the plate and screw heads are not touching your surface. Use a paint roller and apply your first coat of paint. Let dry completely and repeat.
Use a small paintbrush to apply your first coat of paint to the switch, similarly to how you applied primer. Brush away excess paint and let dry completely before painting the reverse position. Don’t worry if the paint looks thin! It’s more durable to have two to three thin coats than trying to get full coverage the first time, which can result in a goopy texture and uneven drying.
Finally, put it all together.
Once everything has set, use a paper towel to cover the screws as you reattach the switch plate to protect the paint. Theoretically, you could paint the screws after reattaching the screw plate, but I found pre-painting prevents paint blobs between the screws and plate. Now, you can safely turn the power back on.
And that’s it — you’re done! Step back and admire your work. What were once eyesores now blend seamlessly into the room.
