
I Tested 4 Popular Hacks for Paint Touch-ups, and My Favorite Shocked Me
I have painted (and written about painting!) countless walls in countless colors over my years as both a renter and homeowner. And when I say countless, I really mean countless: A typical room in my house may be painted no less than four times over the course of two years. It’s even an ongoing joke with friends when they arrive, acting shocked to see the living room is still the same color as the last time they visited. I can’t help it, though! I love change, and painting a room is the fastest and most affordable way to do it.
Painting touch-ups is probably the most ignored item on my home to-do list, though — mostly because I don’t want to pull out a paintbrush and haul a gallon of paint up from the basement just to take care of one tiny spot. That’s why I was so intrigued to try out a couple new-to-me hacks for paint touch-ups that DIYers and influencers promised were easier than pulling out a full gallon of paint.
To see how these paint touch-up hacks really performed, I tested them against a couple hacks that didn’t require buying anything new. I’m happy to report that of the four total methods I tried, there are a few really great options!

How to Touch Up Paint on Walls
To do paint touch-ups on scuffed, scratched, or dinged walls, you’ll need to apply a small amount of paint to the spot, then feather outwards to blend.
For a quick and easy store-bought product, try the SlobProof Pen. But you can also quickly and easily do this project using just a fingertip or cotton swab.
How I Tested the Paint Touch-Up Methods
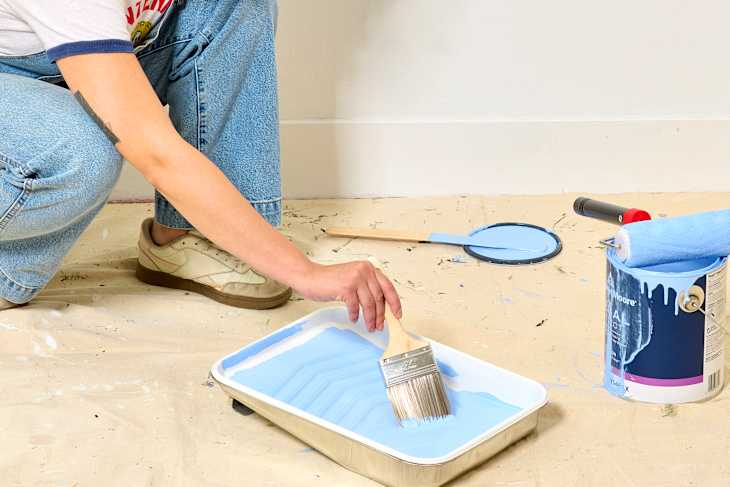
All of my four paint touch-up methods were tested in the same room on textured drywall using the same brand of latex wall paint in an eggshell finish. I tested spots where the touch-ups were relatively similar in size and depth.
The best way to touch up paint is to apply a bit of paint to the spot you’re covering, and then feather the paint outwards to help it blend into the existing paint. I used this technique for all the methods I tried here.
Ratings: The ratings are based on how easy the method was to use, how the paint applied to the wall, if it was easy to blend in, how it looked when dry, and how easy the method was to clean after using.


Method 1: Wall Refresher
Application: To use the Wall Refresher, you need to fill the base with paint and prep the roller — which seems like it wouldn’t be a big deal, but it sort of is. The base isn’t wide enough that you can pour from the can of paint without paint spilling over, so your options are to dip the base into the can of paint (too messy, don’t recommend) or use another vessel, like a scoop, to transfer paint from the can into the Wall Refresher’s canister (tedious and time consuming, but ultimately the better choice here).
Once the Wall Refresher is filled, you turn the dial to the “on” position while rolling the applicator back and forth over a piece of cardboard to load up the roller with paint. Rolling the applicator on the wall was simple enough, since it’s basically a mini-mini paint roller. When I needed more paint, I squeezed the base to release more but made the mistake of not holding the roller upside down, so big blobs of paint shot out and landed on the floor.

- How was the spread? Similar to using a normal-size paint roller, fairly even throughout. Only one coat was needed.
- How was the finish? The finish was perfect. You can’t tell it was ever touched up.
- How thick did it apply? The paint went on pretty even, like it does when using a large roller to paint a wall. You do have to be careful of pressing too hard to avoid lines.
- Are you able to blend with it? Yes, you are able to roll over any areas that are too thick and fan them out.
- Cons: The applicator is a pain to both fill and use. The potential for drips is high, and cleanup takes some time.
- Best used for: Large touch-ups, or areas where the roller didn’t provide complete coverage.
Overall Rating: 3/5


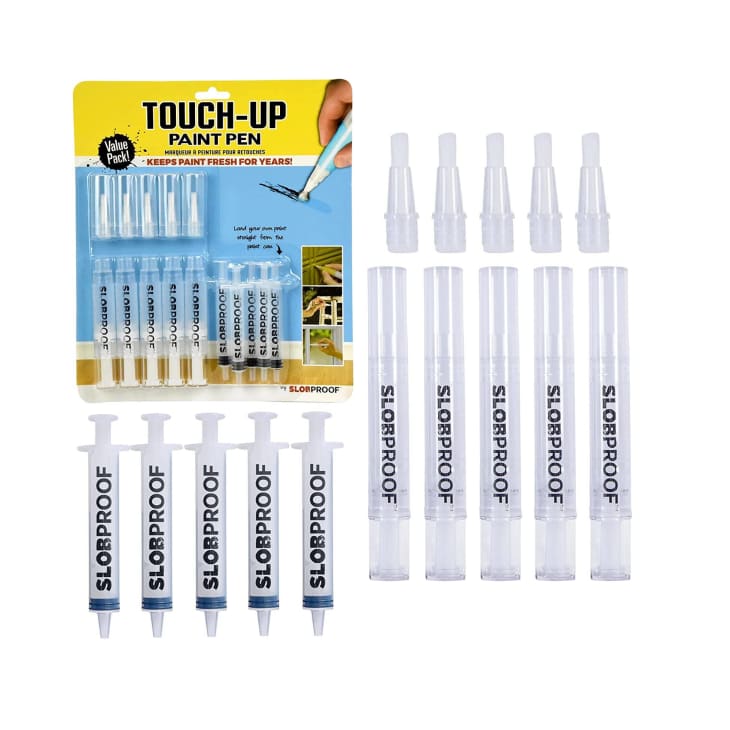
Method 2: SlobProof Pen
Coats needed: 1
Application: Filling the SlobProof pen wasn’t as quick and easy as dunking my finger in paint and slapping it on the wall, but it wasn’t difficult either. To fill the pen, you use one of the included syringes to suck up paint from your paint bucket. Then, you squirt it into the base of the pen before screwing on the brush top. Once filled, the application was flawless and I felt like I had a lot of control.

- How was the spread? The brush on this paint touch-up pen is small, like an art paint brush, and you control the amount of paint on the tip by twisting the bottom of the pen, so you can have as much or as little paint as you like. This amount of control is really nice depending on the size of the touch-up you’re working on. Only one coat was needed.
- How was the finish? Since I was able to feather the edges really well with the brush, you can’t tell it was touched up at all.
- How thick did it apply? I twisted the cap twice to allow the tip of the paintbrush to be filled with paint but not overflowing, so it applied exactly how I wanted it to.
- Were you able to blend with it? Absolutely. The brush is the perfect tool to feather the edges with.
- Cons: Cleanup isn’t as easy as tossing a cotton swab or washing your finger, since you have to unscrew the pen to wash the paint out of the chamber and out of the attached brush. There is a bit of wasted paint once you clean out the pen.
- Best used for: Small touch-ups, and a lot of touch-ups.
Overall Rating: 5/5


Method 3: Fingertip
Coats needed: 1
Application: There’s honestly nothing easier than popping open a can of paint, dipping your finger into it, and wiping your painty finger on the wall to cover a spot. You are in control of how much paint you pick up, and how much pressure you apply to get a good spread — so it’s all based on you, really. As an avid painter this was incredibly easy, and would be easy for someone who doesn’t have a lot of experience either.

- How was the spread? I started with a dab of paint on my finger, hit the largest area that needed to be touched up, and then spread the paint around in circles from there, feathering it out for a nice invisible dry down. It couldn’t have been easier. Only one coat was needed.
- How was the finish? Perfect! You can’t even tell where it was painted.
- How thick did it apply? Since I started with a dab, the paint went on pretty thick, but I was able to move it around and fan it out easily.
- Were you able to blend with it? Absolutely. Anyone is capable of doing this — especially if you’ve ever applied makeup with your fingers.
- Con’s: Your finger gets coated in paint and can be a pain to wash off.
- Best used for: Small- to medium-size touch-ups.
Overall Rating: 4/5


Method 4: Cotton Swab
Coats needed: 1
Application: I was a bit hesitant about using a cotton swab with paint. I worried that as soon as it touched the wall it would start shedding, but that didn’t happen. It was actually really easy to use, and I’m going to say it’s the next best thing if you’re unwilling to use your finger and don’t have any other tools handy.

- How was the spread? Between dabbing and making tiny circles, it was pretty easy to apply. However, it was a bit harder to feather the edges, though it dried down just fine. I found the more I used the cotton swab, the more cotton started to unravel — but thankfully it did not shed onto the wall or into the paint. Only one coat was needed.
- How was the finish? The finish was great, you can’t even tell it was a touch-up.
- How thick did it apply? Not very thick, the tip was so small it was hard to get much on there.
- Were you able to blend with it? It didn’t blend well, I wasn’t able to feather down the edges, but there was such a small amount of paint I wasn’t too worried. It ended up blending right in when dry.
- Cons: You likely won’t want to use the tip more than once, so if you have a few touch-ups to do, make sure you have a cotton swab for each one. I think the more you use it, the more you run the risk of having the cotton shed in your touch-up.
- Best used for: Tiny, single touch-ups the size of the tip of the swab.
Overall Rating: 3/5
My Favorite Method for Paint Touch-ups
I am an incredibly thrifty gal, so it surprises me to say that my top choice isn’t the free “slap a little paint on your finger” method but the SlobProof Pen method. I honestly thought this product was overkill and not necessary before using it, but after using it I can see how it makes touch-ups so easy and fast, and I really do think it’s a helpful tool to have on hand. (I will still be using my finger in a pinch, though!)
The SlobProof pen is my choice because of the absolute precision you can have with it in touching up the smallest of areas and because of the design of the pen. I found once I started with this tool, I just kept going all around the room, looking for even the tiniest spots that needed a touch-up.
I’m not sure how long paint could last in the chamber, but I think as long as the brush is clean, this is something you could keep filled and in the utility closet or junk drawer for when a situation arises that calls for a quick touch-up.