
Before and After: A Very Satisfying $30 Kitchen Cabinet Upgrade
This tiny kitchen was making its owner feel claustrophobic. All it took was $30 and a couple of hours to add breathing room—and beauty—without losing any storage space.
Here’s what inspired this ultra-approachable upgrade:
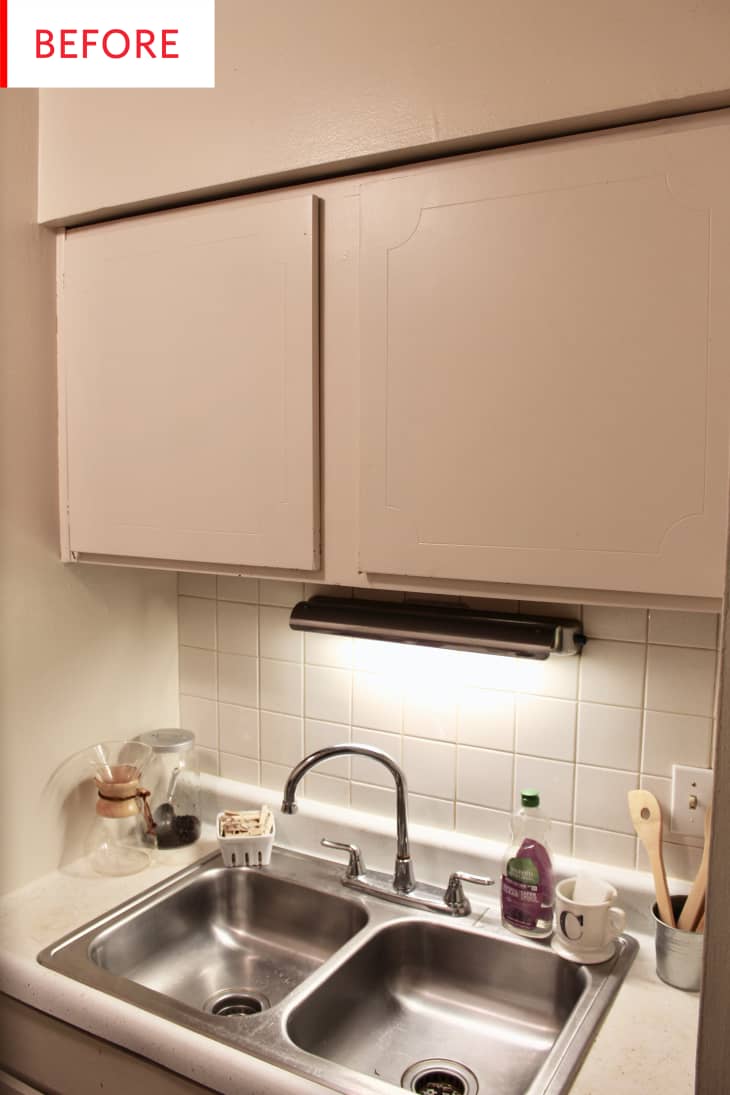
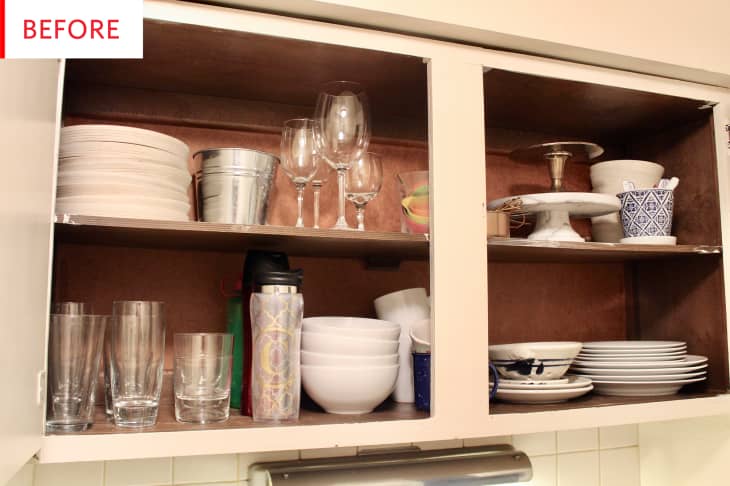
Unfortunately, I have a tiny kitchen… as in “two’s a crowd” kind of tiny. Cabinets on top, limited counter space and cabinets on the bottom. Pretty standard and does the job, usually. I’ve been wanting to do something to try and open the space up a little more (without knocking down a wall) and settled on the idea of taking the doors off of the cabinets above the sink. My kitchen has two large cabinets above the sink where plates and glassware (and a few other odds and ends) are stored.
When I cook, do the dishes, or grab some late night water, I am surrounded by a claustrophobic set of white cabinet doors. I thought if I took the doors off to provide depth, it would make the room seem a little bit bigger.
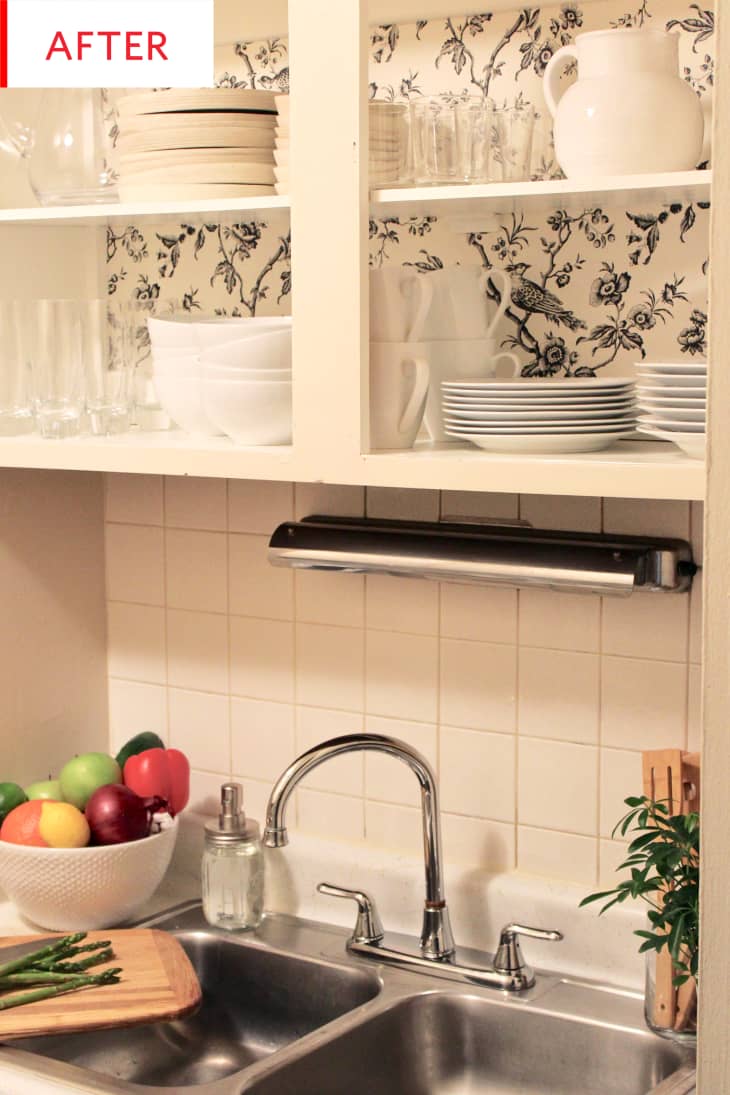
This looks fantastic! And it achieves Darling Minimalism, which is a rare and difficult feat. The wallpaper is cute and folksy, but its black-and-white palette keeps it clean and simple. Similarly, the dishes are stacked in a cozy jumble, but the fact that they’re monochromatic keeps things minimal. All of the wooden provide organic warmth, and clean modern lines.
Cody Czmyr of The Mystic Avenue is responsible for this low-cost makeover and achieved it through that tried-and-true renovation approach, “Make a Dramatic Step to Force Yourself to Continue”:
The process was very simple. I had to start with taking the doors off. I had been thinking about this for a long time and finally came home after work and did it. I figured if I took the doors off, then I needed to finish the project. That weekend I went and bought a pint of white paint, matched as best as I could to the existing color, and a few brushes for $22. I was able to secure the wallpaper from work so that didn’t cost me anything. Once I started the project, it took a total of two hours. Because the surface of what I was painting was small, it dried quickly and with three coats. The wallpaper was pre-pasted so I only needed water for that. Luckily for me, the project was quick and easy.
Almost all projects have an awkward stage, and this was Cody’s. Fortunately, the dishes and glassware are attractive—especially the cake stands—so the shelves still look decent. But here’s a piece of advice:
Do your homework. Make sure you know exactly what you want to do before you start doing it. When I took the doors off of the cabinets, I wasn’t ready to finish and had doorless cabinets for two weeks and it looked bad. Also, don’t be afraid to try something new. As long as it is only cosmetic, it can always be fixed.

Ah, this is so soothing. It makes me want to give every aspect of my life a fresh coat of paint and a pretty piece of wallpaper.
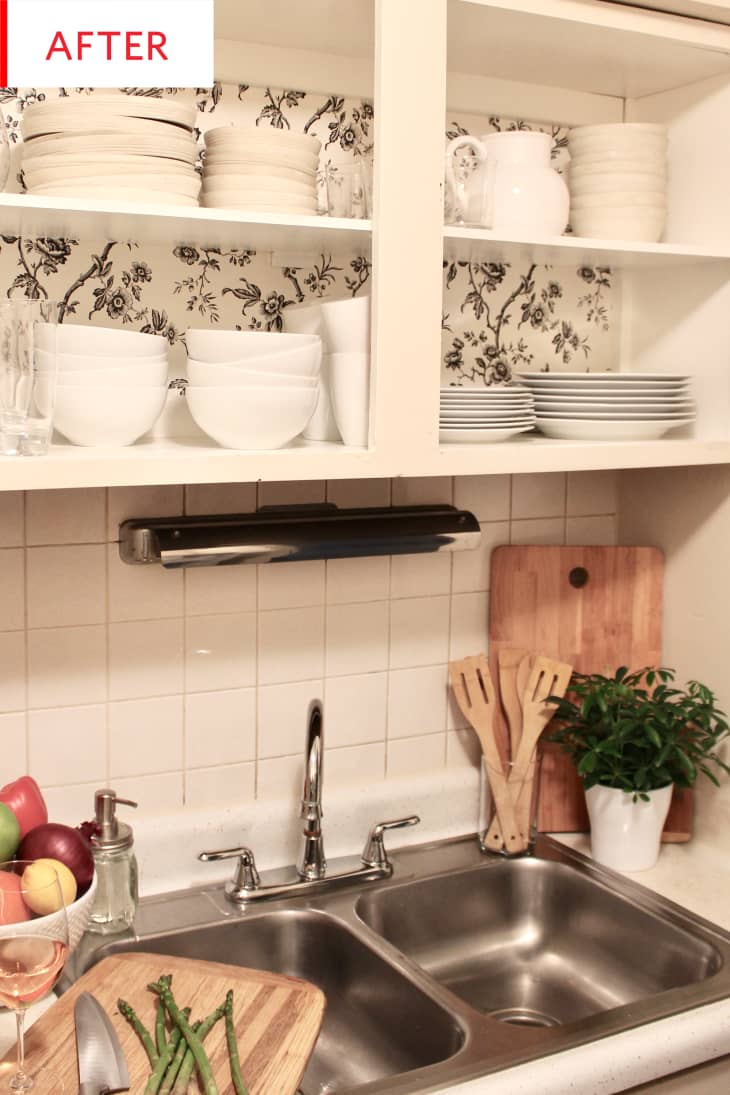
The true test of open shelving is if it looks good with things on it, especially a real amount of everyday items. It’s easy to attractively style a shelf with a pitcher, a cake stand, and three objets, but it’s a whole different game to use open to actually store your dishes and have it look this good. Well done! Fortunately, Cody is pleased as well:
I love how the cabinets turned out. It’s so much more open and bright. I cleaned up the plates and glasses and now it looks beautiful and organized. The colors of whites blend well together and the wallpaper adds a bit of fun and depth to the room. When I go into my kitchen, while it is still small, it feels like I have a little more room to breathe.
Thank you, Cody Czmyr of The Mystic Avenue!