
I Gave My IKEA HEMNES Dresser a Glow-Up for $60 (in 1 Weekend!)
After graduating from college — and moving back into my childhood bedroom for what felt like a little too long — I left LA for New York in 2011 with, as they say, a suitcase and a dream. My first apartment was teensy tiny, but despite the criminally small square footage, filling it with furniture felt mind-blowingly intimidating. It was my first real, adult apartment; my roommate and I didn’t know where to start.
Off to IKEA we went, resulting in our own home-themed version of Supermarket Sweep. We left that IKEA with smiles on our faces and two taxis filled with an entire apartment’s worth of stuff.
Although IKEA was my one-stop shop at the time, I’ve been slowly discovering my design aesthetic in the nearly fourteen years since. The (slightly) larger apartment that I now share with my wife and 65-pound dog has been, over time, meticulously curated with antique store finds and Craigslist gems. The IKEA pieces are becoming fewer and fewer (donated, sold, and in some cases, trashed.)
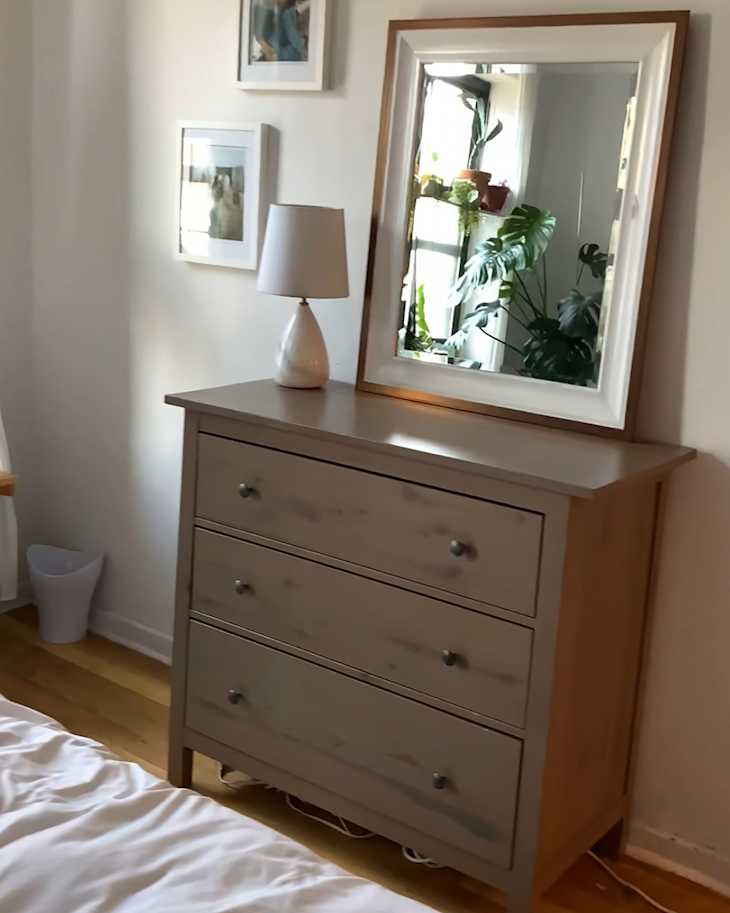
And yet, there’s one piece that has stood the test of time from that iconic IKEA haul in 2011: my trusty HEMNES three-drawer bedroom chest. The size is still perfect for our home, but I was growing to dislike the unnatural brown color and painted-on “wood.” So, one weekend, I decided it was time to impulse buy some paint and give the HEMNES a few more years of life.
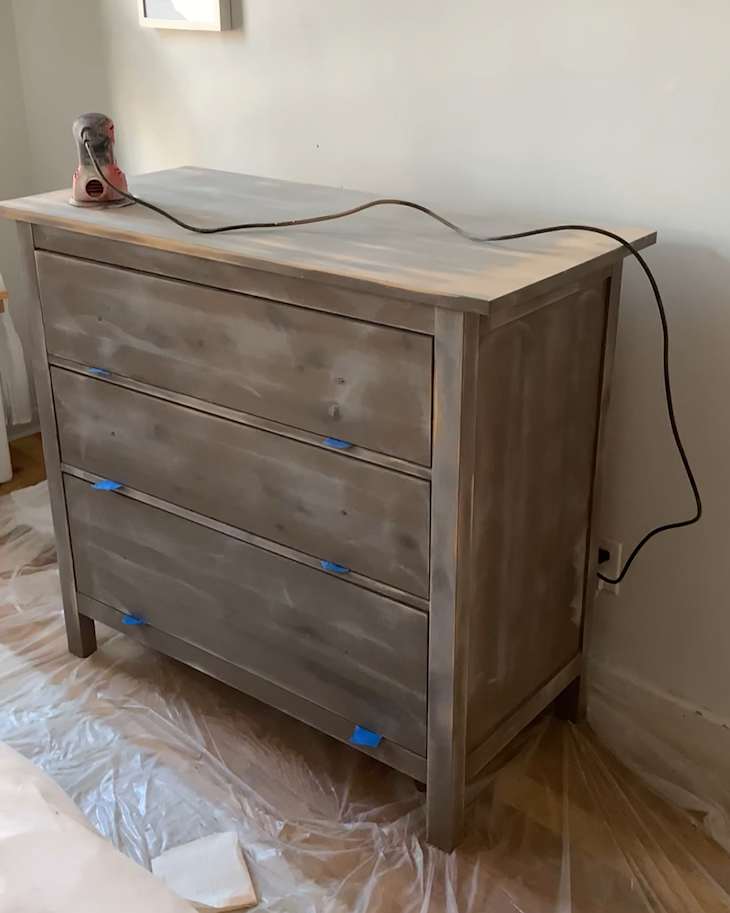
First, I sanded the dresser.
This DIYer’s tip? If you can, move the piece of furniture outside. If you live in an apartment, like I do, and have to do this whole process inside, you’ll need to open a few windows for a cross-breeze, and cover the rest of your furniture with plastic so you’re not left with a light dusting on everything you own.
I used a 120-grit sandpaper on my electric sander to sand the whole piece down, and then wiped the HEMNES with a soft microfiber cloth. I then did a once-over on the top with a finer, 200 grit sandpaper, and wiped it down again.

Next, I primed and painted.
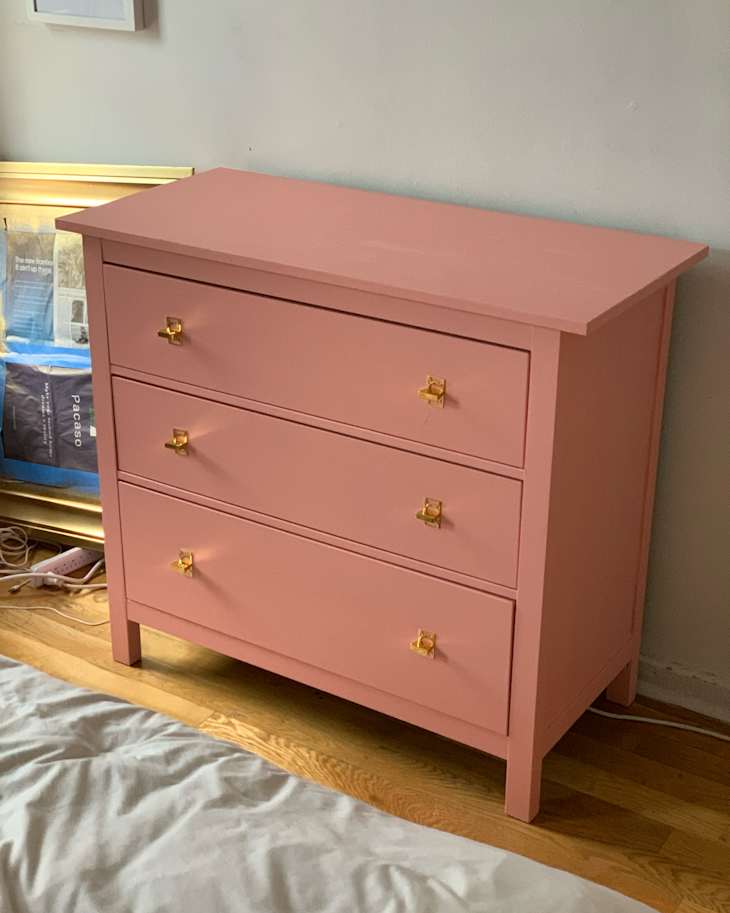
After removing the knobs and replacing them with painter’s tape,I primed the piece, but I wasn’t too precious about it. I had some leftover white primer from another project I’d recently been working on, so I did a quick, sloppy prime over the newly sanded wood. A quick trip to The Home Depot had led me to the perfect pink paint (Behr’s Peach Mimosa). I used a mini paint roller to paint one coat, wait a couple of hours, and paint a second coat.
I finished the upcycle gold knobs.
I’m a vintage-loving gal at heart, so I typically would source knobs from places like eBay, Etsy, vintage shops, or flea markets, but you can also find pretty cute options at your local hardware store, or even online! My goal was to transform this dresser over the course of a weekend, so I quickly snapped up gold ones (now sold out) during my run to The Home Depot, and I love them.
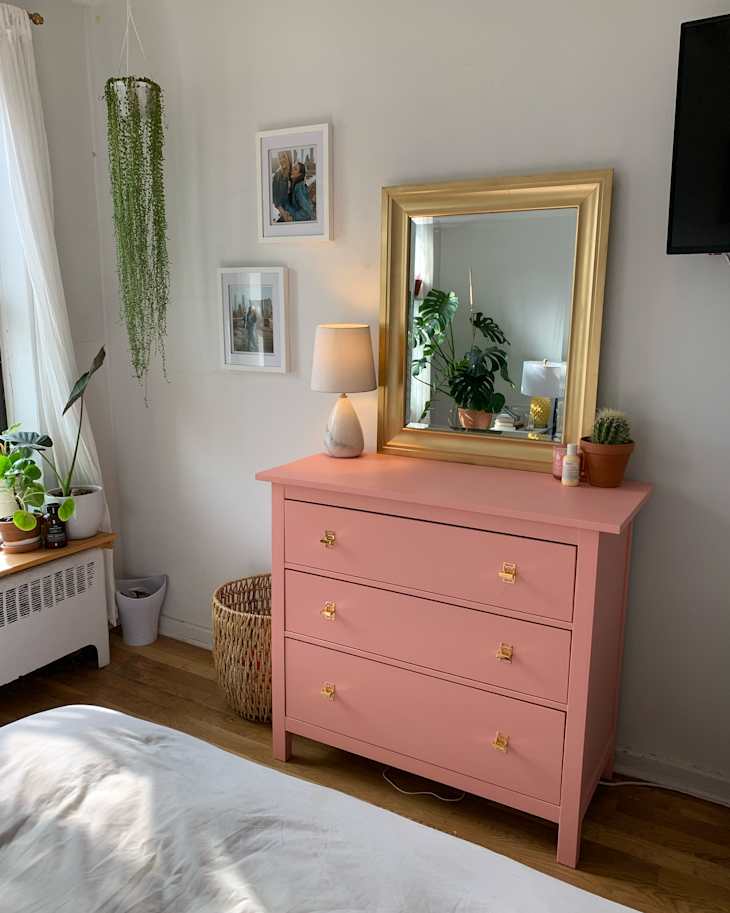
The whole process took me 36 hours and about $60, and it feels like a whole new piece of furniture.
Inspired? Submit your own project here.
Get all the IKEA UPDATES
Sign up for The IKEA Edit, our twice-weekly newsletter with the latest IKEA finds, deals, and hacks.