
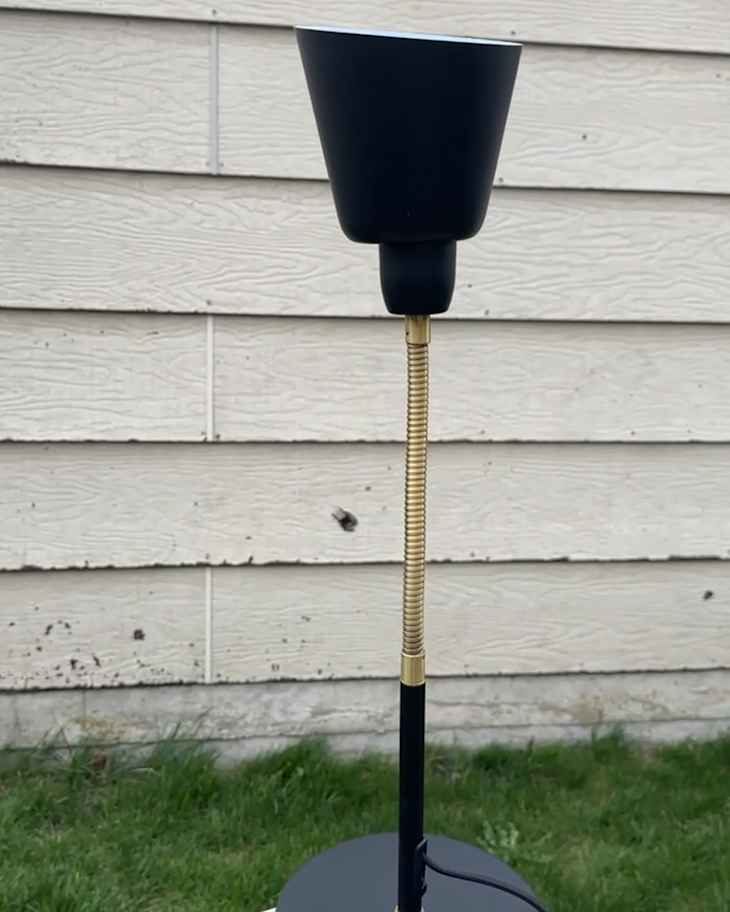
See How I Transformed a $3 Thrifted Lamp into a Stunning Designer-Looking Piece
I have a thing for novelty lamps. As an avid lamp lover, I’ve always been intrigued by artist Peter Bliss’ floral lamps, and one day while I was at the thrift store staring at the lamp section, inspiration struck. I knew I had to try to create a tulip lamp with this $3 thrifted gooseneck desk lamp — something that maybe once belonged on a college dorm or office desk.
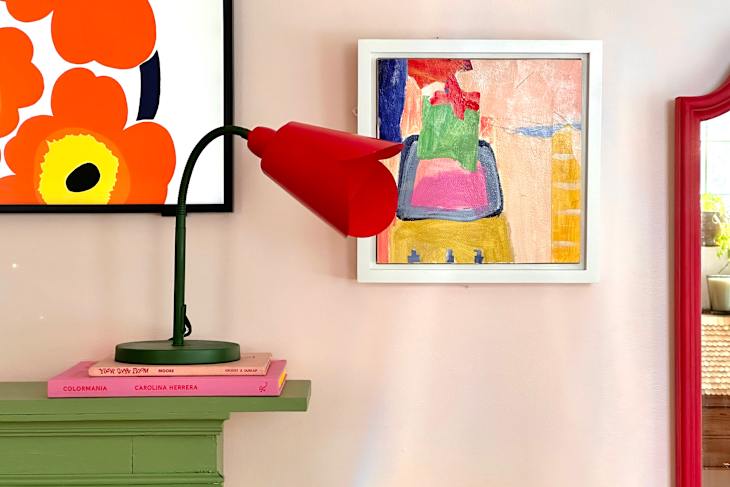
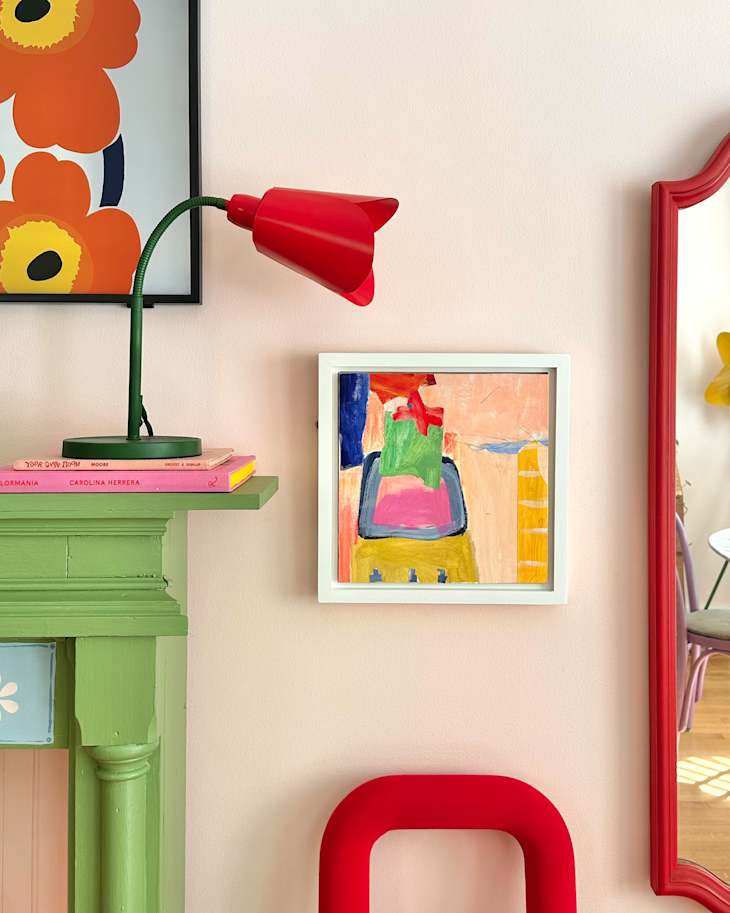
I was about to give it some major style (and color). Before starting, I absolutely needed to get the colors right, so I went to Blick and stared at the giant wall of spray paint for a solid half hour until finding the perfect shades of red and green.
Roofing supplies — yes, really! — came in handy for creating the leaves.
I’d previously used craft foil on an early version of a daffodil Bliss-inspired lamp I made from an old Crate & Barrel floor lamp, and it was fantastic for adding detail — but in the end, too flimsy.
Quite a few people suggested roof flashing, so I picked up a roll at The Home Depot and was surprised how affordable it was ($12 for a 10-foot roll), but was a bit skeptical I’d be able to work with it without any other roof flashing tools.
It turns out, all I needed to cut the material was scissors, and it cut beautifully. It was a tiny bit intimidating to uncoil the roll; it’s metal, and you really do need to use caution (wear protective eye gear and gloves!) when working with it, but I was easily able to cut off a manageable size to work with and felt confident fairly quickly after.
After that, I needed sandpaper, glue, and clamps.
A pair of sharp scissors did the job for cutting out the petals, and some 150-grit sandpaper helped to smooth out the edges and rough up the surface for the spray paint to bond. Adhering the petals to the lamp was a bit of a project (my first two solo attempts were fruitless), but once I wrangled another set of hands to help out I was able to bend and clamp the petals in place. After about a day I took the clamps off, and E6000 glue held the petals beautifully.
I loved working through the process of making this lamp and can’t wait to try out new techniques. I’m especially interested in finding a way to heat the petals with an at-home heating element like a blowdryer to see if it will help bend the petals with a more natural curve.
For now, I’ve got a tulip table lamp, a daffodil floor lamp, and a daisy flashlight, and I’m just about as happy as I could be with my bouquet of lamps!
Inspired? Submit your own project here.