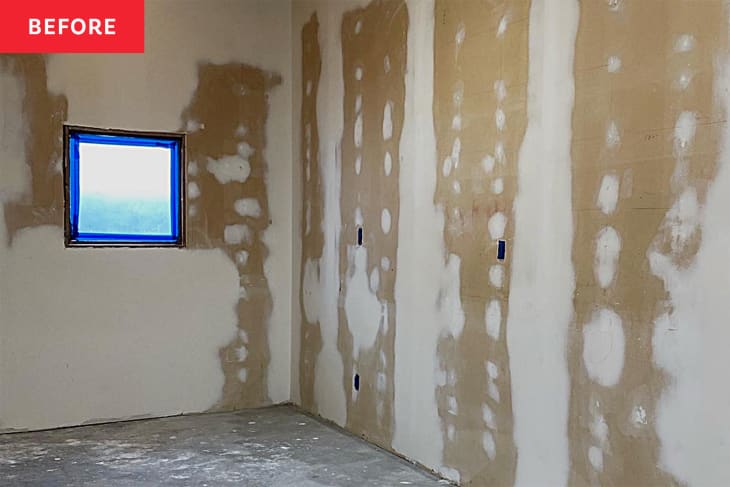
Before and After: A Neglected Spare Room Becomes a Chic Speakeasy for Just $2,000

If you’re someone who has been blessed with a spare room, it’s easy for that space to become a crash pad for odds and ends like holiday decor, off-season clothing, or infrequently used tools. And there’s nothing wrong with that! But if you’re looking to get a little bit more out of your bonus space, here’s a gorgeous — and completely unexpected — redo to inspire you.
DIYer April Dyck (@apriljustinehome) had a spare room in the 1988 home she shares with husband Darren and their three daughters that wasn’t quite living up to its potential. “The previous owners used the room as a workshop with storage,” April explains, noting that the layout and the aging drywall throughout was “really not functional” for much else. However, April and Darren knew that the space — which is accessible through a secret door in the laundry room — could be so much more. So instead of letting it just exist to stow their belongings, they decided to turn it into a stylish and completely unexpected speakeasy as part of the One Room Challenge.
To kick off the project, April and Darren replaced any damaged pieces of the drywall before creating a board-and-batten look with molding on the walls and up across the ceiling, too. Next, they painted the whole room in a dark and moody brown-gray hue that suits the vibe of an old-school speakeasy (the color: Sherwin-Williams’s Urbane Bronze). Using the same color throughout the whole room — but in a matte finish for the walls and ceilings, and a more satin finish for the trim, doors, and cabinets — ramps up the drama.
April’s father-in-law Bob helped build the cabinets, which were made using MDF. And surprise! They used MDF for the counters, too, but mimicked the look of expensive stone by using an epoxy in a mix of black and metallic colors. April thrifted an arched cabinet for just $40 to store bottles and glasses behind the bar.
A room divider in the form of a green velvet curtain added another dramatic flourish, while the eye-catching furniture and decor — including stools, wall prints, and an armchair — were either bought secondhand or items from other areas of the home.
The whole transformation cost around $2,000, thanks to the huge amount of DIY involved and all of April’s secondhand shopping. “I would have loved an unlimited budget but that’s not real life,” she notes. So, for example, instead of shelling out as much as $200 per bar stool, she paid $150 for four, and her table and three chairs cost just $45.
“My best piece of advice is to not overspend on a renovation. Set your budget and be mindful of it,” April says. Her hard work — and the gorgeous space that resulted from it — proves that with patience, you can achieve a huge transformation without having to rely on a huge budget.
This project was completed for the Spring 2023 One Room Challenge, in partnership with Apartment Therapy. See even more of the One Room Challenge before and afters here.
Inspired? Submit your own project here.
