Before and After: This 1954 Kitchen Keeps Its Checkerboard Floors But Adds Chic IKEA Cabinetry

When real estate agents walk through a kitchen, they’re often looking at the cabinetry. After all, ample storage space is a sellable feature in a home. They generally prefer closed cabinetry to open shelving, and they have preferences when it comes to cabinet color. (Lately, deep and moody shades are superior to white.)
When real estate agent friends walk through Ineke Nordt’s kitchen, she says they “cannot tell that this is an IKEA kitchen and refer to it as ‘very luxurious.'”
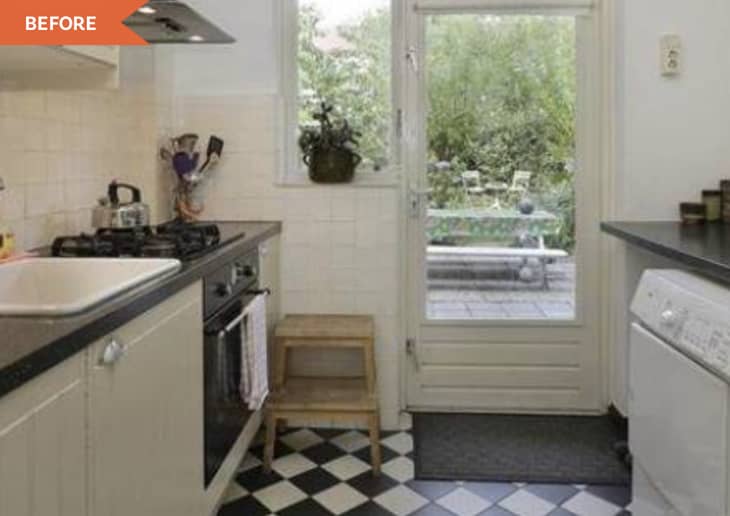
One day, Ineke grew tired of her 1950s-style kitchen and decided to order new components from IKEA. Her kitchen before had “a very weird setup,” she explains.
She didn’t like that the sink and stovetop were so close to each other. “Doing the dishes was a challenge as it was not possible to work left to right,” she recalls. “It wasn’t practical and it looked dated.”
Then, her appliances died on her. “When the oven decided it knew best when my food was done, the fridge had a little pond at the bottom, and the range hood gave up, I had enough,” Ineke says. “It had to go.”
She used the IKEA ENHET planner to outline her cabinetry, counters, sink, and appliances (except for the stovetop, which is from ATAG). She added a built-in fridge, positioned the stovetop and sink opposite each other, and placed an oven to the left of the stovetop. Although you can purchase similar rounded pulls from IKEA, Ineke got her chrome pulls from a Dutch retailer.
One of Ineke’s favorite parts of her new setup is the fact that there actually aren’t any cupboard doors. It’s all soft-close drawer storage. “I never ever want cupboards again, ever!” she says.
Ineke says she was nervous at first about having no upper cabinets, but she loves the way the minimalist look opens up the space and makes it feel larger. She says her open shelving motivates her to keep the area clean and cutter-free.
On the right side of the room, above the open shelving, there’s now exposed brick on the ceiling. “While demolishing the old kitchen, we discovered the ceiling was made out of bricks. I immediately decided that had to become a feature, so when the ceiling was plastered, the part above the sink was left untouched,” Ineke says. “I love surprises like these!”
She also chose to keep her kitchen’s retro checkerboard floors — a pattern that’s making a comeback these days. Her advice to renovators looking to protect their existing floors is to cover anything you don’t want damaged — even if it’s not in the room you’re renovating. “This way you prevent the plaster, dirt, and debris to be carried through your entire home,” she says.
In all, she’s thrilled with her renovation, and she’s especially thrilled that it looks high-end. But Ineke’s second piece of advice is that you shouldn’t rely on items from one store, especially when it comes to the accessorizing stage. She filled her space with several boutique finds and collections from her travels, too.
“You do not have to buy everything from the same store,” she says. “Make it your own, give it something different, and play!”
Inspired? Submit your own project here.
