
Before and After: A Two-Piece Cabinet Gets a Charming Two-Tone Painted Makeover

Are you eyeing your first-ever furniture flip project, but feeling intimidated about the process and wondering where to start? Make your way through our starter pack. This content was created independently by our editorial team and generously underwritten by the Toyota Corolla Cross.
When it comes to figuring out what to do with secondhand wood furniture, the options are pretty much endless. Of course, you could paint it or stain it. You may choose to cover it in peel-and-stick wallpaper. Or you can do what Christina Lipstone, the furniture flipper behind Around the Lemon Tree, did and put your woodworking skills to the test.
“This piece was a culmination of all the skills I’ve learned since starting my furniture flipping journey in September 2020, including adding a new top, applying edge banding, attaching new legs, and finally mastering paint washing,” she says of the redo.
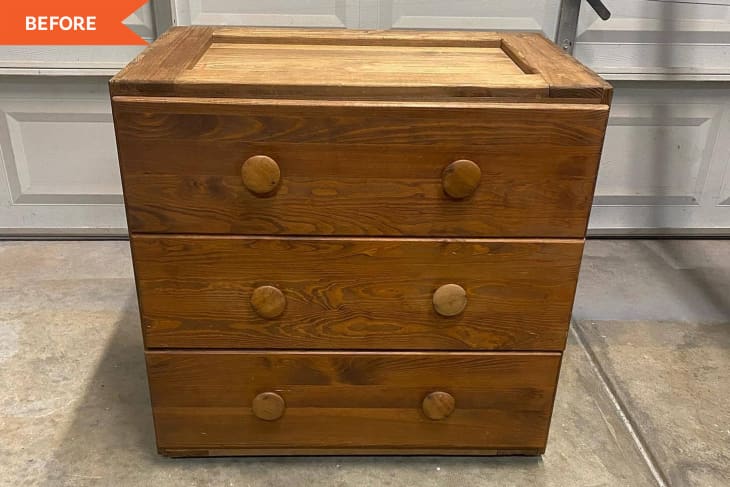
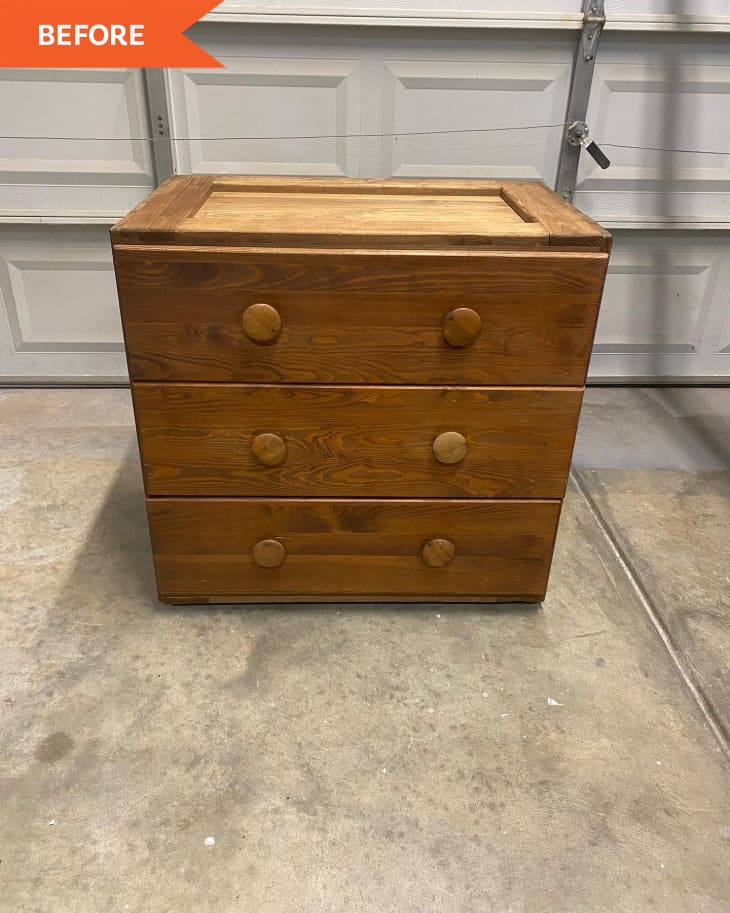
Christina found this piece on Facebook Marketplace as part of a five-piece set from a seller who brought the furniture over from India when they moved to the United States. This particular item originally had a cabinet on top of it, making it more suited for a kitchen, but Christina looked beyond those intentions to imagine how the structure could change with a few tweaks.
“I knew separating them would result in the cutest little dresser, and I decided to add a new top and legs,” she says. Since the piece was originally a cabinet, it needed an entirely new top, which she made out of a quarter-inch white oak plywood panel cut to size and secured with wood glue and screws. From there, Christina used edge banding, which is a thin wood veneer attached with heat, to give the raw edge of the plywood a finished look. The legs were ordered off Amazon and easily attached with screws.
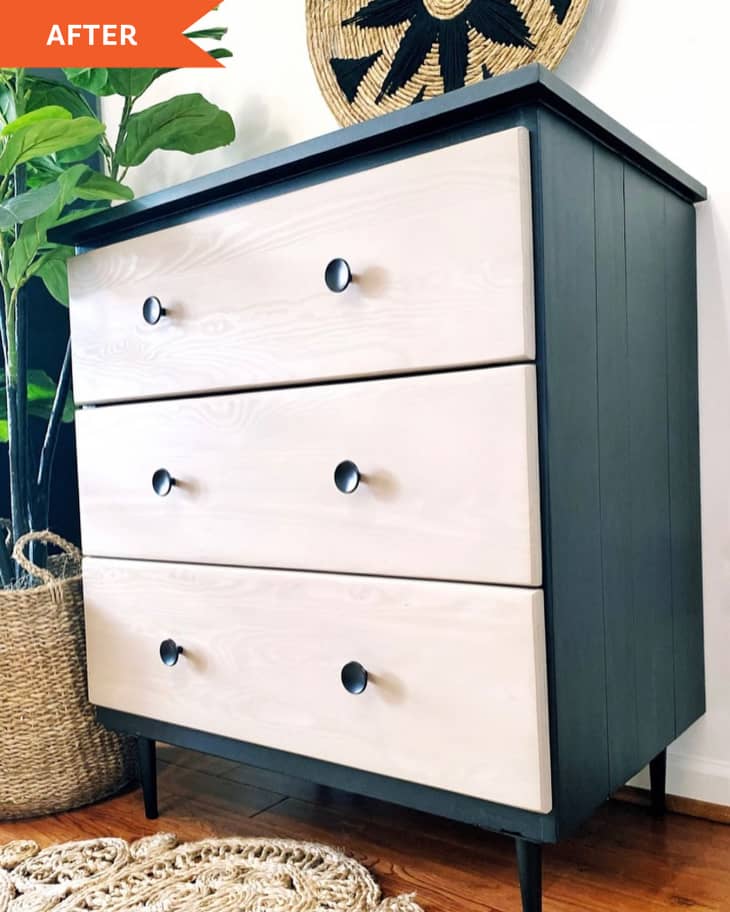
When it came time to paint, Christina found her inspiration in her own personal style archives. “I’ve always loved the look of black and natural wood tones,” she says. “My home has a modern, boho style with a lot of black, white, and wood tones. If I could do every furniture flip in this style, I would!”
She scuff-sanded the piece to prepare it for paint, and used two coats of Zinsser’s B-I-N shellac primer to prevent any bleed through that could arise from the red-toned hardwood. Next up: her go-to black furniture paint, Fusion Mineral Paint in “Coal Black.” On the drawer fronts, Christina sanded all the way down to the raw wood to prepare for a paint wash using Fusion Mineral Paint’s “Algonquin.”
What’s a paint wash, you ask? It’s equal parts paint and water that’s applied to the entire surface and immediately wiped off with a paper towel. Two coats resulted in a light, airy treatment that reveals the wood grain while giving it the look of paint. As a final step, Christina updated the hardware.
With just a few thoughtful changes, this DIY project went from an unfinished part of a larger item to a stand-alone dresser with a new identity. “It’s a timeless piece that would work in almost any bedroom,” she says. “With every furniture flip I do, there are always challenges, but this one went smoothly and I love the result!”
And if you’re wondering what happened to the top cabinet that Christina removed, don’t worry. Never one to waste a piece of furniture, she recently turned that into a wine rack.