
Before and After: Upcycles and DIYs Transformed a 1910 Living Room for Just $1,060
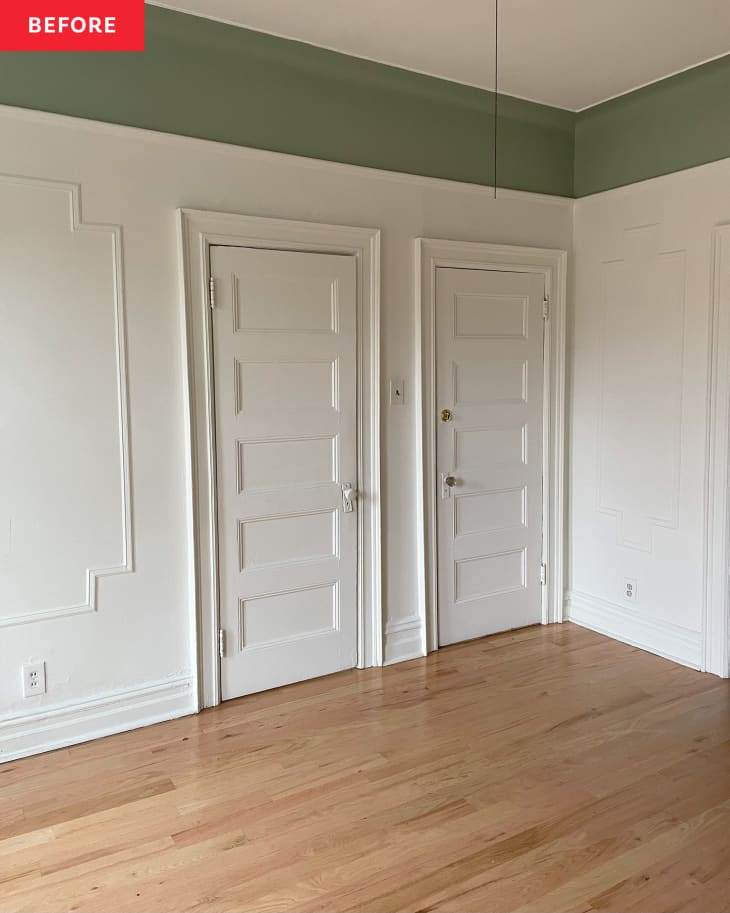
White walls are often called a blank canvas since they give you the opportunity to showcase your personal style with whatever decor you like. But the idea of a “blank canvas” can also be taken literally, as it was in this living room redo from interior designer and DIYer Sydney Moss (@sydleemoss).
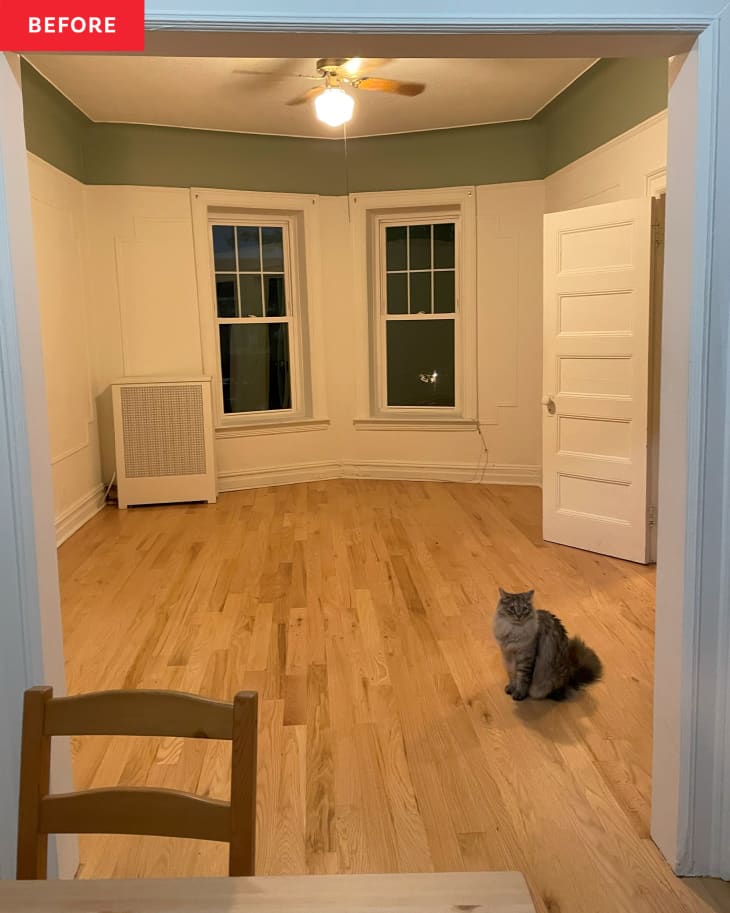
When Sydney and her boyfriend Joe moved into their 1910 apartment, Sydney was smitten. “When we first saw the apartment I fell in love with the original details like the picture frame wall molding and I have always wanted a living room with a bay window,” she says. “It was also so open and sunny to walk into.”
Sydney didn’t see the white walls as boring, though. “I wanted to treat the walls like a blank canvas for my own creative practice and play,” she says. “The openness, historic features, and light made me feel like I had to go big and bold with the space, with lots of detail and color so none of its natural assets went to waste.”
The color palette was inspired by other rooms in the home.
Sydney actually started the living room redo by focusing on all the other rooms in the apartment. “I picked out all the paint colors for the other rooms in the apartment first because I knew I wanted this room to be the heart of our home, so I chose to make it an amalgamation of all the other colors used throughout the space,” she says. Once every other room’s colors were chosen, she turned her focus back to the living room.
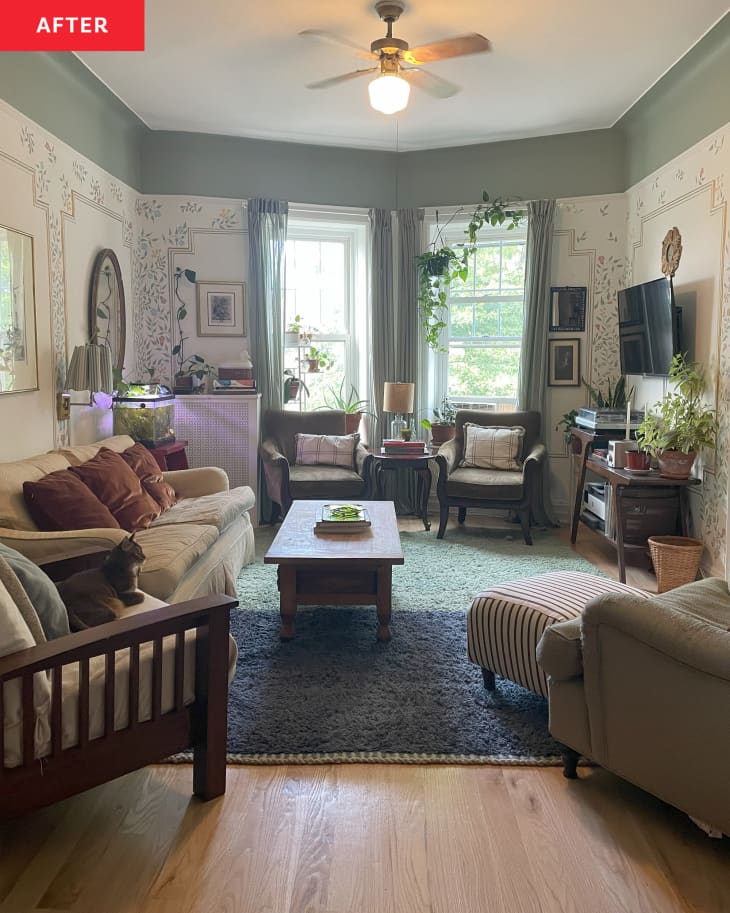
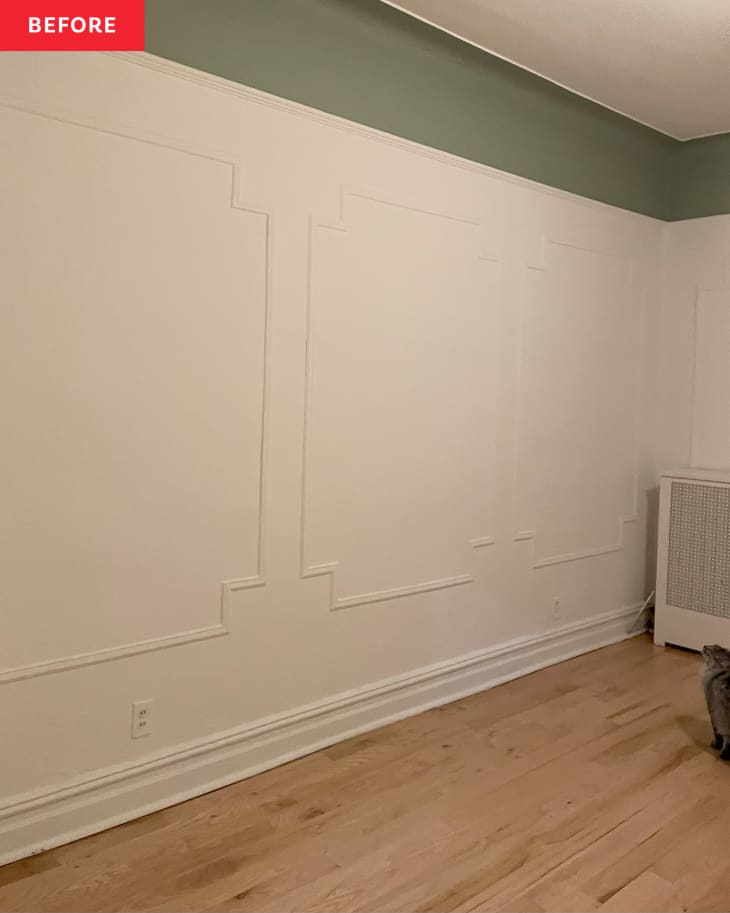
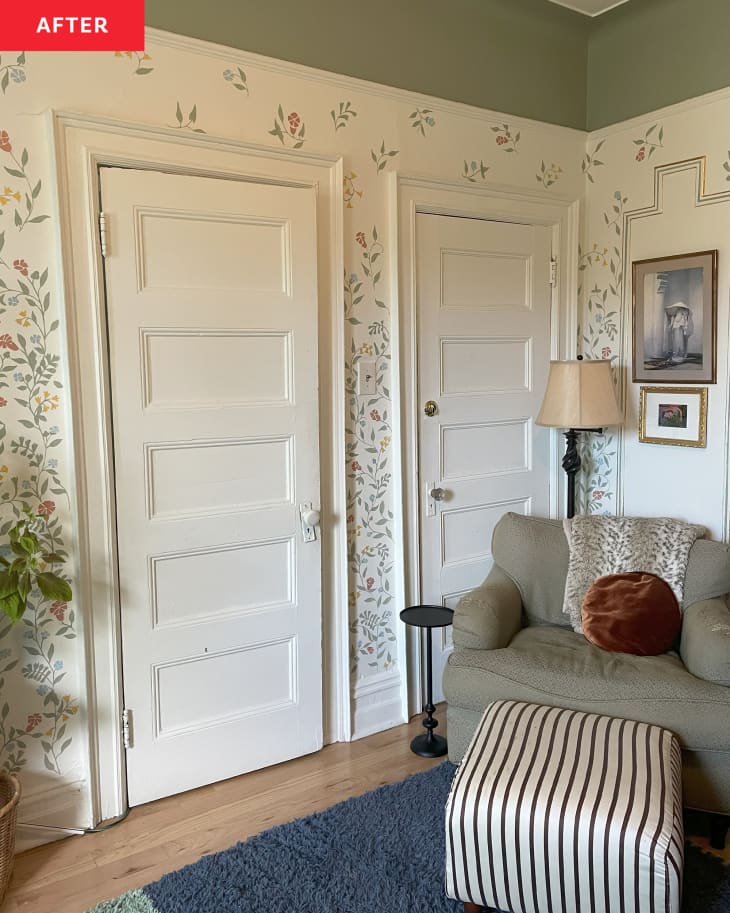
Her goal: to create an area that was super cozy, and make “every spot the perfect place to sit and read a book,” Sydney says. She started with stripes on the wall molding to help the original architectural feature stand out. Painter’s tape and a craft knife helped her get the super thin green and gold stripes; she painted over the tape with the white wall color first to help prevent paint bleeding and ensure a really precise end product.
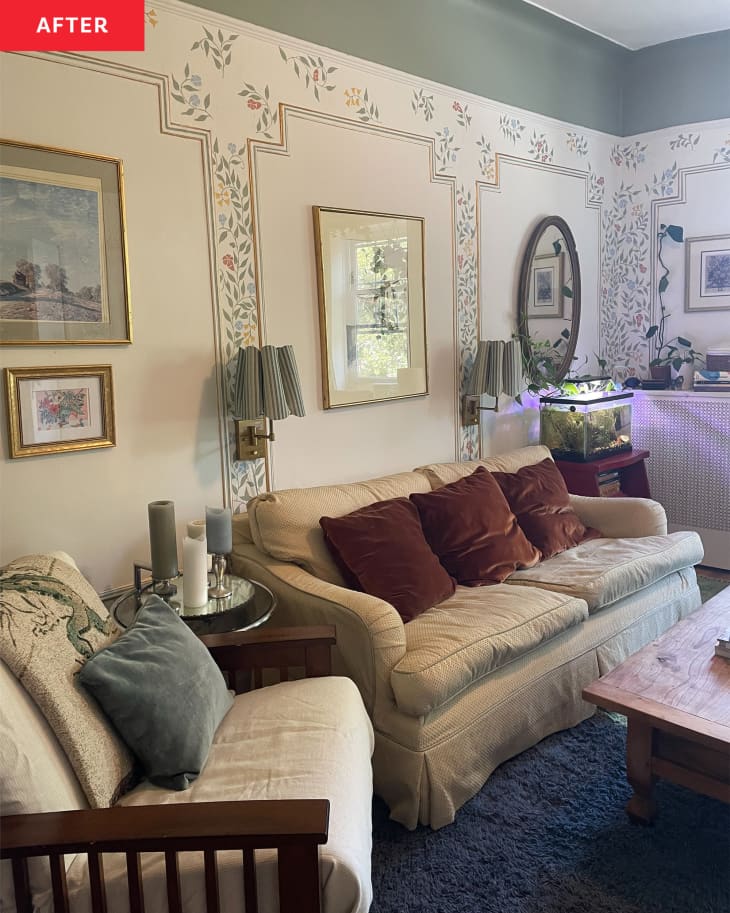
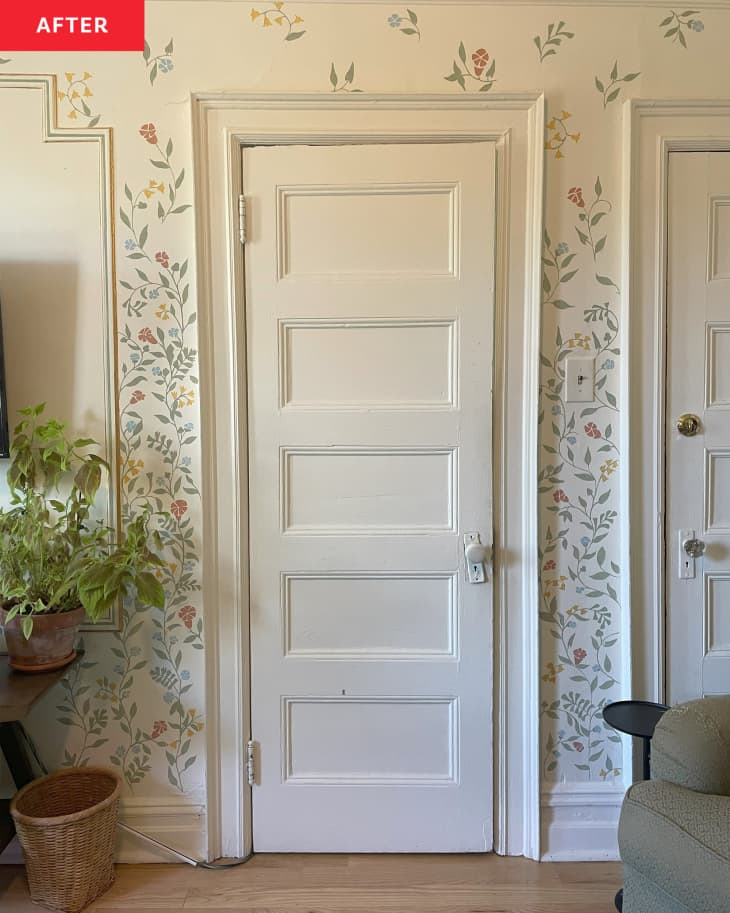
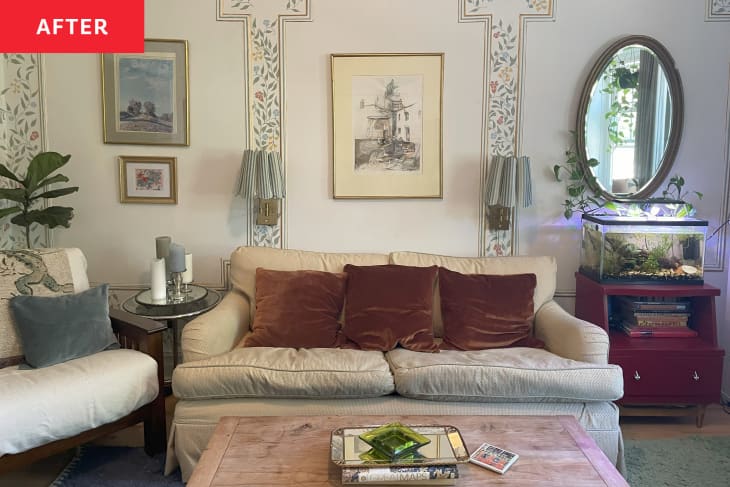
Hand-painted florals call attention to the original molding.
Creating the floral painted accents took a bit more time (and work). Sydney started a few months after she and Joe moved in, and it took six months for her to complete that part of the project alone. She started by drawing each section in pencil — it’s all freehand! — then painting it in before moving to the next section.
“I have painted floral patterns on walls before but never at this scale,” Sydney says. “It was difficult to make sure all the flowers and leaves were the same size and spaced consistently since I was painting portions months apart.”
Upcycling helped keep the total cost down.
Once she figured out the design she wanted, Sydney says, it was easy enough to replicate it and play around with the scale and angle. “Painting the stems turned out to be more difficult because I wanted them to be thin and dainty, not thick globby lines, but it took a very steady hand to get right,” she says.
Using leftover paints and purchasing sample cans allowed Sydney to use a wide range of colors without breaking the bank. In fact, she used four different colors and only spent about $60 on paint. (The colors are all Sherwin-Williams: The green is Cascade Green, the blue is Vast Sky, the pink is Coral Island, and the yellow is Olden Amber.)
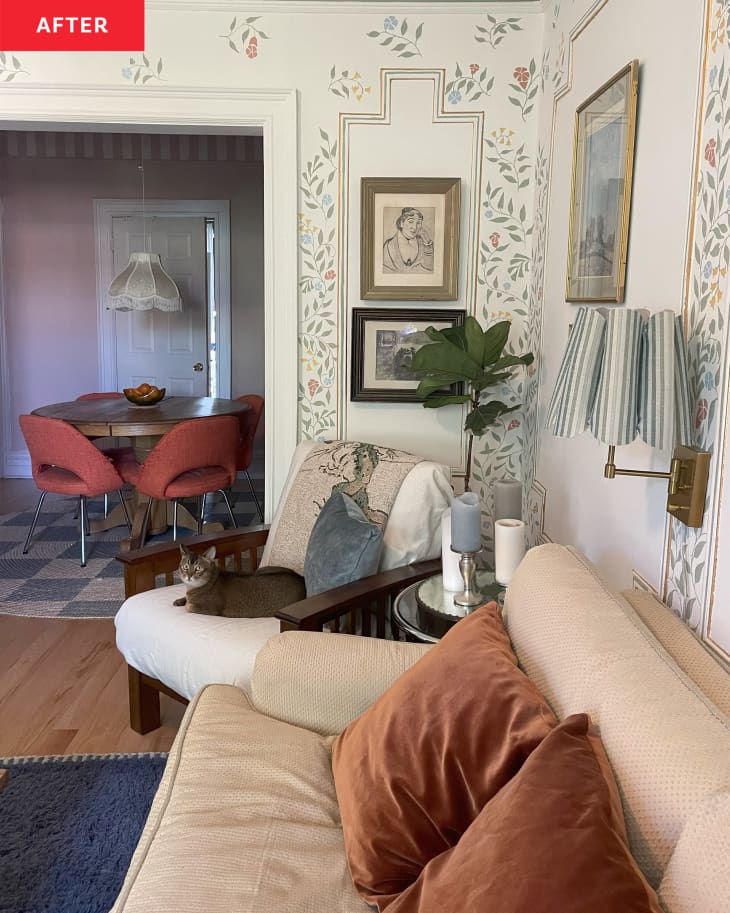
When it came to furnishing the space, Sydney says she was “committed to upcycling as much furniture as possible.” She thrifted many of the items, found some on the sidewalk, and inherited some as well — even a lot of the plants, she notes, come from clippings her dad gave her. When it came to fixing up older items, Sydney’s skills helped a lot. “My upholstery background makes it easier to give certain items some TLC, and I save all my scraps from projects for clients so I always have some fabric I can use at the ready,” she says.
Patience was key to this makeover.
The room’s pillows are all Sydney-original creations (as are the sconce shades), the rug came from a vintage seller on Etsy, and the ottoman was part of her childhood bed set; she reupholstered it for a fresh look. The total cost for furnishings was about $1000.
Sydney didn’t rush the decorating process. “I really took my time to feel out the layout and choose which furniture pieces to place in the room and wanted to make sure each item had character of its own as well as fitting nicely together,” she says. Because it all came together so slowly, she adds that “keeping up momentum” was the hardest part of the project. “I had to power through and finish before second guessing or undoing any of my work and it has been a joy to watch things come together,” she says.
The living room now highlights all the great features — the molding, the bay window, the tall ceilings — that Sydney first loved. “The whole room feels so joyful and comfortable and can seat so many people when we have guests,” she says. “We absolutely love sitting in this room and it really is the best spot to hang out and read or watch TV.”
The absolute best part, though, is that it feels so personal. “The space feels like me. I love floral prints and it makes me so proud to know I did it all myself,” Sydney says.
Inspired? Submit your own project here.