
Before and After: You Haven’t Seen an Oak Dining Table Redo Like This Before
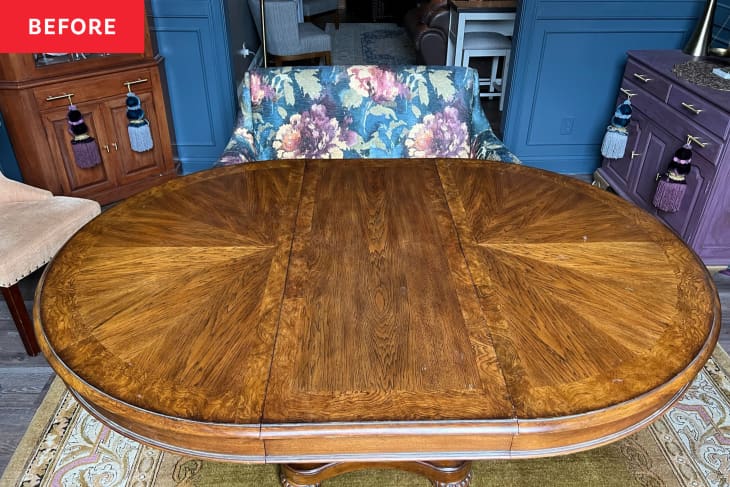
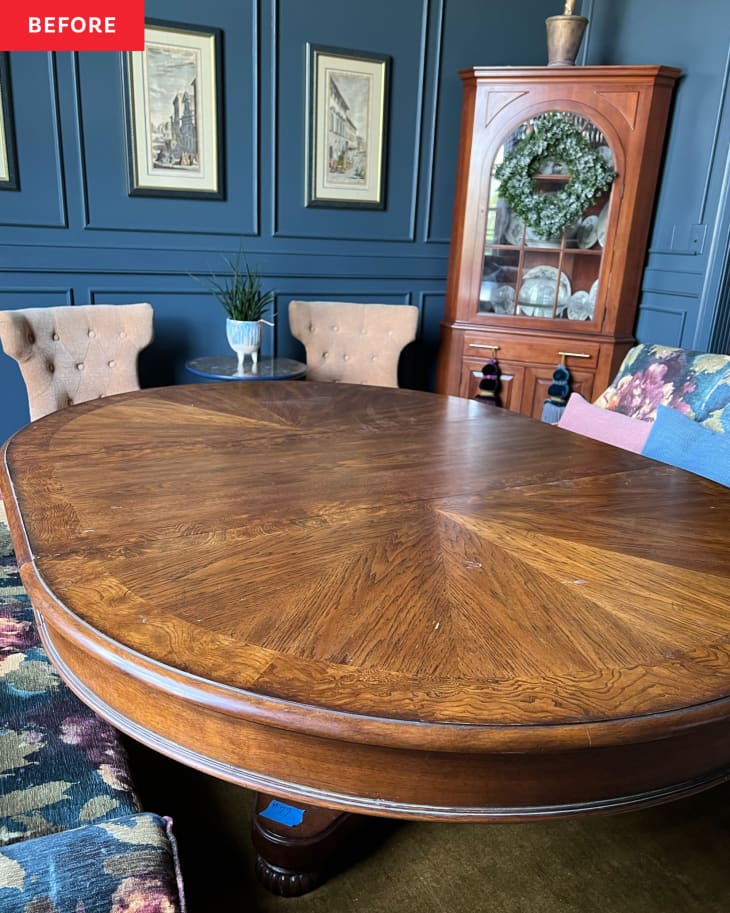
Furniture that’s flipped, hacked, or upcycled often has a one-of-a-kind look, and this dining table redo by Jo Dotson of Chica and Jo is no exception. “I’ve been wanting a new table for the dining room for a while, and this was the perfect opportunity to go a bit ‘extra’ on it,” Jo says. “The biggest cost-saving thing was starting with a table that was secondhand. I always like giving new life to pieces that might otherwise end up in a landfill.”
What was once an oval oak dining table became a one-of-a-kind work of art thanks to a wallpaper mural (which, as it turns out, isn’t just for walls), thick decorative trim, and resin. “I had a vision in my mind of recreating the beautiful frescoes I’d seen on Italian ceilings,” Jo says. “It had to have detail and dimension and look like I had plucked it right from an old ceiling and transformed it into a table.”
For the Renaissance-inspired artwork, Jo used the Apotheosis of Flora mural by Limitless Walls. She prepped the table with degreaser and a dusting cloth, then painted the tabletop with a white chalky finish paint. “This paint sticks to just about anything, making it the perfect product for basecoating the semi-slick surface on the table,” Jo explains on her blog. For the base of the table, she used black chalky finish paint.
Then she stuck the wall mural to the tabletop — it was a great pick because it already came in an oval shape, Jo adds — and she actually used two copies of the mural to get a layered look: “one for the overall base design, and one I could cut shapes from for the layered pieces,” she explains. One of the hardest parts of the redo was smoothing out the bubbles in the layers of wallpaper, Jo recalls. (She affixed it to the table with spray adhesive.)
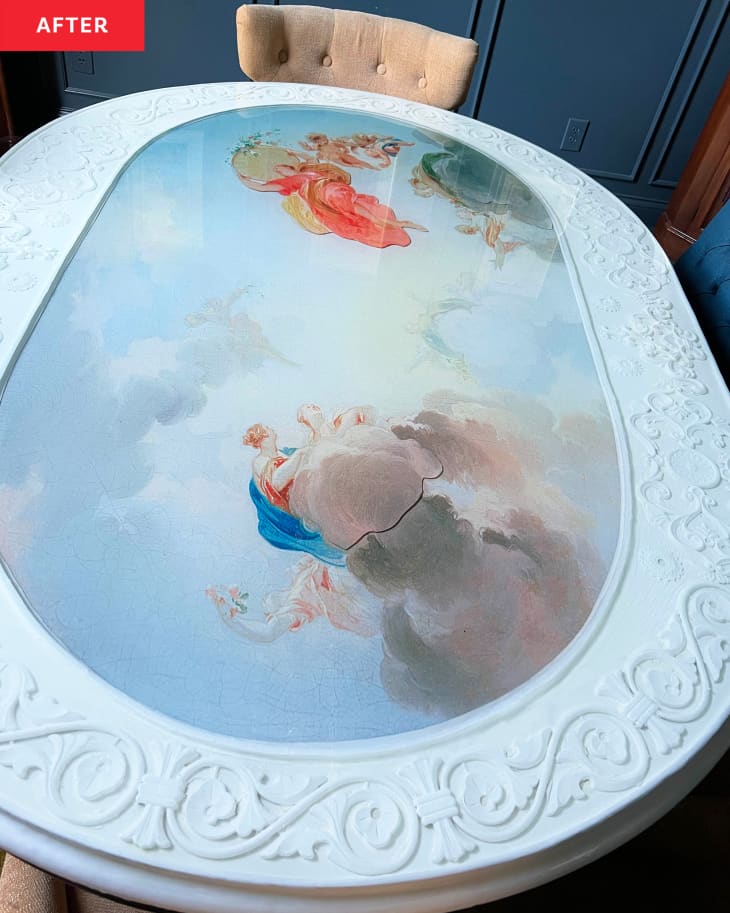
“By working in thin layers and being patient, I was able to get rid of most of the bubbles,” she says. Another nerve-wracking part of the project was pouring the resin over the top of the design once it was stuck on to Jo’s liking.
“This much resin on a single project was harrowing,” Jo says. “I had to let go of perfection since I didn’t have a truly “clean room” in my home to avoid all dust particles that might settle on my table.” But the resin is nice because it makes the table durable, and if it gets scratched over time, Jo can sand it down and re-resin, she says.
To create her museum-worthy frame around the artwork, Jo used a budget-friendly find: flexible weather-sealing strips for a window AC unit. “I couldn’t find anything affordable in the trim section that was flexible enough to work for the big curves I wanted,” Jo writes on her blog. “Stood up on its short side, this foam was plenty flexible enough to handle my wide ovals, and super affordable, too. I used my hot glue gun to tack it along the edge of the table and along the edge of the mural, creating quick and easy trim that will serve two purposes. It will hold the resin in place when I pour it, and it will give the border a luxe, 3D look.”
Jo coated the foam with paintable caulk to make it sturdy enough to hold the resin in place while it cured. “I was surprised by how easy it was to create the look of molding with the window seal,” she says. “I will be using that technique on other projects.”
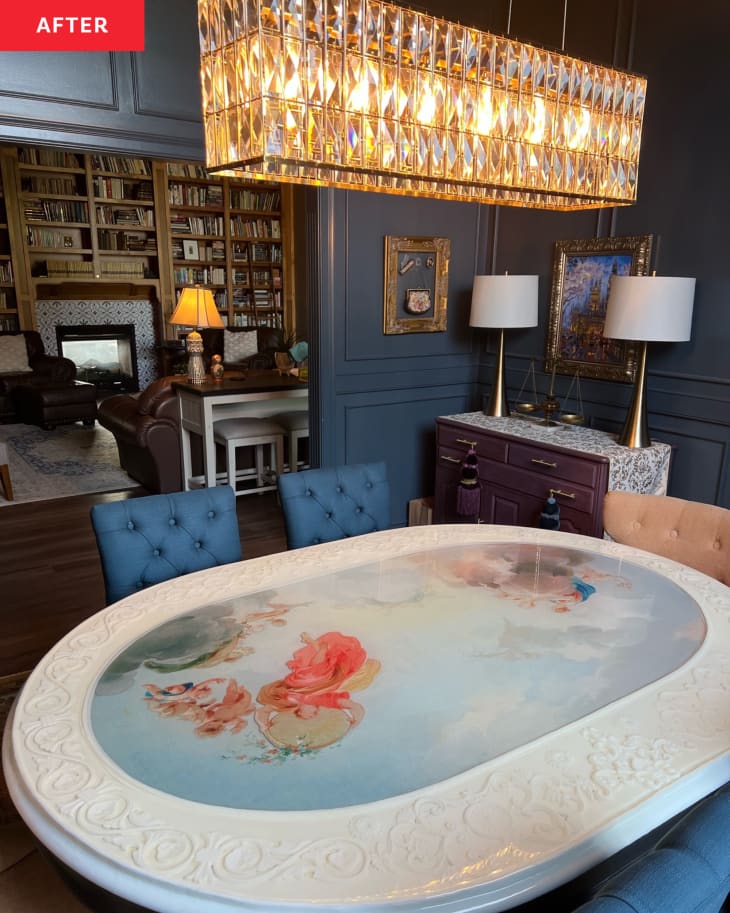
In addition to her caulk-foam barrier, Jo added decoration using plastic molding she found at a flea market. “I went overboard here, stuffing the frame with as much ornate trim as I could, and it definitely paid off,” Jo writes on her blog.
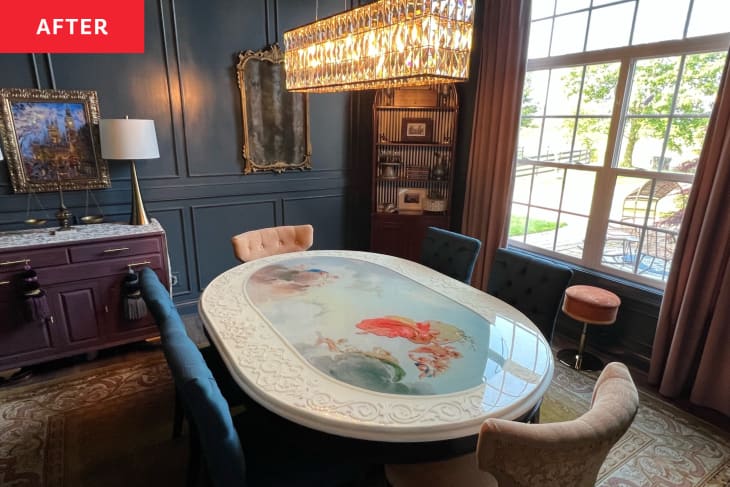
The after, she says, is the ultimate dinner conversation starter. “This table is a wow moment in my home and everyone immediately walks over to touch it,” she says. “With a little ingenuity, some layering with resin, and some creative materials, we made it happen.”
Inspired? Submit your own project here.