
9 Ways to Revamp Your Light Fixtures, No Matter Your Skill Level

In our DIY Makeover Issue, we offer project inspiration, instruction, and helpful tips and hacks for every DIYer, no matter your skill level or budget. We can’t wait to see what you create with your new skill set — find it all here. This content was created independently by our editorial team and generously underwritten by the new Ford Maverick™.
If there’s one design trend you can count on, it’s that style is fluid and constantly evolving. Of course, some decor elements are challenging and expensive to update as your aesthetic changes — but you can zhuzh up light fixtures fairly easily.
Whether you have lamps you’ve purchased that no longer serve your style, hand-me-downs that need modernizing, or thrift store finds that could use a glow-up, there are myriad options available for transforming light fixtures’ appearances. You don’t have to be a DIY expert to try them, either!
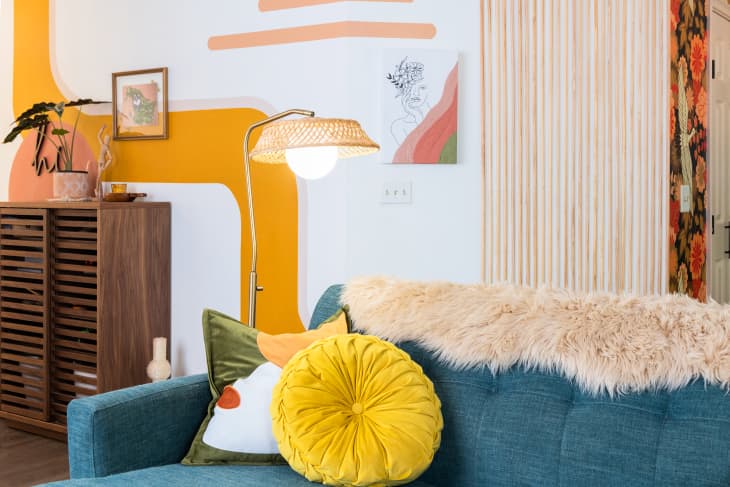
Replace the Lampshade with a Basket for Boho Vibes
What you’ll need: basket, wire cutters, craft wire
Have a lamp with a broken or missing lampshade? Instead of replacing it with a new shade, use a basket instead. They’re easy to come by at thrift stores or find inexpensively online; Meg Baker of @baker.blooms found the one pictured above at a local thrift shop for just $1. Using wire cutters, cut a hole in the bottom center of the basket that’s large enough to feed the lamp socket through and insert the light bulb. To keep the light bulb securely in place, wrap a bit of craft wire around the bulb’s neck, thread the wire through the weave of the basket, and then twist the ends tightly together. The addition of a basket shade will add instant warmth and texture to your space.
Paint It with Plaster to Create a High-End Textural Look
What you’ll need: Plaster of Paris, paint brush
Enter the keywords “plaster lamp” into your search bar, and you’ll see these items tend to retail for a pretty penny. But, pssst: You can easily give your old lamp the high-end look of hand-poured plaster without the expense. All it takes is a $9 box of Plaster of Paris, as seen in this DIY by Jenny Komenda. Simply mix the plaster with enough water to create a pancake batter consistency, and paint a few light coats onto the surface of your lamp. (If your lamp has a high-gloss surface, you may want to prime it first to ensure adhesion.) Smooth out any rough patches on the final coat by brushing a clean wet paint brush over the surface. Let it dry, and your textural transformation will be complete. Prefer to paint your plaster? Check out this DIY from The Accent Piece.
Use Air Dry Clay to Turn a Boring Light Into a Ceramic Superstar
What you’ll need: air-dry clay, spray paint or craft paint
Air-dry clay is essentially Play-Doh for grown-ups, and while squishing it into playful shapes is certainly fun, what’s even better is using it to make outdated lights look like expensive ceramic ones. Whether you’re starting with an old metal, wood, or glass lamp, all you have to do is wrap and press the clay around the lamp’s surface, smooth it out, and then let it air dry for 24 to 48 hours. You could keep the same silhouette, or change it up, like Drew Scott of Lone Fox did in this DIY. Once the clay has fully dried, spray it with your desired paint color, spritz it sparingly with textured paint to create a speckled look, or hand paint your own designs on it. Just make sure you opt for a matte finish so that your “ceramic” lamp looks convincingly artisanal.

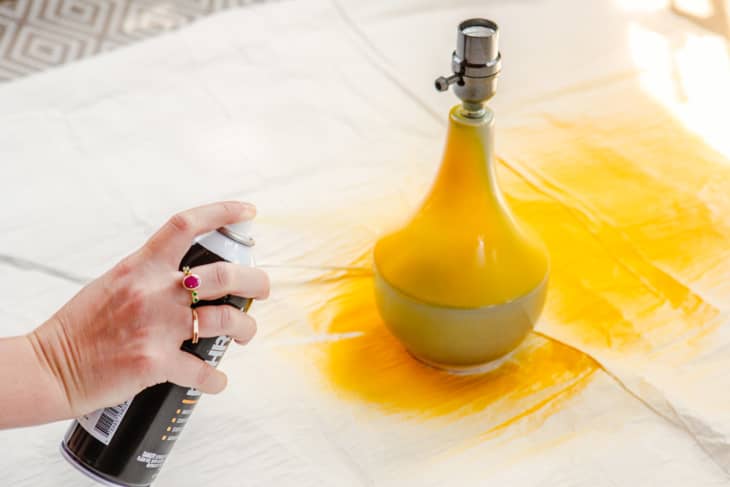
Switch up the Look by Spray-Painting It in a Fun New Hue
What you’ll need: fine-grit sandpaper, spray paint, painter’s tape
If you love the shape of your lamp, but feel a little meh about the color, spray-painting it a different color is an easy fix. Start by taping off the cord and light socket, and then scuff up the surface lightly with a fine-grit sandpaper. Be sure to wipe away any sanding dust before spray-painting it with a paint that has built-in primer. Aim for multiple thin coats, letting it dry 20 minutes between applications to ensure a streak-free finish. That’s literally all there is to changing a formerly drab lamp color to a fun new hue. Need color inspo? Check out this DIY from Monica Wants It.
Create an Aged Metallic Finish for an Antique Look
What you’ll need: Rub ‘n Buff, black spray paint
Nothing adds charm and character to a modern space quite like the worn and weathered surfaces of antiques — or the look of them. You can easily add an aged metallic finish to your lights with a bit of Rub ’n Buff. It comes in a variety of shades, from gold and silver to copper and pewter. The trick to creating an authentic patina? Spray-paint the lamp black first, and then rub the metallic wax on top, like in this DIY via Jenna Sue Design Co. It may sound counterintuitive, but creating a dark base allows it to peek through the gilded finish and results in greater color depth. For about 30 minutes of work, you can transport your light back in time to appear more like a treasured find from a day of antiquing.
Pump up the Color By Painting the Lampshade
What you’ll need: acrylic craft paint, paint brush, painter’s tape
Though painting the base might seem like the obvious choice for a lamp makeover, sometimes painting the lampshade can have just as much of an impact. Want to zhuzh up a basic white shade with a burst of color? Brush on a few coats of acrylic paint, and you’re all set. If you prefer a pattern versus a solid color, you can’t go wrong with stripes. Simply tape off vertical or horizontal portions of the lamp and brush paint onto the exposed areas. Polka dots would add a whimsical touch and are easy to freehand in a random pattern. If abstract art is more your speed, check out Delineate Your Dwelling’s DIY for some colorful pattern inspiration. Whatever you decide, a painted lampshade will definitely brighten up the style on your old lamp.
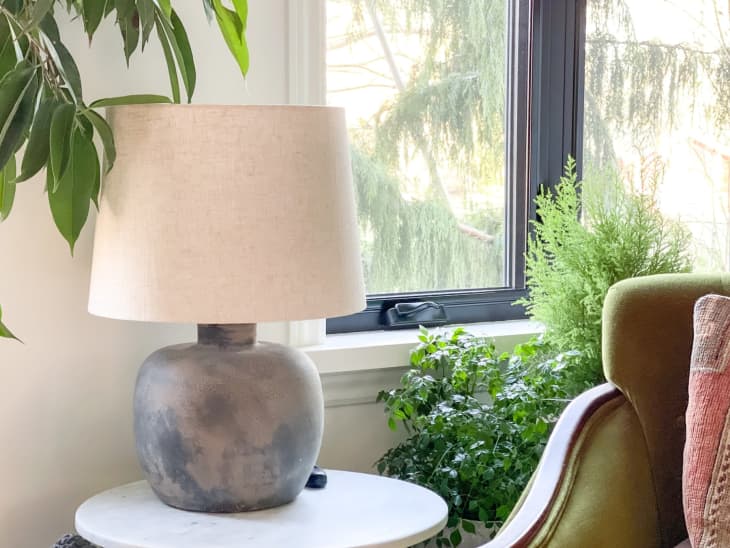
Give It an Aged Stone Look with Paint and Mud (Yes, Actual Mud)
What you’ll need: textured spray paint, black spray paint, mud
If you’ve ever scrolled longer than five minutes on TikTok or Instagram, chances are you’ve seen the “aged pot DIY,” where influencers rub actual mud onto a painted pot to create the look of ancient pottery. It turns out you can use the same technique on a dated lamp, as seen in Meg Gizuk’s DIY. It all starts by creating a textured base — try coating the lamp’s surface in textured stone spray paint, Plaster of Paris, or joint compound. Follow that with spray paint in black or gray to give the appearance of dark stone, or see this DIY by Nadine Stay for a lighter stone look. After the paint dries, slather mud all over the lamp. (Potting soil works, if you don’t have a yard.) Once it dries, use a damp cloth to strategically wipe off some of the dirt, more so in some areas than in others. When paired with a crisp lampshade, the distressed finish strikes just the right balance between elegant and earthy.
Wrap It with Rope for a Rustic Twist
What you’ll need: jute rope, hot glue gun, scissors
Love the beachy or nautical look? Try giving a lamp a maritime makeover. All you have to do is wrap the entire lamp with jute rope. Start by securing the bottom row with a dab of hot glue, and then secure every couple of rows with glue at the front and back as you wrap. This is key to keeping the rope bound tightly around the lamp. To create a fun accent, you could wrap a row of thicker rope at the top and bottom of the lamp like Kerri of Pop of Pretty did in this DIY. Not only is this project a breeze to complete, it infuses a breezy style into your space.
Play with Pattern by Covering Lampshades in Fabric
What you’ll need: fabric, scissors, iron, glue or glue dots, ribbon
Who says lampshades have to be a boring white or basic beige? Dress up a plain lampshade with fabric in a stylish pattern like plaid, florals, or checkerboard. You just need to mark the height of the lampshade on the fabric, and cut a strip long enough to wrap around it. Press the fabric with an iron before attaching it, and also press the raw edges under. Then wrap the fabric around the lampshade, and secure the ends with glue (or use glue dots, as Jennifer Griffin of Dimples and Tangles did in this DIY, to keep the fabric removable). Hot glue ribbon along the top and bottom edges to put a finishing touch on your lampshade’s striking new look. Want to up the project ante? Try pleats, like Marynn Udvarhelyi did here.