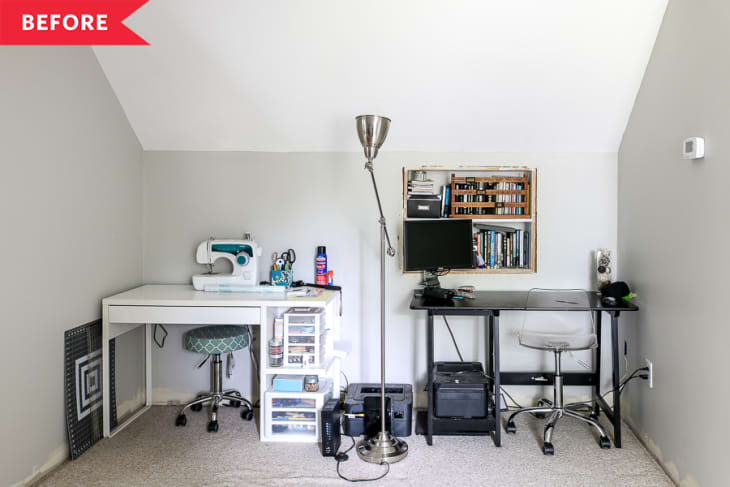
Before and After: This Charming DIY Home Office Goes Fabulously Un-Gray

When it comes to decorating, the most frequent beneficiaries are the usual suspects: bedrooms, kitchens, living rooms… you know, the spaces that everyone wants to be able to spend time in. Sometimes that can end up leaving the less exciting spaces in the dust. At Carmen Smith’s home, the office and crafting area was a small alcove that had more space than charm.
Two side-by-side desks suited Carmen’s needs, but the rest felt lacking. “With plain gray walls, it just did not provoke any creativity whatsoever,” she says.
But there were pieces of the room that held promise, like the cute little built-in cubby that just needed a spruce-up.
Carmen and her husband took on the whole project themselves. They started by installing geometric wallpaper as an accent, then finishing out the cubby with trim and paint. To make it easier for chairs to roll, they DIYed a clever fix, screwing plywood into the floor before topping it with self-stick vinyl tile in a marbled pattern. Three ALEX drawer units from IKEA make the base of the new desk; for the top, Carmen used a birch veneer countertop.
Finishing the cubby with trim and paint made it look brand new. To give a sense of balance to the wall, Carmen framed a piece of glass to match—she uses it as the chicest dry erase board you’ve ever seen.
New gold sconces from Amazon look way more expensive than their $48 price tag.
Spray painting the legs of the new SNILLE swivel chairs gold made them look extra high-end. For art, Carmen used a print made by a friend that she framed with scrap wood and hung with twine. Smart!
The new space is fun and functional—just what Carmen was hoping for. Carmen’s advice to fellow DIYers: “GO FOR IT! It’s one room! You don’t have to invest a ton of money or even tear a room down to the studs to get the space you really want.”
Inspired? Submit your own project here.
