
This $600 DIY Turned a Blank Entryway into a Custom Built-In
Drop spots in homes where you can store shoes, coats, and keys are integral clutter catchalls. But if your home doesn’t have any, sometimes you have to take matters into your own hands. For inspiration, check out these five foolproof formulas for an organized entrance, from nearly non-existent to enviably large.
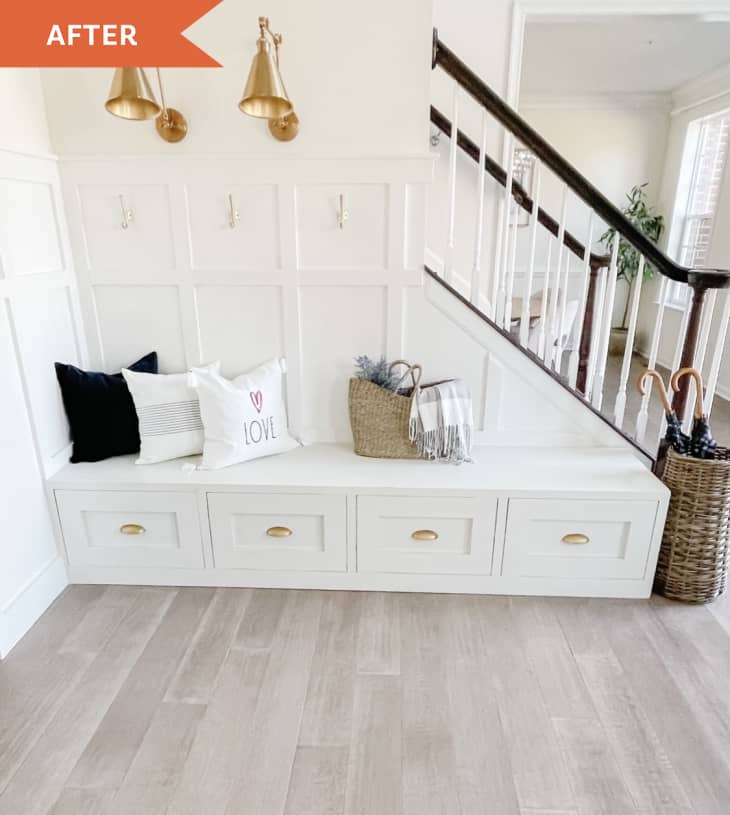
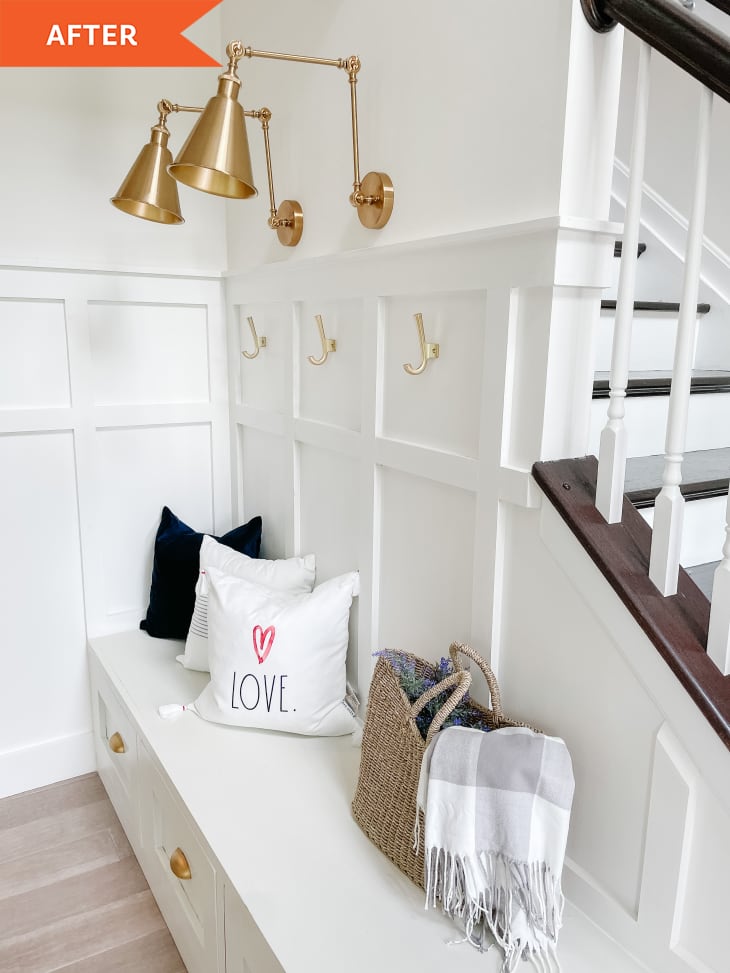
Here’s another clever project to add to your inspo list: In Sandra and John Tsarouxas’ home, they were looking to add a bit more function (and flair) to their blank corner entryway next to the stairs.
“I decided to make a change to the entryway so that it would appear larger and stand out when people enter our home,” Sandra (@ourblissfulhaven) says.

Became a $600 Week-Long Project
To prep, Sandra sketched some board and batten looks for behind the wall. “I wanted to be practical and decided that having a storage bench would allow for shoe storage,” she explains, so John watched several YouTube tutorials for creating bench seating with drawers underneath.
The couple bought 2x4s, 1x2s, and quarter-inch plywood for the drawers and two dolly carts for the storage bench. The board and batten wall required 1x3s, 1x4s, and 1x6s.
“After my husband purchased the materials, he made all the cuts based on the measurements he had made and created the frame of the storage bench,” Sandra says. “He then created the drawers and the inside section that would hold the drawer slides. He put the pieces together and then painted everything.”
John used wood filler to cover the fronts of the drawers and the top of the bench, and then sanded it down to paint it. “This gave it a more finished and polished look,” Sandra says.
Sandra recalls that the biggest challenge was getting the paint to cover the plywood. “A recommendation for someone doing this is to use a paint sprayer if it’s in the budget to make it easier,” Sandra says. “It took longer for my husband to make it smooth, painting it by hand.”
She says the entire project took about a week and cost $600, including the fresh white paint and the new brass accents (hooks for jackets, bin pulls, and adjustable brass wall sconces from designer Jonathan Y.).

The Added Storage Is a Must-Have in Entryways
In the future, Sandra says she might paint the bench and board and batten a bolder color, but for now, she loves the stylish-but-neutral backdrop she’s created. “We love passing by the entryway every day and styling it for every season,” Sandra says.
Not to mention, she loves the added storage it provides. Sandra uses two of the drawers to store seasonal decor and two to hide shoes. “The drawers are sturdy and extremely deep, allowing for a lot of storage,” she explains.
It’s a clever use of space that can be easily replicated, whether with a permanent install like this, or a renter-friendly version with an IKEA bench and command hooks. “Our guests always love it and want to know how it was done so they can do it in their homes,” Sandra says.
The answer, she notes, is sketching, planning, measuring, watching YouTube tutorials, and practicing patience. “My husband and I are proud that we worked as a team,” she says. Way to go, Sandra and John!
Inspired? Submit your own project here.