

A “Dark and Dingy” Renter’s Kitchen Got a Minimal, Boho Redo for only $180
With an electric saw and a bit of know-how, it’s possible to convert basic builder-grade cabinets into arched beauties, just as Lisa Ksprzok (@knots.and.pots.home) did in her small townhouse kitchen.
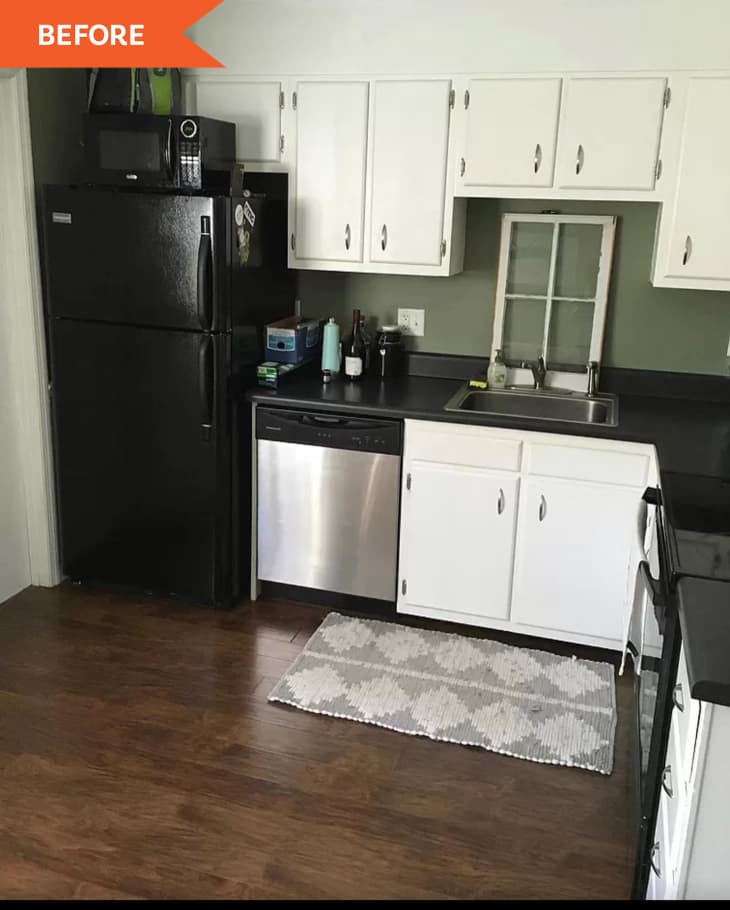
When she first moved into her home, Lisa’s 1970s rental kitchen was “dark, dirty, and dingy,” she says. “It did not spark joy nor make me want to spend time cooking.”
Even Though It Didn’t Spark Joy, She Was Determined to Make It Work
But she was still optimistic about what she could do with these surroundings. “Even though we rent, I knew I could make some simple changes that would have a big impact on the overall brightness of the kitchen,” Lisa says. “I wanted it to really reflect my neutral and boho style.”
Renter-Friendly Countertops and Backsplash Were an Easy Swap
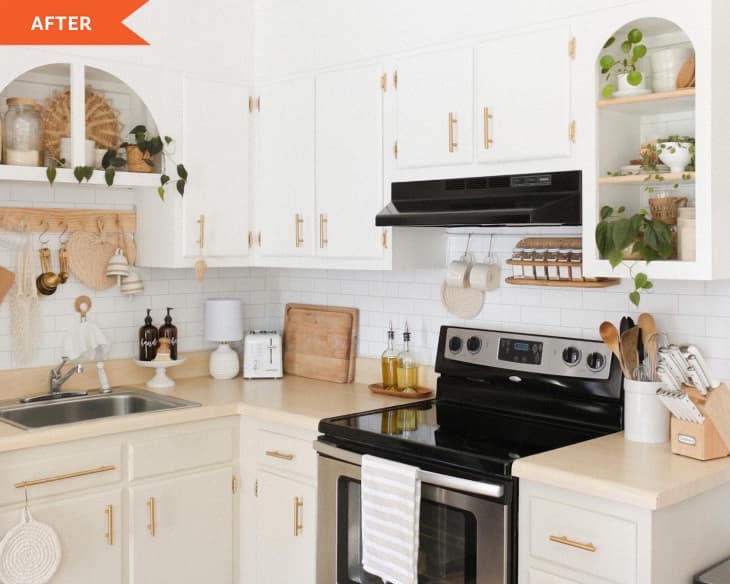
Her first and most straightforward redos were peel-and-stick counter and backsplash coverings. She used two rolls of a $26 option that mimics maple for the counters and two rolls of a $30 subway tile lookalike for the backsplash. “That was a weekend project,” Lisa says. “Take your time when applying peel-and-stick paper, and clean your surfaces really well before you apply it to ensure that it will last a long time,” she adds.
Another quick and renter-friendly change Lisa made was swapping out the small silver handles with gold hardware from Amazon, priced at $17 for 10 pulls. She kept her old pulls so she can reverse the decision whenever she moves out.
Landlord-Approved Neutral Paint and a Simple Personality DIY
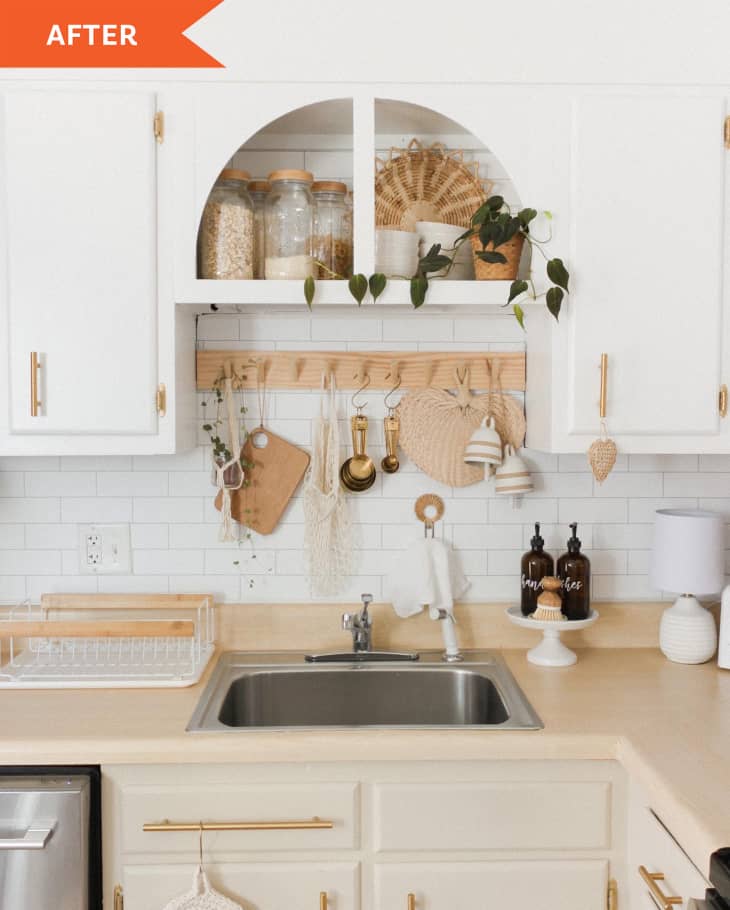
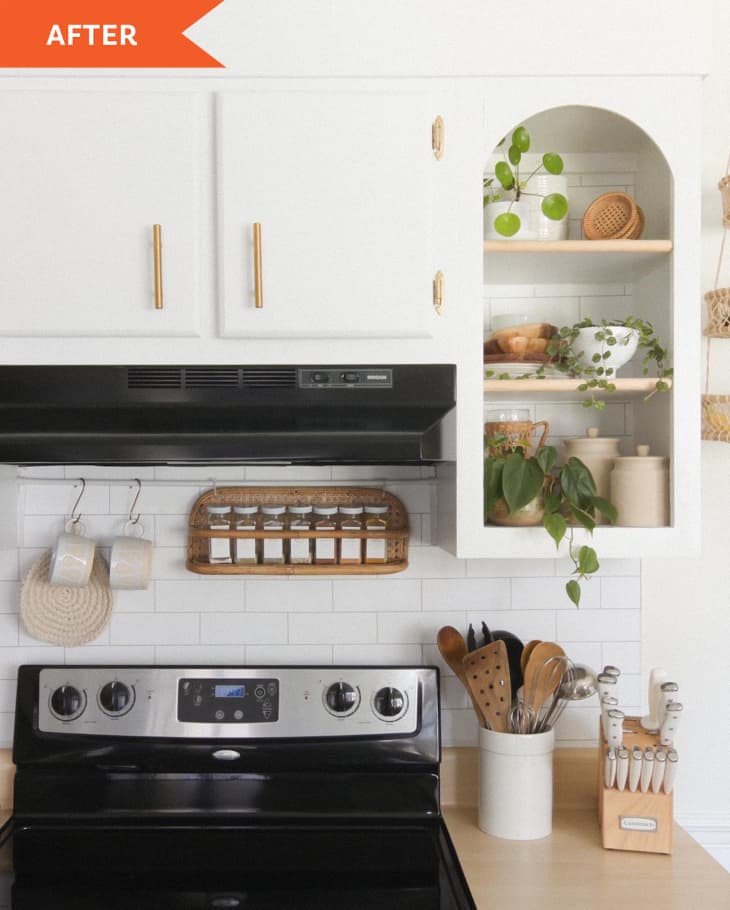
Thanks to the pulls and the landlord-approved shades of neutral tones — Valspar’s “Perfect White” on the uppers and Sherwin-Williams’ “Nantucket Dune” for the lowers — her cabinets look new again. But it’s the detail of arched open cabinetry that really makes everything look unrecognizable from before.
“One of my favorite features of the ‘after’ is the arch cutouts that I added to the open cabinets,” Lisa says. “I used 1/4-inch plywood and secured it with a couple of small nails, so I would be able to easily remove them and reattach the cabinet doors when moving out.”

Only $180 to DIY This Renter’s Kitchen
Another great DIY in the space is the peg rail above the sink. Lisa used a 1×4 board from the hardware store and a dowel to make the angled pegs, and she says she loves accessorizing this little spot.
“I managed to add a ton of personality,” Lisa says. She did it all for about $180 — and made every last decision renter-friendly, too.
“I am most proud of how bright and inviting the kitchen is now compared to how it looked before,” she says.
Inspired? Submit your own project here.


