
Before and After: A Luxe-Looking DIY Tile Project Revives This “Sad Brown” Faux Brick Fireplace
Depending on where you live, it might not quite feel like fireplace weather yet, but December is here! ‘Tis the season to cozy up near the fireplace with hot cocoa, and ’tis the season to adorn your mantel with cute wintery things.
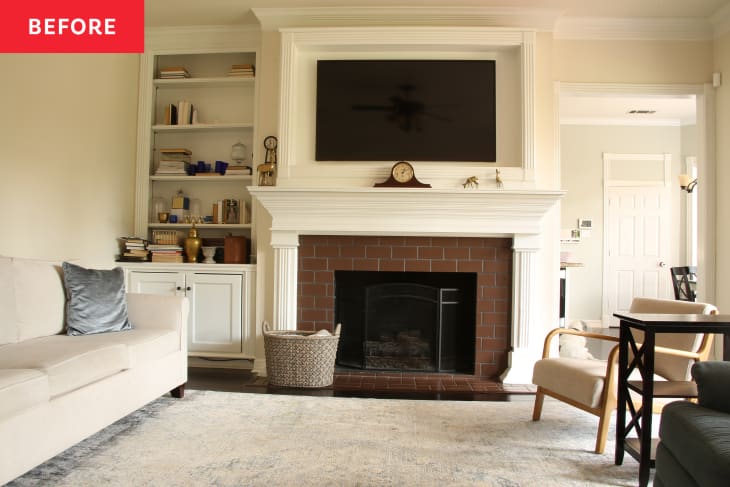
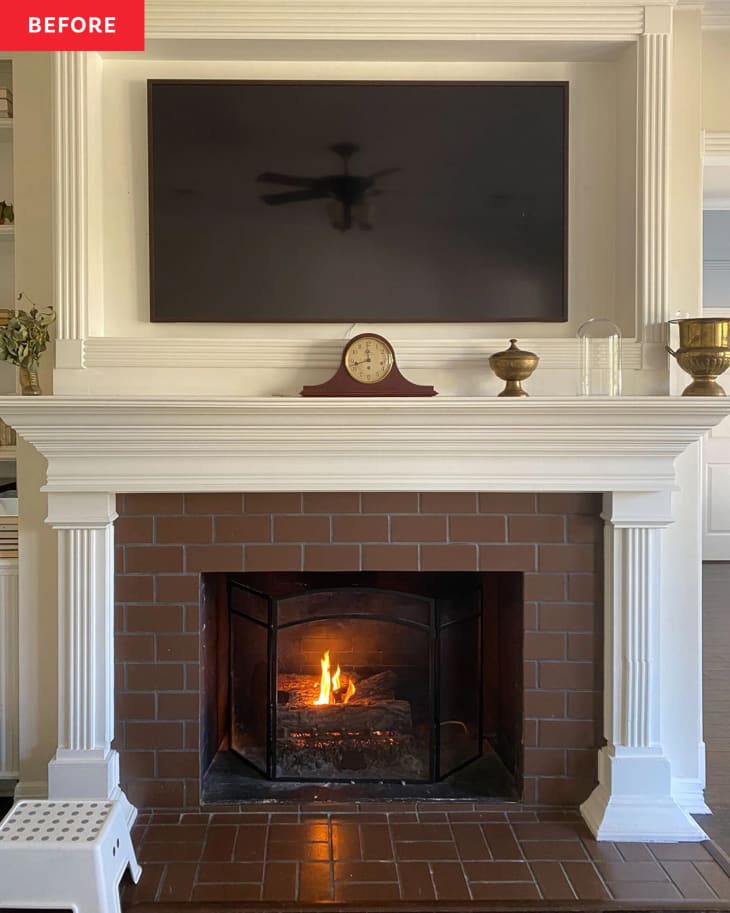
Looking for some glam, timeless fireplace inspo? Look no further than Jennifer Harrup’s (@jenniferlauraliving) fireplace. It’s now totally chic, but before she retiled it, the brown rectangles were just a bit lackluster, in her opinion.
“The before was this sad brown brick looking tile,” she explains. “It was so dark and unfortunate-looking. I loved everything about the fireplace, the molding, the mantel — all of it was beautiful! But the tile really made the entire thing look so dated and drab.”
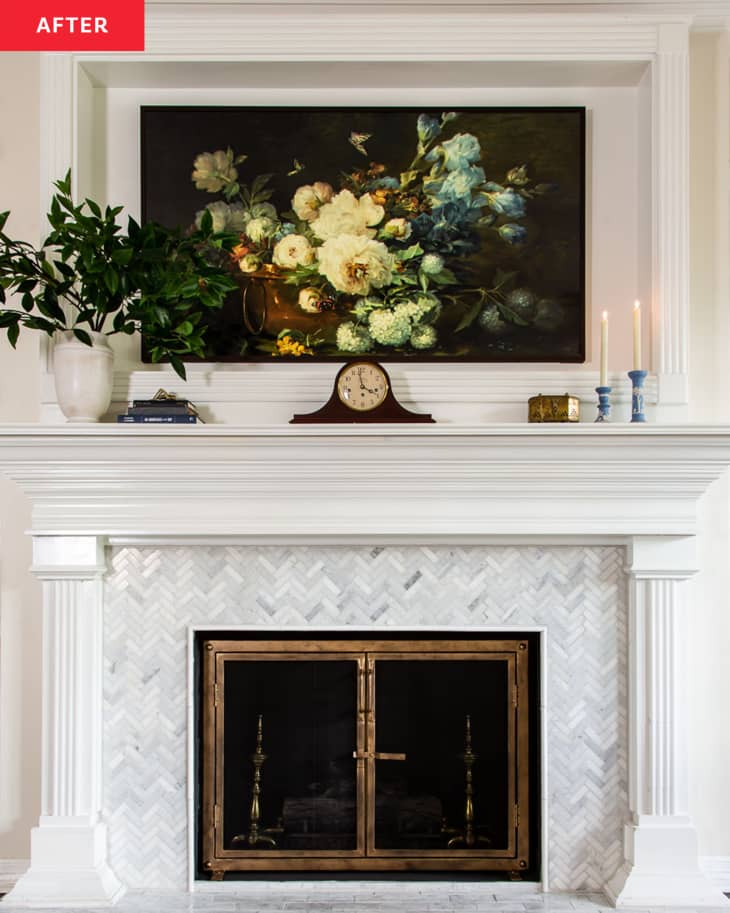
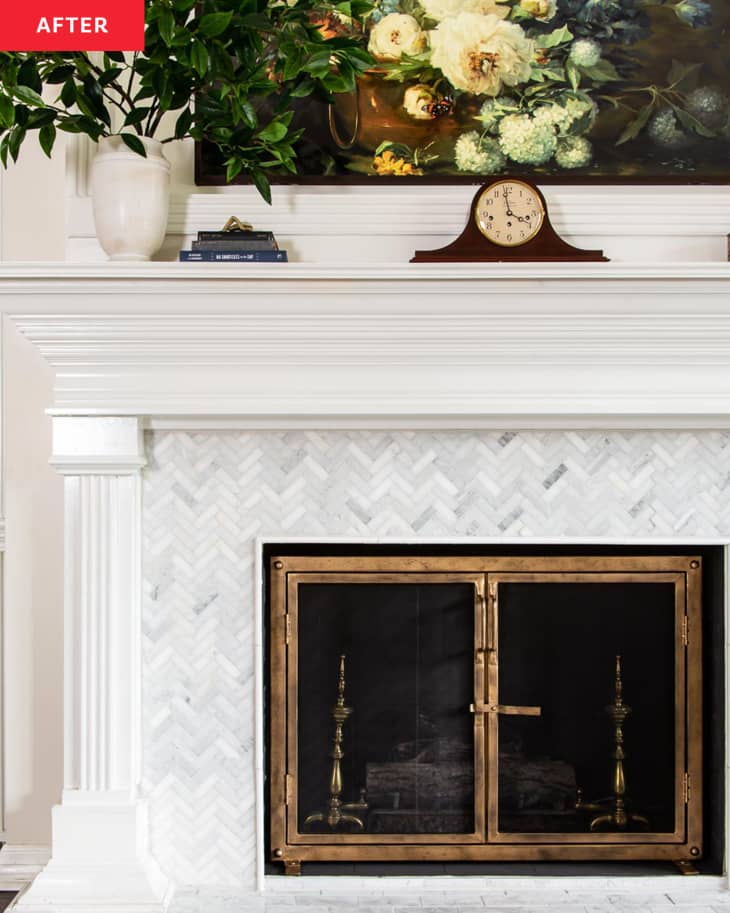
Because she loved the framework of the fireplace so much, Jennifer decided to redo just the tile in a $1,254 redo. She spent $740 on new tiles (a marble-y chevron mosaic for the surround and a polished marble subway tile for the hearth), $25 on backer board, $28 on a self-leveling compound and primer, and $250 on miscellaneous supplies, like trowels, mortar, caulk, and more.
“Some of the best advice I got for this project was from a tile installer who helped us buy our supplies,” Jennifer says. “He had a wealth of knowledge and was incredibly helpful!” Her two biggest tiling takeaways: Plan your tile layout before starting, and do your research.
There are some other great tips to steal from Jennifer’s DIY process, too. She used the old backer board that couldn’t be salvaged (but was still the right shape!) as a template to cut her new backer board pieces, she rented the big saw instead of purchasing it (which saved her not only space in her tool shed, but money, accounting for only $211 of the project), she used edging around the fireplace to make the tile look more complete, and she gave the surface-leveling compound plenty of time to try before installing the tile. In Jennifer’s case though, it was way too much time.
“I started this project back in February and thought it would take me about a week, but I ended up getting so overwhelmed with the project and worrying I would mess it up that I demoed out the old tile, prepped it for new tile, and then let it sit like that for over six months,” she says. But eventually, Jennifer returned to her half-complete project and made her vision a reality.
“I’m proud that I tackled this project when it was really scaring me,” she adds. Save for the six-month intermission, the project only took her about eight total days of work — two or three for demo and then five for tile installation.
The long wait and risk of imperfection were worth it. “Even though I can see the errors and inexperience of this being my first big tile job (if I look closely), I wouldn’t do anything differently,” Jennifer says. “I love it so much!”
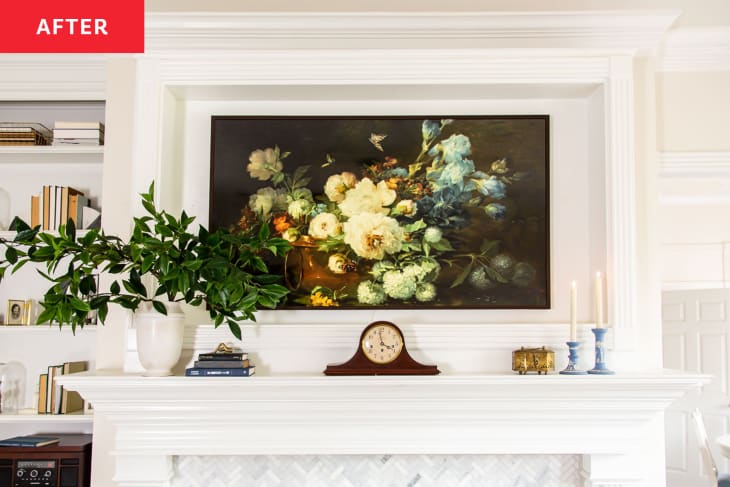
In particular, Jennifer says she loves “how fresh and clean the fireplace feels now.” And with finishing touches like her Samsung Frame TV (subbing in here for art with a traditional style floral still life screen saver), Wedgwood candlesticks, and Target-vase– plus-faux-greenery combo added, the whole room feels refreshed yet still classic. Jennifer’s got a timeless tiled beauty on her hands.
Inspired? Submit your own project here.