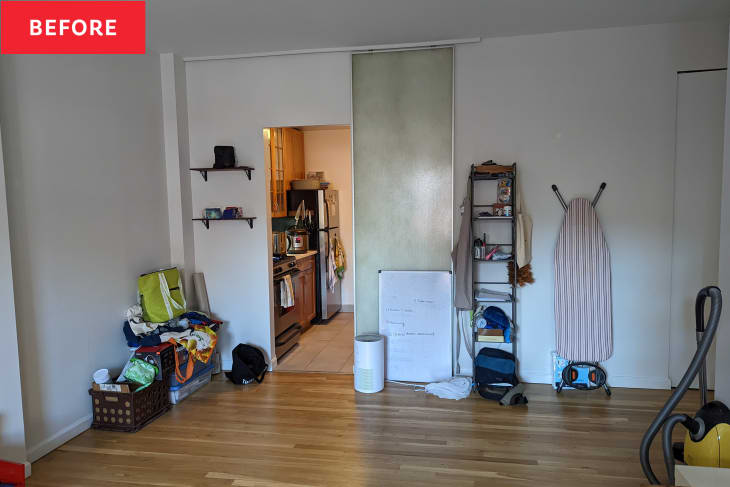
Before and After: A $200 Paint Project Brings Instant Cheer to a Bland White Dining Area

Looking for an instant decor mood booster? Try adding pops of vibrant color to your home, like citrusy orange or sunshine-y yellow. If you want an eye-catching project to inspire you, check out this accent wall project from DIYer Ji Hea Kim (@feedthehouse).
The wall Ji Hea transformed was in her dining room, just off the galley kitchen in her apartment. “The plain white wall was nice in terms of reflecting light, but it was often shadowed because it was far from the windows and felt drab, especially since it’s the first thing you see upon entering the apartment,” Ji Hea says of the wall before. She and her husband, Thomas, live in a smallish pre-war NYC apartment, so they were hoping to add as much brightness as possible. Ji Hea also wanted to use the project to help break the space into distinct areas.
“I wanted the area to feel sunny and visually separate from the hallway, kitchen, and seating area,” Ji Hea says. She also wanted to “create more of a zone and brighten the feel — almost like internal sunshine when you come home.”
And Ji Hea’s paint picks — Behr’s English Daisy and Soft Boiled — are pure sunshine. Armed with her bold yellows, a gray, and a white (Behr’s Statement White), plus a hexagon stencil and painter’s tape, Ji Hea created a charming and eye-catching honeycomb pattern on the wall.
The longest step was prep, which included taping up the stencils. Ji Hea’s best tip for getting crisp lines on stencils like this: Lay down a base coat of the wall’s primary color (in this case, white) before painting on your accent color. The first coat will help the colorful paint from bleeding through the edges.
“Prep will take 80 percent of the time,” Ji Hea says. “The actual painting (cutting the edge, rolling the wall, etc.) was actually really easy.”
For that step, Ji Hea primarily worked with her lightest yellow color (English Daisy) but also added in a few randomly placed hexagons of darker yellow (Soft Boiled) and a light gray color. “I feel like it adds a good bit of balance and keeps the wall from feeling overwhelming and too one-note,” she says.
All that prep time Ji Hea invested was well worth it. Her $200 paint project — plus the addition of a tea cabinet Thomas made and a dresser they picked up from a stoop one evening — makes the corner feel much more complete, not to mention much more cheerful.
“It’s my first time painting and I’m quite pleased with the result,” Ji Hea says. Her DIY advice? “Get doing! You don’t need a perfect plan. The beauty of painting projects is that it’s simple enough to sand and paint over if you don’t like the result.”
Inspired? Submit your own project here.
