Yes You Can Change Your Own Bathroom Fixtures, and This Is How

A little while ago, Rebecca came to us for help with a bathroom facelift. We told her one of the quickest and most affordable ways to bring in some major drama is to upgrade her fixtures. She didn’t want to hire a handyman, she told us, and we didn’t want her to. We told her that fixture changes are totally DIY projects, and she should totally DIY it. So we sent her some beautiful new Moen fixtures from The Home Depot. You may have seen her transformation here.
Now that Rebecca’s a believer, we want you to be too. Below are the steps Rebecca used to install her fixtures. We’re pretty confident you’ll see how easy they are and get inspired to start your own facelift.
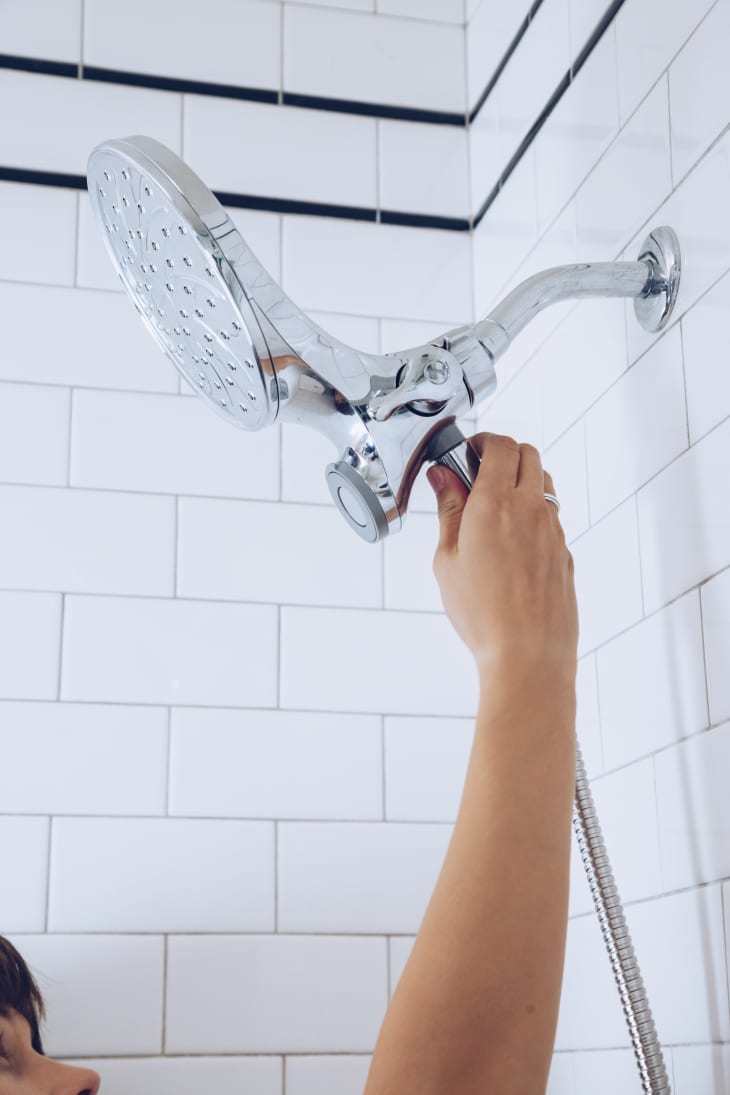
Shower Head
For her shower, Rebecca installed Moen’s Attract Magnetix Chrome Rainshower Combo . It has the best of both worlds, with a luxe 6.75″ rainshower spray face and a hand shower with six settings. Moen’s unique innovation shows up in the handheld’s magnetic docking which always faces forward to prevent surprise splashes when you turn it on.
Installing it so much easier than you think, and totally something you can do on your own.
- Remove the old head using a wrench if necessary. Strip the arm of any old putty or tape.
- On the new head, loosen the nut so the head can rotate and then thread the head onto the arm. Finish tightening it with a wrench, but cover the head with an old cloth to protect it. Hand tighten the nut on the head to secure the fixed head to the arm.
- To attach the handheld, attach a washer and one end of the hose to the fixed head. Attach the other end of the hose and a washer to the handheld head. The magnetic system will then hold it in place.
- Shower! The head has a knob that controls the type of shower: handheld, fixed, or both.
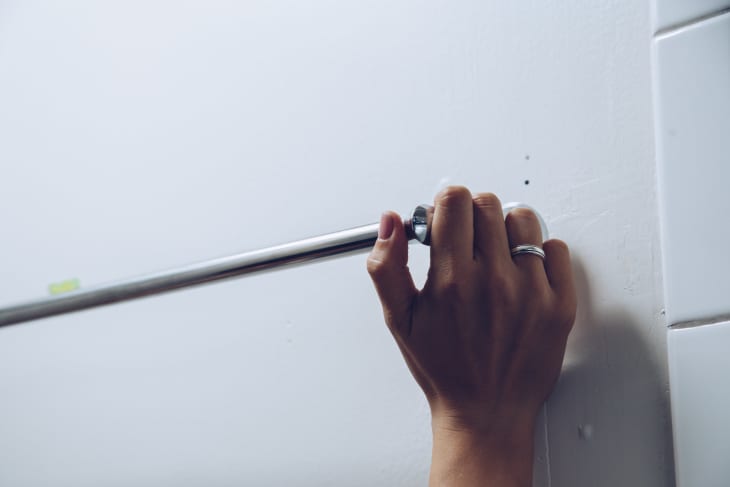
Accessories
Rebecca installed a Hensley Towel Bar (24″) and Towel Ring, both in Chrome. The installation for all these accessories is very similar, so we’ll go with the towel bar for our example. The big thing to get right is to hang it level. Moen’s super innovative Press & Mark technology uses washable ink to make installation super easy. Of course, follow the individual product’s instructions, but this is the general formula:
- The posts comes with markers attached to the back. Remove the caps —and don’t lose them!
- Affix the level that comes with the piece and position the bar where you want it.
- Lightly press each post into the wall to mark your drill holes.
- Drill your holes with the bit size indicated in the instructions.
- Screw in the brackets.
- Slide the bar on and tighten the set screws.
- Shun gravity, for it has failed to pull your towel off its level towel rack.
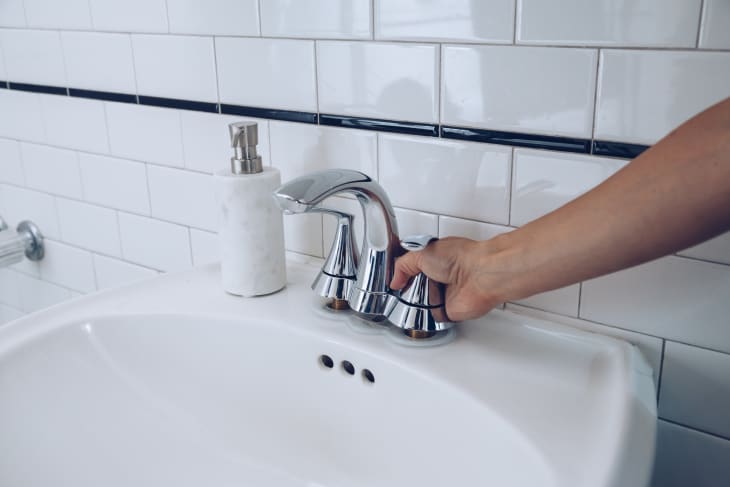
Sink Faucet
Finishing the facelift, Rebecca knew it was time to replace her rusty sink faucet after a friend told her it took 20 minutes to get the thing on. We didn’t confirm if that was an actual time, but we did take the point that her upgrade to a Darcy Centerset 2-Handle Faucet in Chrome was overdue. Installing it is a little more complicated than the shower head, so definitely read the instructions.
This post is sponsored by The Home Depot and was created by Apartment Therapy’s Creative Studio.
Thank you for supporting the brands that make Apartment Therapy possible.