
Before and After: A $150 Refresh Makes this 70-Year-Old Patio Look Brand New
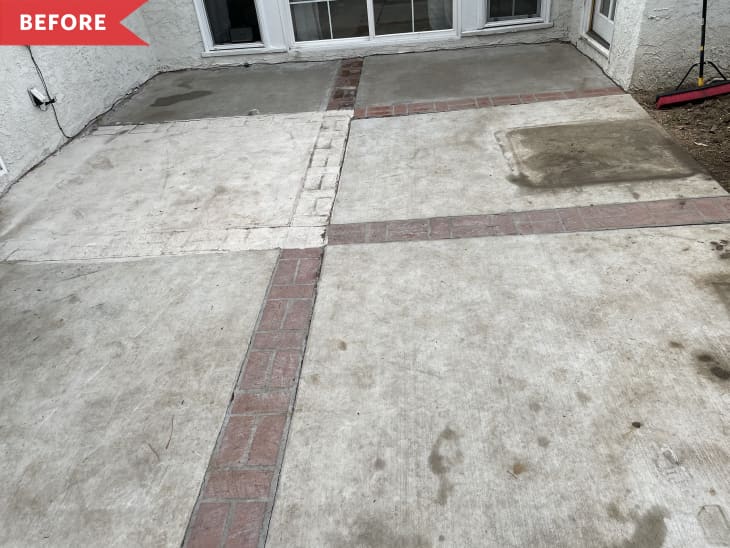
Here’s the thing about outdoor furniture that no one tells you: No matter how nice it is, or how much you spend on it, that gorgeous furniture can’t save an ugly or run-down patio. Case in point: This outdoor space from the home of Deema Lopez (Pretty on Fridays). “Our house was built in 1950 and I don’t think anyone had done anything to the patio since then,” Deema says, calling the stained and cracked patio a “filthy disaster.”
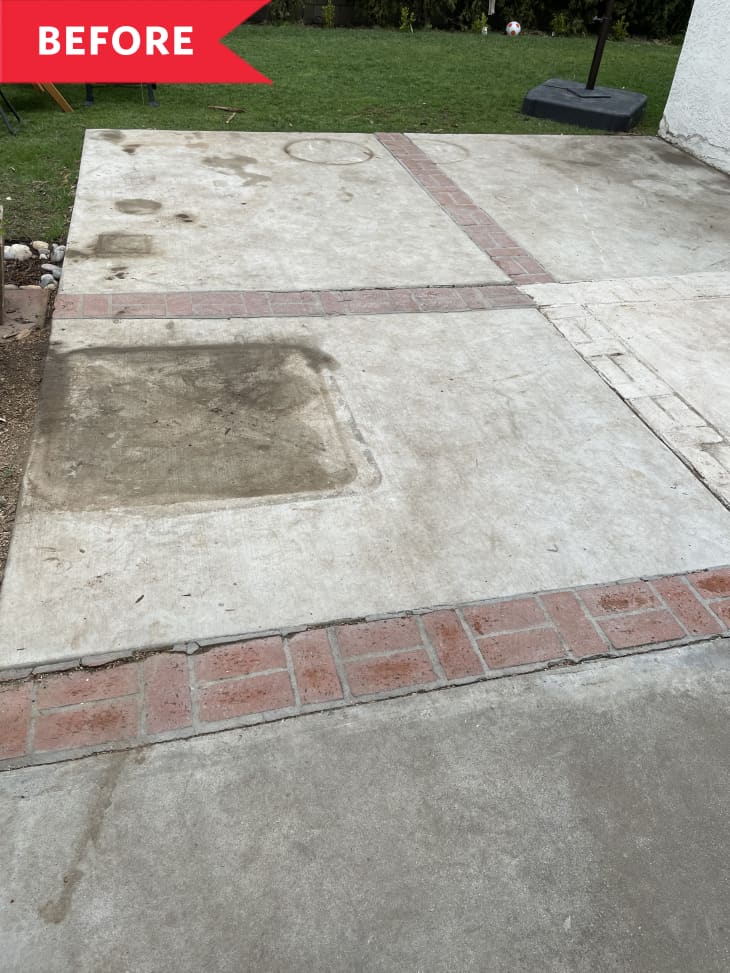
“No matter what furniture we put out there, it always looked terrible,” Deema says. “It looked dirty and grungy. I just couldn’t stand it anymore.”
Thinking they’d replace it altogether, Deema started to do some research on costs. “We got a quote to put in tiles and long story short, our bank account laughed,” Deema says. She decided that she’d do the next best thing: fake it with a DIY painting hack.
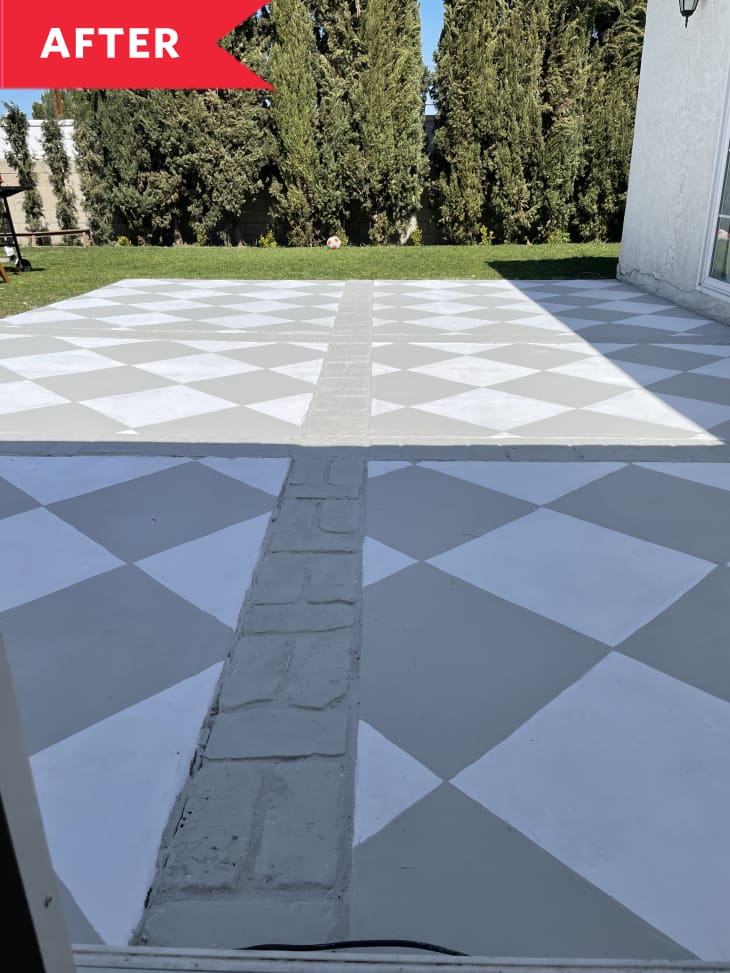
Deema started by treating the patio to a much-needed power wash session. Then, she filled in the cracks to give herself a clean canvas to work with for her painting. For longer lasting results, she started by priming; once that was dry, Deema painted all the concrete with a porch and floor paint in a bright white color (Behr’s Ultra Pure White).
To create her checkerboard pattern, Deema traced an 18-inch-square tile with a pencil, repeating until her whole patio was full. It was an idea her friend gave her after she messed up in taping the squares out and got frustrated with that method; Deema found this way to be much easier.
Using a foam brush and a paint roller, Deema painted every other square a light gray. Finally, once the paint was dry, she sealed the whole patio to help increase its durability. All told, the materials and tools for this patio redo cost just $150.
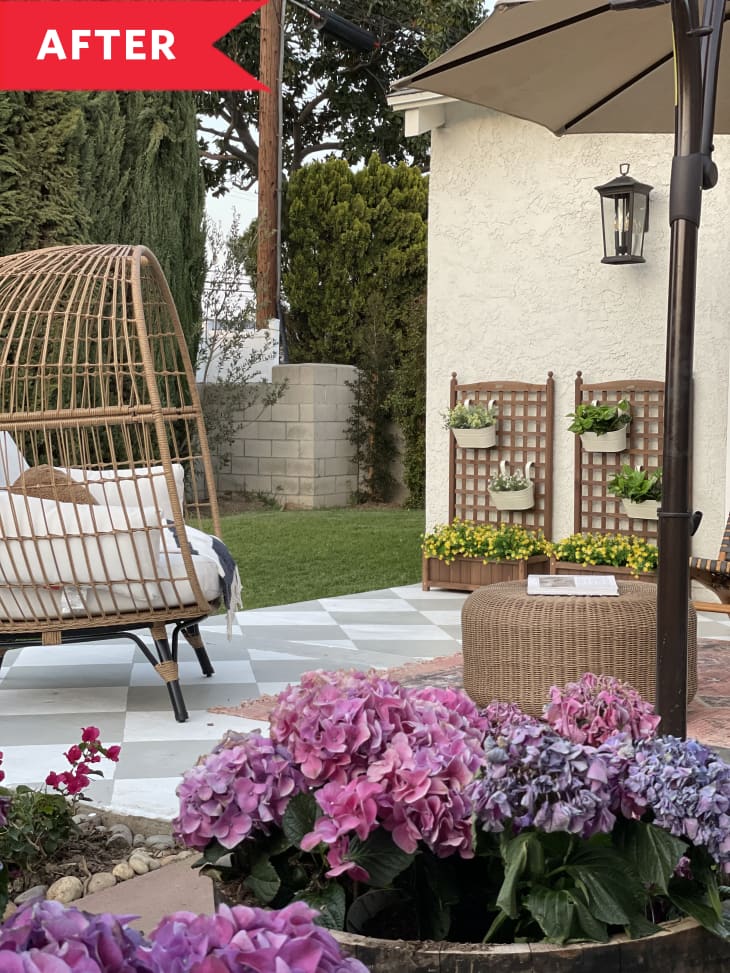
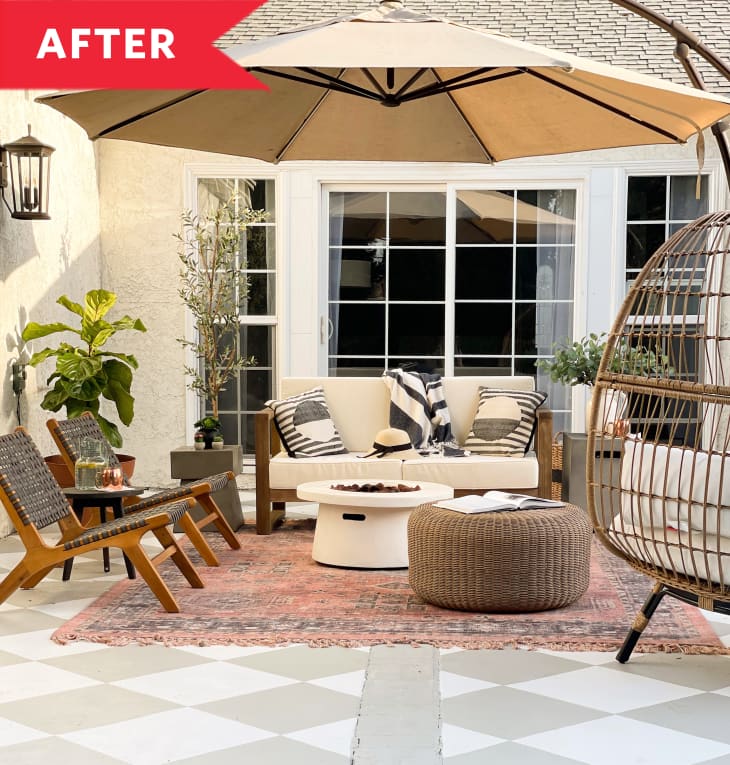
“When I say the tile transformed our backyard, I mean, it really transformed the backyard,” Deema says. “It made the grass prettier, the furniture nicer, it even made the bugs more pleasant. Ok, that last part is a lie!”
Inspired? Submit your own project here.