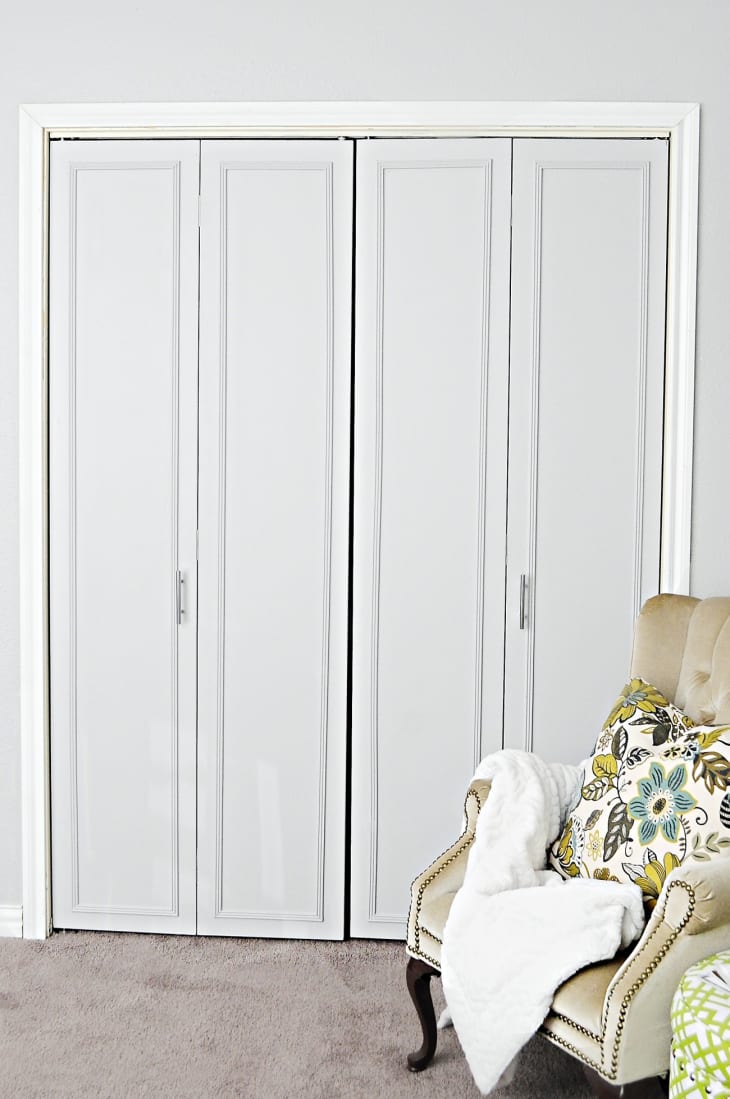
A DIY Update to 70s Style Bi-Fold Doors
We independently select these products—if you buy from one of our links, we may earn a commission. All prices were accurate at the time of publishing.

(Image credit: Submitted by Monica)
I think nearly anyone who buys a 1970s ranch home will likely end up with those dark wood, hollow core bi-fold doors. We ended up with them in two of our three bedrooms. Replacing them with more modern, up-to-date bi-fold doors can run over $150 per pair, so why not put in some elbow grease to bring those doors to life and save yourself about $100?
Skill Level: Moderate
Time Required: 4-6 Hours
Project Cost: $40-60
(Image credit: Submitted by Monica)
What You Need
Materials
- Set of bi-fold closet doors
- Medium & fine grit sanding blocks
- Tack cloth
- Painter’s tape
- Zinsser primer
- Paint in color of your choice
- Moldings
- Liquid nails for small projects
- Caulk
- Door knobs/hardware
- Non-Mortise hinges
- Cabinet hardware installation template (optional)
Tools
- Screwdriver
- Paint brush
- Foam rollers and paint roller
- Paint tray and liner
- Tape measure
- Pencil
(Image credit: Submitted by Monica)
(Image credit: Submitted by Monica)
(Image credit: Submitted by Monica)
(Image credit: Submitted by Monica)
Instructions
- Take off the hinges and hardware from your bi-fold doors to prep for sanding
- Using your medium grit sanding block, sand all of your doors, including the sides. Use a tack cloth to remove all dust to prep for priming.
- Apply primer to all your doors using a roller. Allow the primer to dry a few hours before moving on.
- Up next, make your cuts for your moldings. I measured my doors and subtracted 2-inches from each side to leave a border around my doors. This part is totally up to you. Just make sure your moldings won’t cover up the hole where the knob would go. Adhere the moldings using a nail gun or liquid nails.
- Caulk will give your DIY project a flawless, professional finish, so make sure to caulk all the sides and mitered corners.
- Paint your doors! Use a small roller for the larger areas of your closet doors, and a small angled brush for your moldings. Sand in between coats with a fine grit sanding block for a smooth finish.
- Attach your new hinges, knob/pull, and reinstall your bi-fold doors. It’s easiest to get the top part into/onto the track, and then make adjustments to the little screw on the bottom for height.
Enjoy your new bi-fold doors knowing they’re custom made just for your home! You can see more of this project on Monica’s blog Monica Wants It.
Have a really great DIY project or tutorial that you want to share with others? Let us know! We love checking out what you’re making these days, and learning from our readers. When you’re ready, click here to submit your project and photos.
