
My 10 Minute, $10 Bathroom Tweak
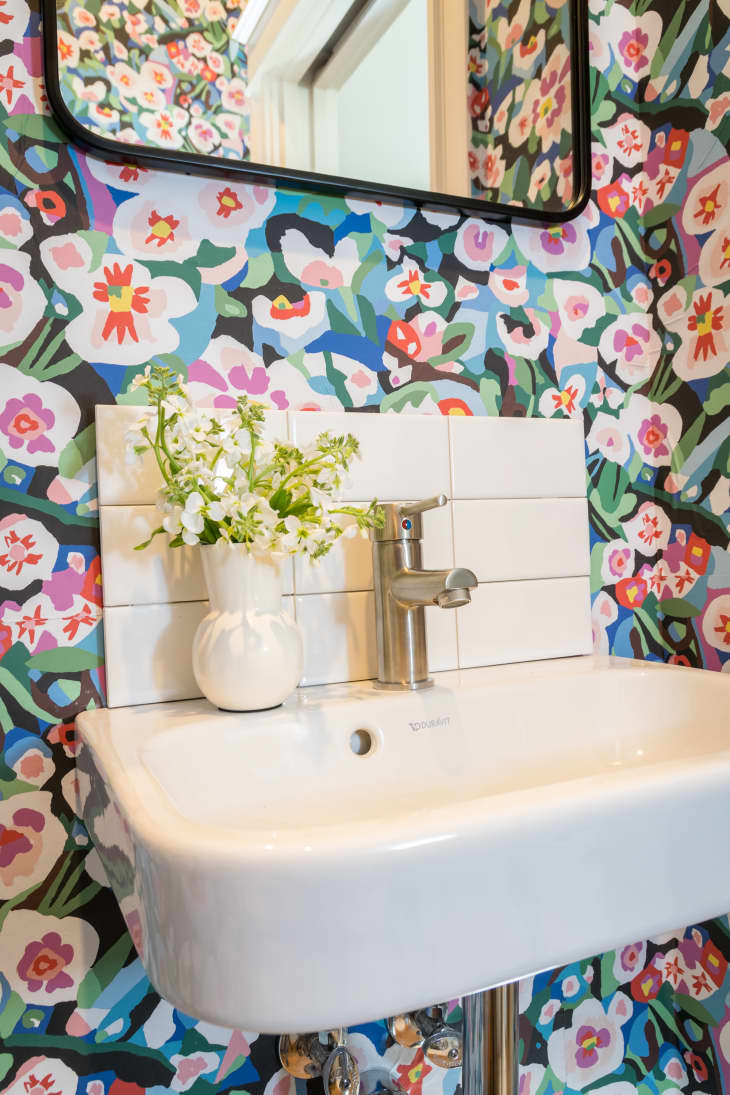
You might have already seen my recent bathroom makeover, which I did in the span of a frenzied weekend and shared earlier this week. After all was said and done, I was very happy with how it all turned out. Then, I made one last-minute addition, which was about ten minutes worth of work, and cost less than $10. It made a small, but significant difference nonetheless. And here’s the good news. You can do it too, even if you’re a renter.
Can you see the difference? It’s a little thing, but it’s mighty. I’ve written about micro backsplashes before, and I remain a fan. They are an inexpensive and extremely easy way to add a splash of style, and stop water splashing on your walls. I used basic subway tiles here, because I think we can all agree there was enough visually happening in the room already, but you can use something graphic and bold to instantaneously make a big statement in a small little space.
Of course, if you’ve got a sink backsplash already, just ignore this whole post. But if you don’t, and want one, then read on for this simple project. Full disclosure: I got this idea from Alex Kalita, a very clever renter who regularly does smart things in her apartments. She was the first to do a temporary, removable backsplash and I’ve been smitten with the idea since.
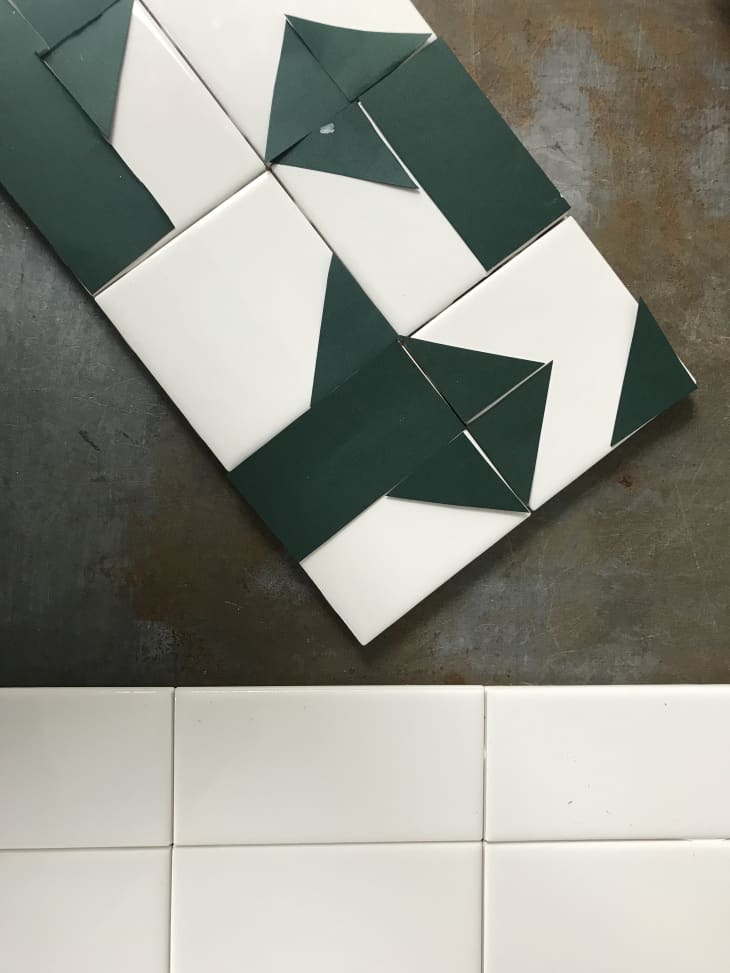
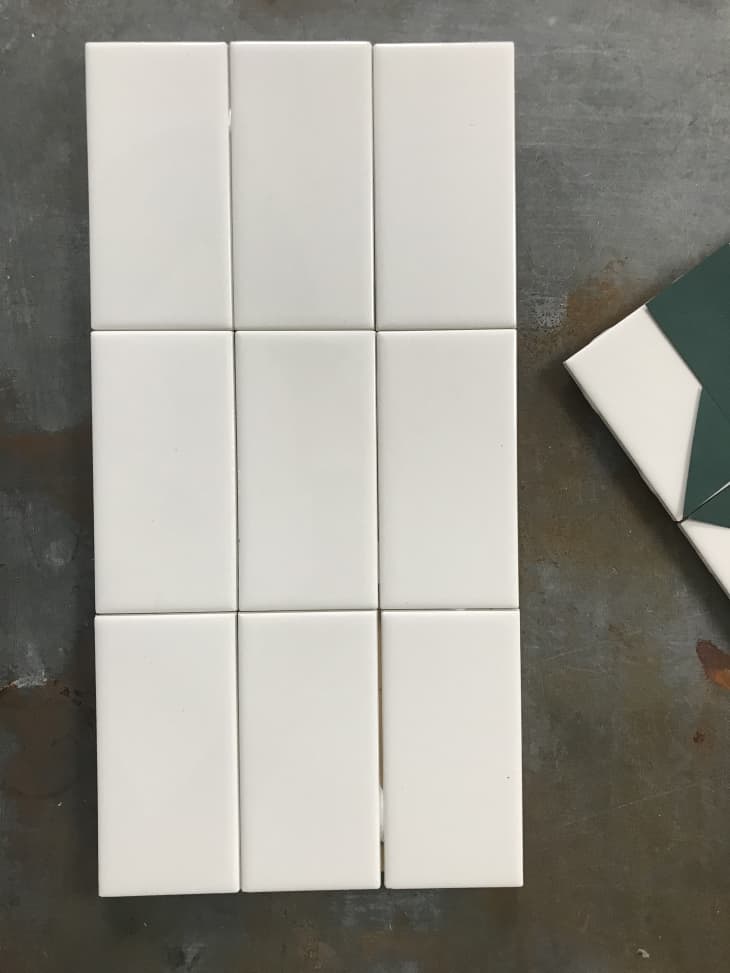
It’s pretty simple. Line up your tiles as you’d like them to appear on the wall. I was playing around with adding a pattern with some paint, but wound up going with the plain tiles below. Decide now if you want to leave space for grout in between each tile, or forgo the grout and just push them all together. Again, this can be a quicker temporary project, or something more long term — it’s up to you.
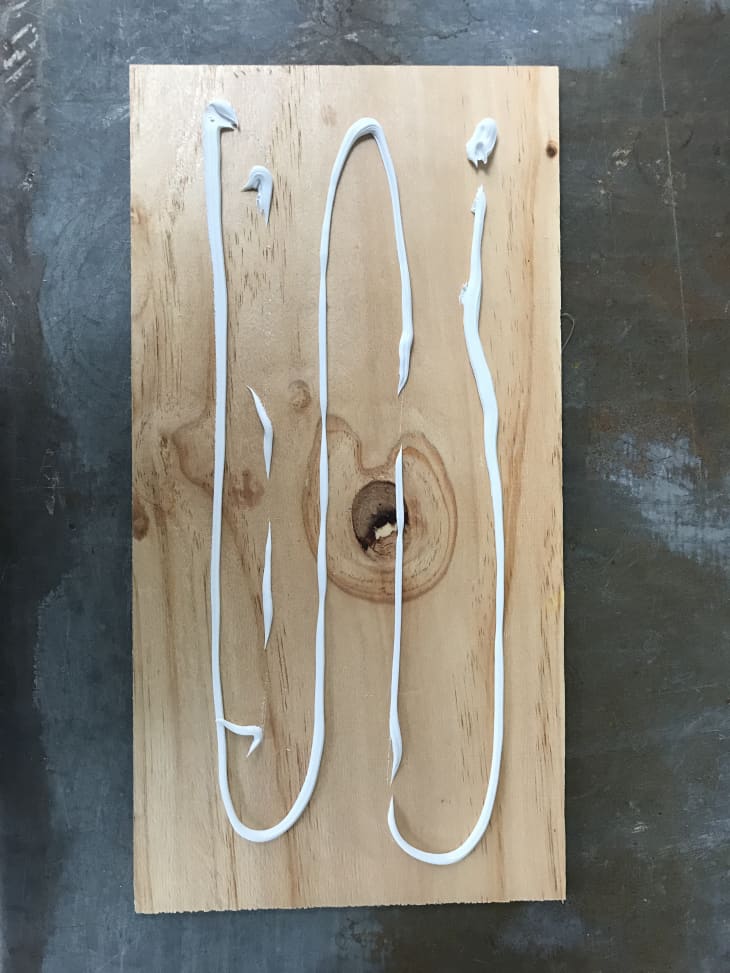
Cut a piece of plywood the same size as your tile, cover with some caulk or silcone, then press the tile down in place on the board.
Let everything dry, then mount on the wall behind the faucet on your sink. When you’re ready for a change, or are moving out, it couldn’t be simpler to remove.
For this project, I used a whopping nine white subway tiles (22 cents each) from Lowes, for a total cost of a $2. I had some caulk on hand, and the wood was scrap I had lying in my basement. And then I bought some flush mount hangers to complete the job.
Makeover Resources
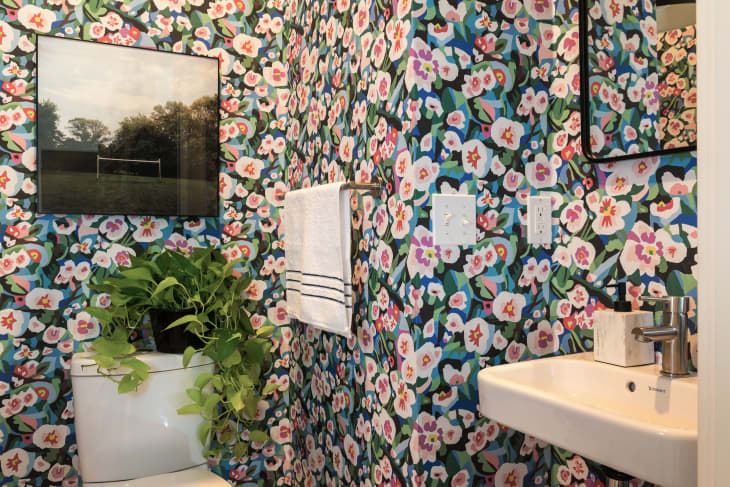
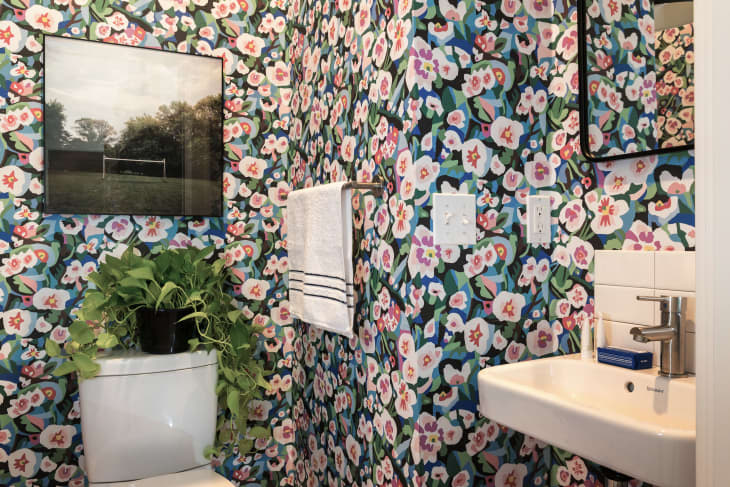
- Multi-floral Wallpaper from Chasing Paper
- Happy D 20″ Wall Mount Bathroom Sink with Overflow from Wayfair
- Delta Trinsic Bathroom Single Handle Single Hole Bathroom Faucet from Wayfair
- Trinsic Bathroom 18″ Wall Mounted Towel Bar from Wayfair
- Delta Trinsic Bathroom Wall Mounted Toilet Paper Holder from Wayfair
- Project 62 Metal Framed Wall Mirror from Target
- BADAREN Bath mat from IKEA
- Fieldcrest Luxury Stripe Accent Hand Towel from Target