
Before & After: A Mauve Toilet Meets Its End
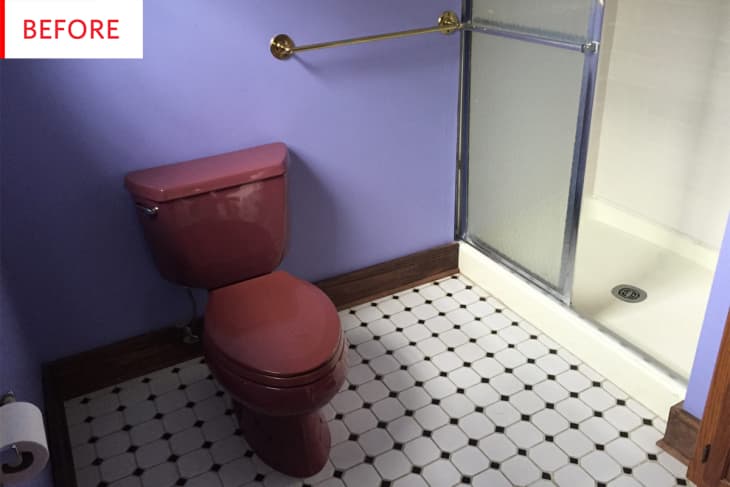
Scuffed mauve toilet, periwinkle walls, mauve sink, pebbled glass shower door, yellowed shower stall—what’s not to love? Well, perhaps a few tiny updates might be in order here…

Ahhhh, much better! I know there are those of you who dislike white-centric makeovers (I always love them), but in this case, the interplay between the mostly white walls and the mostly black floor is so fun and vibrant, and the room really pops. If you’re confused about the juxtaposition of these two images, know that the toilet and shower switched spots, and there were a few other layout changes as well. The swap allowed for the toilet to go in more of a nook, while the small shower stall has been replaced by a clawfoot tub that takes advantage of all that space that used to surround the toilet.
This renovation is the creation of Amber Ford of The Happy Tudor, who shared this gem:
Uniformity in a small space helps to make it feel a bit larger and more cohesive.
The uniformity of black, white, silver, and glass in the new bathroom definitely makes the room look a lot larger and brighter, with each item and area flowing elegantly into the next. Meanwhile, the art, plants, and wood shelves add life, color, and vibrancy.

Here’s the original sink—the combination of mauve sink, formica, wood, periwinkle paint, brass towel ring, builder-grade mirror slab and silver shower accessories is less-than-ideal.

The wall just to the left of the sink was removed (since the shower moved location), allowing for a more open feel around the sink. The vanity was replaced by a wall-mounted sink, but additional storage was achieved via the shelves you see above, as well as larger shelves installed above the toilet.
You should definitely check out The Happy Tudor’s bathroom transformation post to see more Before & After pictures, resource links, and additional information, but definitely pay attention to the layout strategy that was employed during this renovation. The couple cut out large sheets of paper in the dimensions of the toilet, tub, and sink, and moved them around the room to see what worked best—taking into account practical concerns such as plumbing, electricity, and code requirements, of course. So smart! That little trick could come in handy in all sorts of home projects. The bathtub saga—did you know clawfoot tubs weigh 350 pounds?!?—is also worth a read.
Thank you, Amber!