
Before and After: An IKEA Hack (and More!) Makes a New-Build Bathroom Feel Custom
Whether you live with your parents, your kids, or roommates, it’s important to carve out spaces in your home that feel like you. DIYer Sarah Murphy (@colourfulsaz) lives with her parents in a new-build in Ireland, and she wanted her bathroom to feel like a special and designated spot for her.
“When I found out I’d have my own bathroom, I knew I had to make it a relaxing space,” Sarah says. But she didn’t want to spend too much on the project — in fact, her entire project cost about 50 euros, or about $53 — or do any major demo because the bathroom was in fairly good condition.
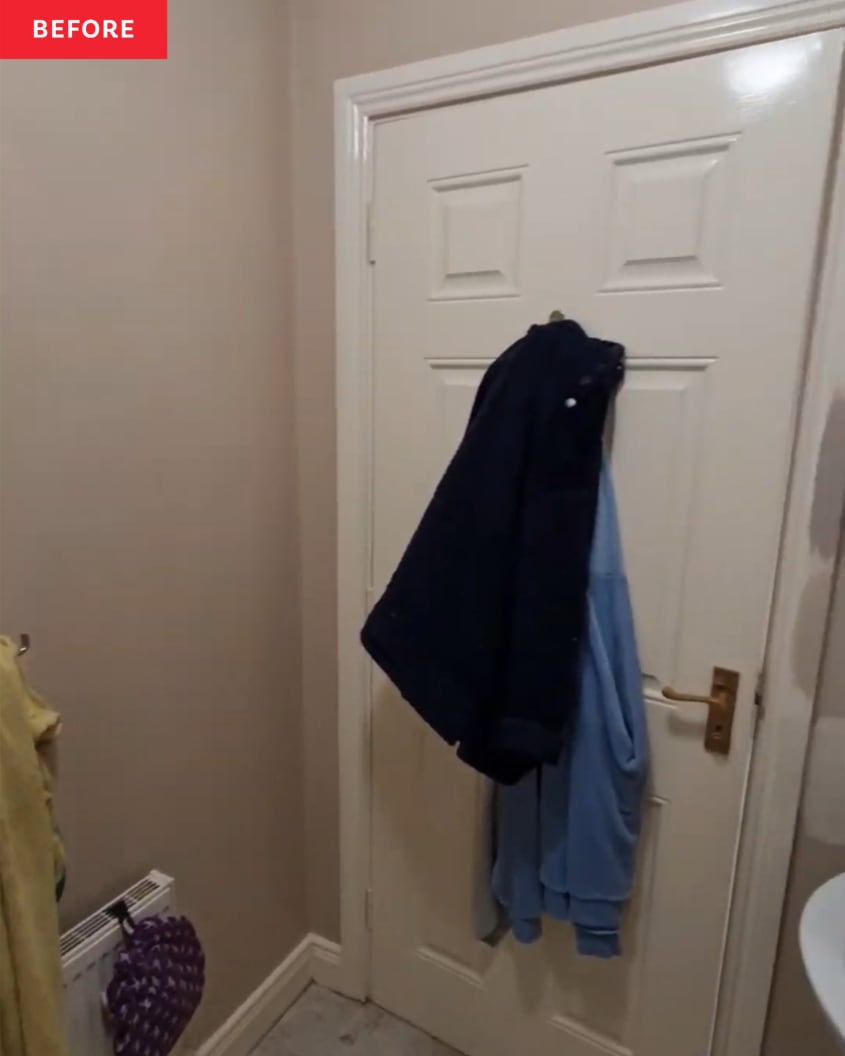
The things Sarah wanted to change were the oil-based paint on the door (which was beginning to look yellow, she explains on YouTube), the paint on the walls, the builder-grade tub, the storage in the space, and the vanity mirror.
“I didn’t want to make it complicated,” she says. “I knew I could elevate the space in a budget-friendly way.”
Fresh paint complements the existing tiles.
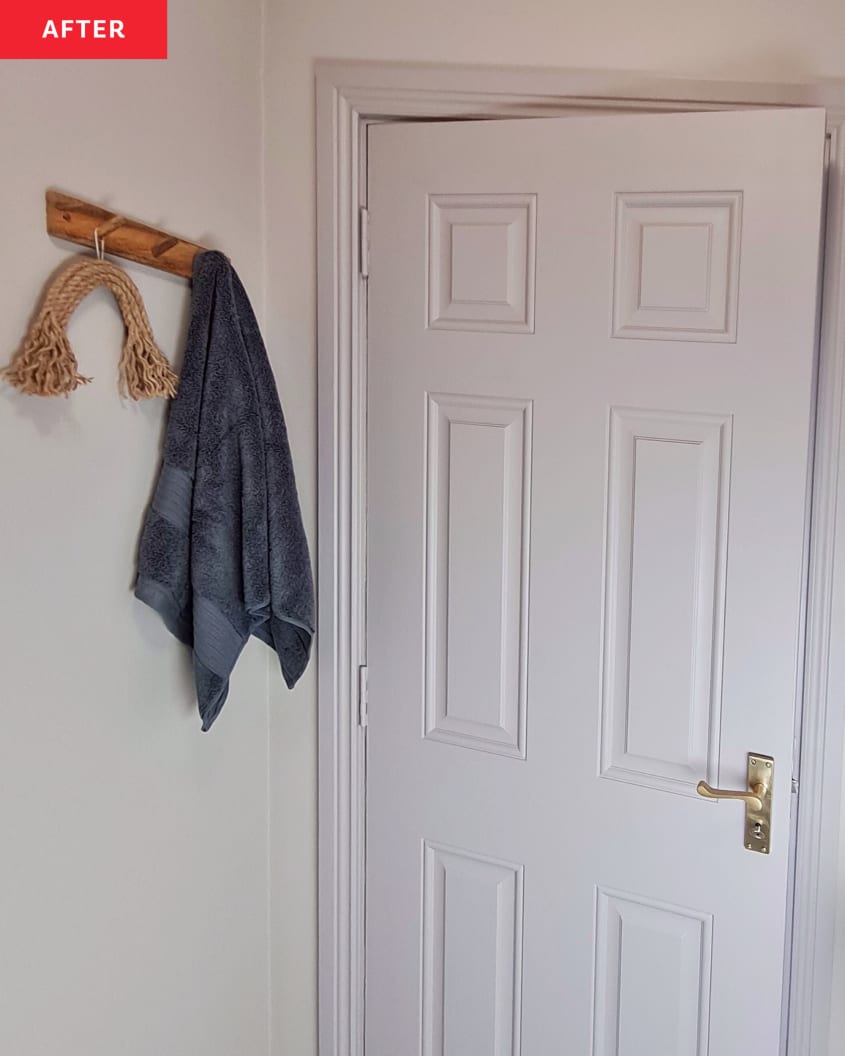
Sarah decided to keep the existing tiles in the room to save money. “I was going to paint the tiles, but after looking into it, I didn’t want to risk having chipped paint,” she says. Instead, she chose to paint the ceiling, walls, doors, and woodwork.
“I highlighted the door by painting that in a darker color, and I love how this made it pop,” she says.
Sarah says the hardest part was just landing on colors. “I had a hard time finding colors that muted down the tiles and complemented them in a way to make them look like an intentional design choice rather than something I was stuck with,” she says. She ended up going with a greige color and a tan (Crown Paints’ Elle Decor range’s Refined and Blended).
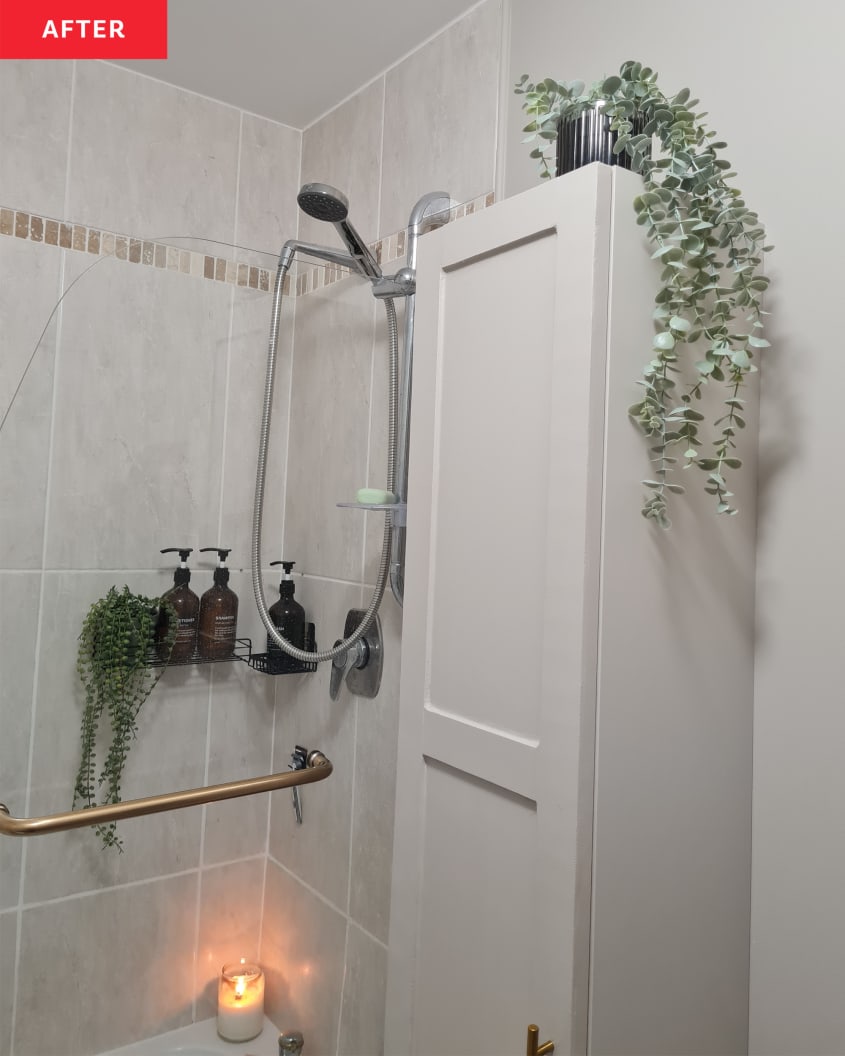
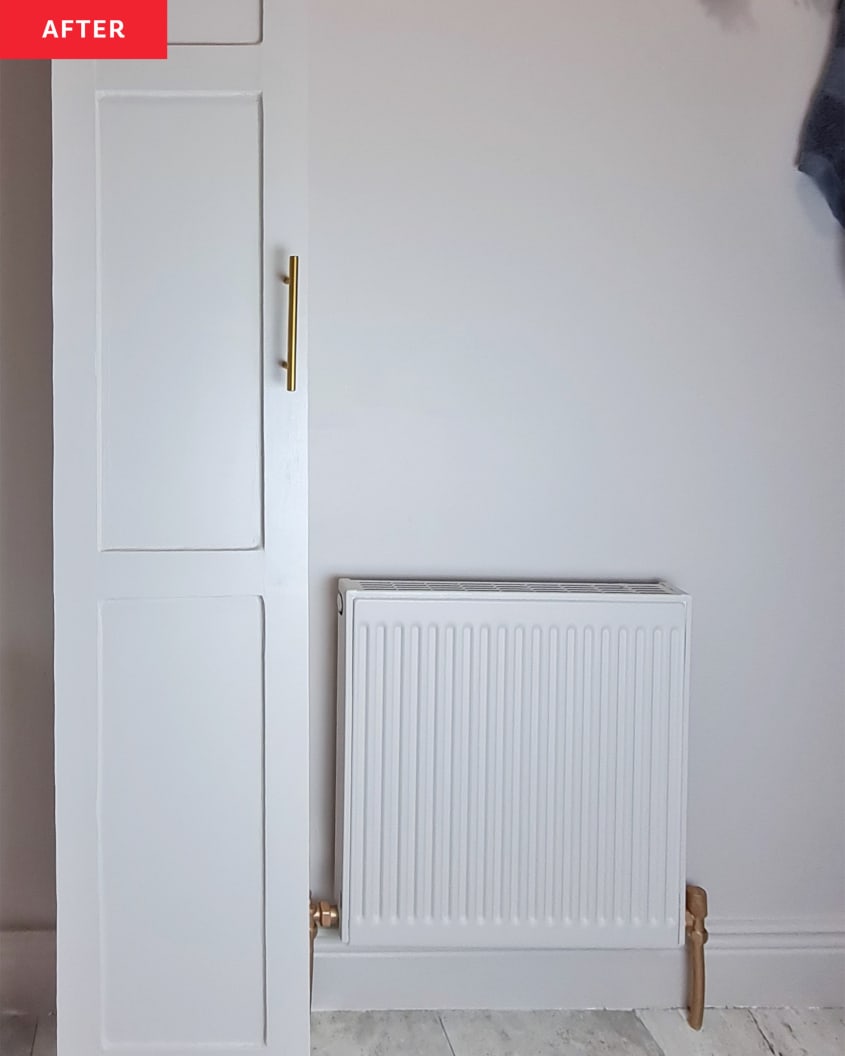
An IKEA cabinet brings storage.
Sarah used paint on the slender IKEA NYSJÖN cabinet she added to the bathroom to squeeze in more storage, too. (Inside the cabinet are plastic organizers labeled with custom DYNAMO tags to keep things streamlined.)
“I find if I make over a room, and I like how it turns out, I’m much more likely to keep it clean,” Sarah says.
Sarah already owned the cabinet, so all she had to pay for was paint. Her IKEA furniture painting advice? “To get a flawless finish on the cabinet, I used Two Fussy Blokes rollers,” she says. These are mini microfiber rollers that “provide a spray-like finish,” Sarah says.
Sarah also upgraded the plain NYSJÖN cabinet door with the same paneling technique she used on the tub, which she says was easier than expected, gave her an expensive cabinet look for less, and made for a cohesive look.
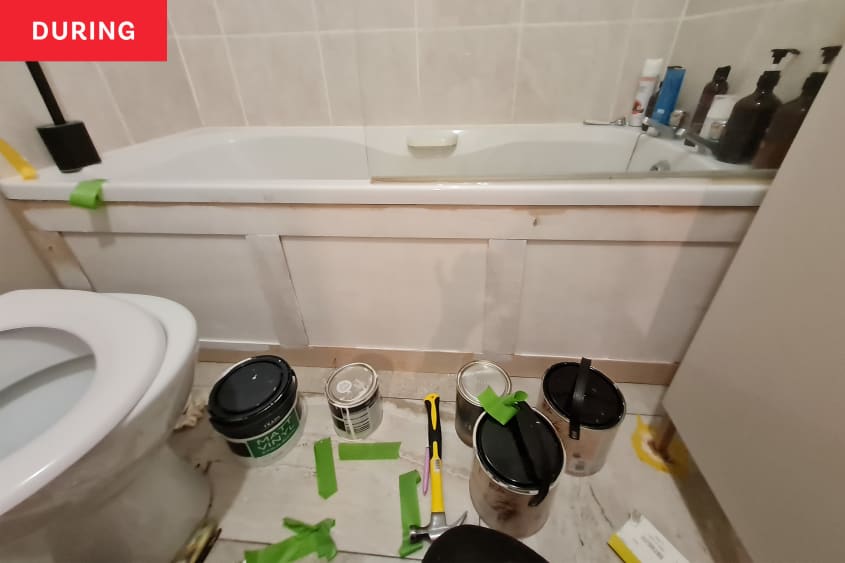
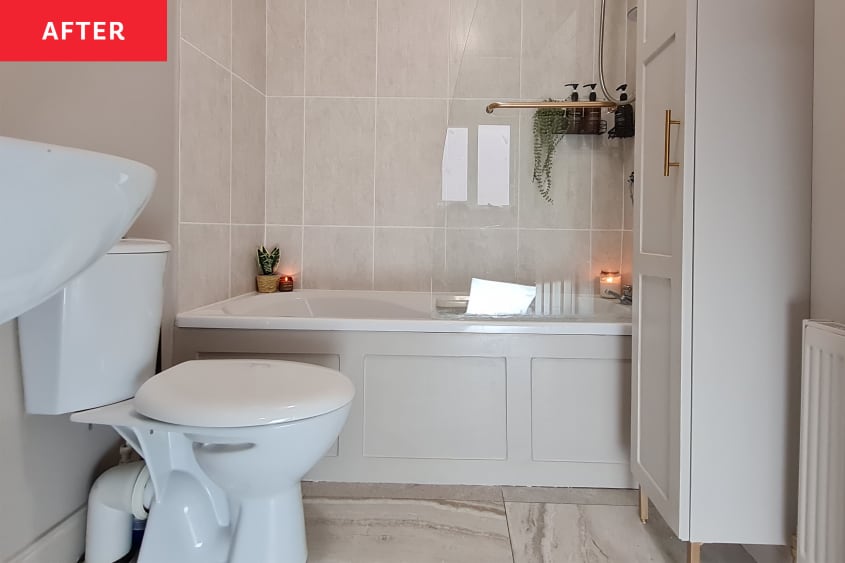
Plywood paneling gives the tub a major upgrade.
To make the tub look less builder-grade, Sarah removed the “ugly plastic panel it had before” and replaced it with a custom cover for a more built-in look. She had a piece of plywood cut to size to cover the side of the tub, primed it, and her dad helped her cut strips of paneling with a miter saw.
“I had never done paneling before,” Sarah says. “It was a bit fiddly trying to get the different strips of wood to stay put, but it was pretty simple.”
She used painter’s tape (and clamps for the IKEA cabinet) to help hold her paneling pieces in place and ultimately secured them with nails. “I filled in all around where the pieces of wood met,” Sarah adds on YouTube. “I used a lot of filler to make it look a good bit better.” She says you could also use caulk for this.
Sarah’s DIY advice is to “just try it.” It might not be as hard as you expect, she says, and the results can be amazing. (See: Sarah’s bathroom redo.) “I love how relaxing and calm this space is,” she says. “It feels like a spa now, and I love spending time in there.”
Inspired? Submit your own project here.
Get all the IKEA UPDATES
Sign up for The IKEA Edit, our twice-weekly newsletter with the latest IKEA finds, deals, and hacks.