Before & After: A Beautiful Billy Bookcase Hack You Can Try At Home

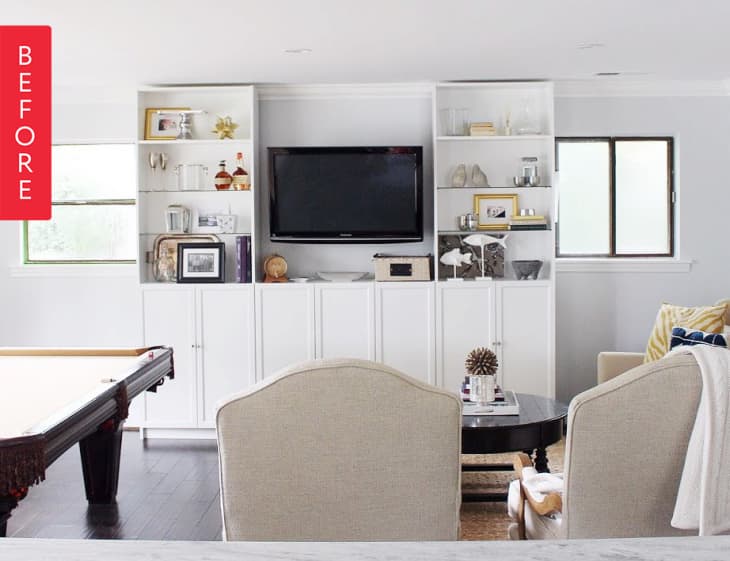
One of my absolute favorite elements of our living room design is the IKEA Billy bookcase hack that TJ Breil of Slab Woodworking rescued. I say rescued because we attempted to create a hack of our own, using the bookcases you see here and a shelving unit, to fake the look of built ins. We got as far as putting it all together but the process of making the unit look “built in” was a dud.
I had all of the best Pinterest style intentions but it was a lost cause – until TJ walked in the door.
We knew we were switching the room layout and would no longer need the upper shelves so TJ was given the go-ahead to have his way with all of our hard work, saw in hand.
Once the upper shelves were removed, the remaining steps of the Hack were relatively easy (at least according to TJ). Here’s what he used, how he did and our finishing touches:
IKEA Billy Bookcase Hack
- Billy Cabinets and Doors, number determined by the length of piece you desire
- Small wood dowels to make .5″ high platform
- Two 1/4″ thick Cherry Wood piece, bark stripped, length to match your project
- Wood Dye or stain
- 4″ Dock Cleats
- One tube Rub and Buff – yes it’s a tiny tube, it lasts forever!
- One strip pre-fab white baseboard, cut to length
- Screws
After removing the upper shelves and discarding them, TJ built a .5″ platform on the top of the assembled Billy bookcase to allow the doors to open fully. If you look closely, you’ll note that there are 7 cabinet doors as a result of using two large cabinets and one single cabinet to create the appropriate width for the space.
Once the platform was built, TJ screwed in the stunning 2 1/4″ thick raw edge cherry top. TJ hand scraped the bark and dyed the wood with a custom mix of dyes to match our floors and pool table.
If you aren’t into hand mixing and dying, the Rust-oleum Ultimate Wood Stain in Dark Walnut or Kona will be your best friend (we used Kona on our dining room table and love it).
When it came to cabinet pulls, we knew we wanted to center them at the top of each doors to minimize the fact that we are working with an add number or doors. We also really wanted to save money so instead of pulling the trigger on the Anthropologie handles I had my eye on, we went for a super inexpensive dupe:
4″ galvanized, open based dock cleats. From Wal-Mart.
Each cleat was painted with a coat of antique gold Rub and buff and screwed into the cabinets (make sure that you use the correct length screw—too long and it will bump the inside of the cabinet and the door won’t close). Once the screws were in, we dabbed the screw heads with Rub and Buff for a cohesive look.
And finally, to finish the project, TJ added a pre-cut section of pre-fab white base board. The piece was cut to fit at Home Depot, matches the baseboards in the room, cost less than $10 and absolutely finishes the piece to perfection.
To see more photos and details on this project, head to
Olive and Tate.
Thank you, Stephanie!
