
Before & After: A Discarded Designer Chair
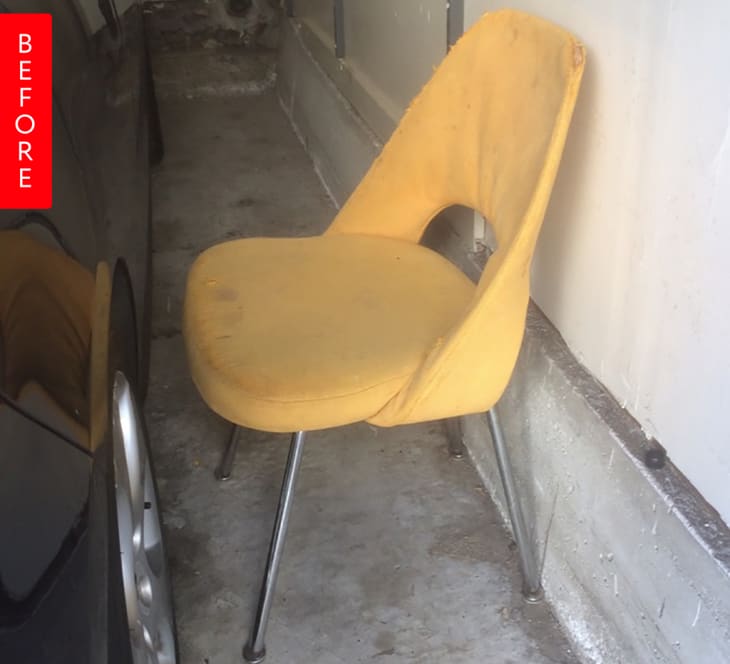
I was driving by the intersection of 16th and South Van Ness in San Francisco one day when I spotted what looked like an Eero Saarinen side chair (with metal legs) in a pile of discarded furniture. I turned my car around to take a closer look, and turns out it IS an authentic Knoll Saarinen side chair(!!!). The upholstery was in poor condition with rips and stains, but other than that, the chair looked like it’s in a solid condition.

I brought my treasured find back home and did a little more research into re-upholstery of the chair. The takeaway was that the reupholstery job is not particularly straightforward — I could either do it myself by taking apart the existing upholstery, making a pattern, then sewing the whole thing together. Even though I have worked on some soft goods / sewing projects, the tasks involved seemed way too advanced for my undertaking.
The second option was to have it professionally reupholstered, the cost of which could be at least $200. I took the chair to two local upholstery shops and both of them gave me a quote of $400 plus the cost of the fabric. I was not ready to spend $400 on a chair.
A month or two passed, and the chair was just sitting in my garage, staring at me — I had to do something about it. I kept wondering what it would be like to take the upholstery apart and work with whatever there was. I figured I had nothing to lose, since I got the chair for free.
The instructable link details the process of taking the chair apart and turning it into something that Eero Saarinen might not approve of, but I think is not too shabby and fits in with mid-century modern decor. The best part about it was that it cost me close to nothing.
Thank you, Purin!