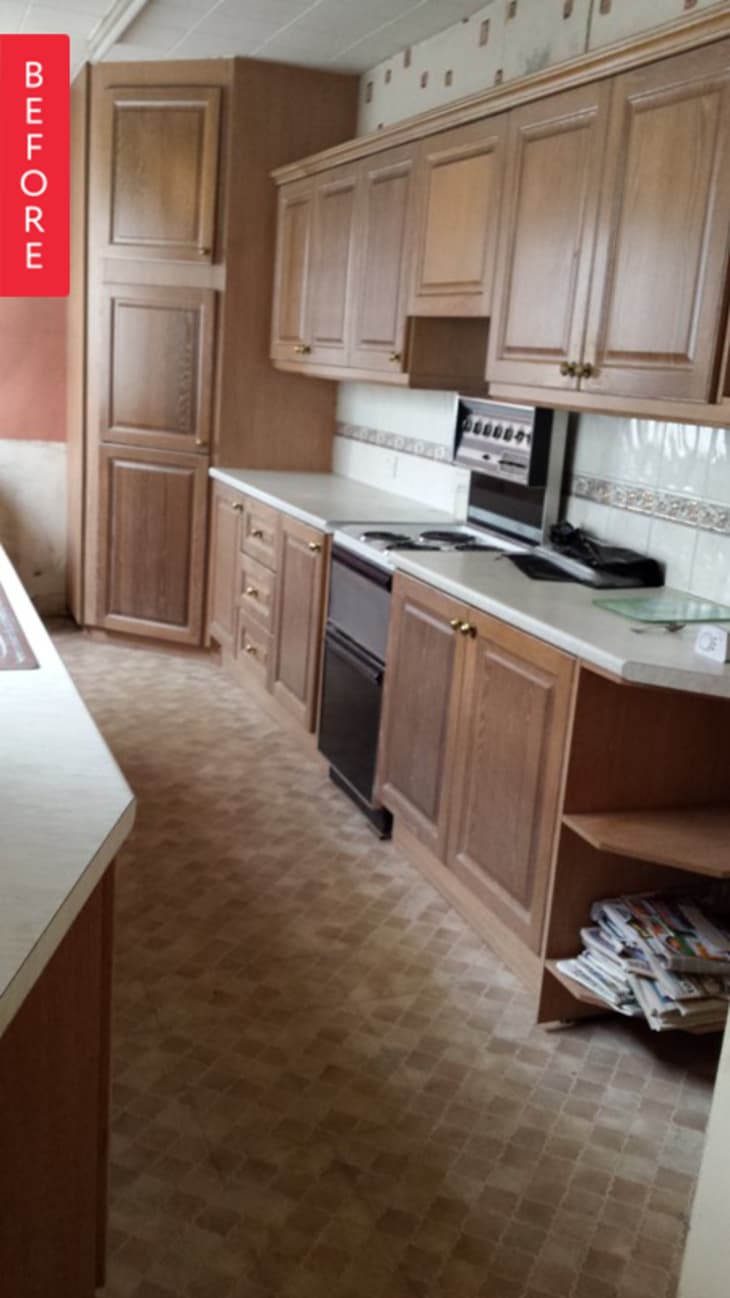
Before & After: A Kitchen Goes Green For Under 5k

| This kitchen won’t be for everyone- but I love it to pieces! I decided early on to replace the upper cabinets but to repaint the lower cabinets as they were solid wood. The only problem was which color! I spent a lot of time on pinterest following the ‘OOooooh’ factor. Anything that made me make a noise of desire got pinned and I found myself pinning a lot of dark green kitchens… I’m all for interesting design but that seemed a bit too edgy even for me! |
While battling with color decisions I started the project. I ripped the ceiling tiles out, took the wall cupboards down and generally made a mess of the place. I did as much work as I could myself but hired an electrician (sensible) and plasterer (to fix the holes made by the electrician). I was living in there at the time like the clever human being that I am.
With the money I saved on the cabinets I wanted to splash out on real stone, which I spent weeks whining to my friends about. I visited several stone masons but hated everything- if something costs that much I have to be in love with it! In the end I gave up my dreams of real stone and went with ikea oak. That way I could install it myself and replicate the weird angles of the previous worktop.
I went with tall IKEA glass cabinets because I think kitchens should be practical. Open shelves are for people who like dusting and closed cabinets would make the room feel oppressive. Glass means you can see inside so no more opening every door to find a single jar of mustard! Installing lights in the cabinets was the best idea ever, I’m glad I spent the extra £100 doing it. I tried to aim for a kitchen that is reminiscent of a victorian butler’s pantry- it’s a long, thin kitchen and no amount of feng shui was going to fix that!
I finally bit the bullet and painted the cabinets dark green… only for disaster to strike. The paint I picked was just not up to the job and I had to spend a week stripping down the cabinets to start again. After some research I tried BIN shellac primer and Dulex Weathershield in Oxford green. Success!
In the end the renovation cost around £3300 ($4,643): £700 for plastering, £1300 in IKEA, £600 on appliances, £600 on floor and backsplash tiles. I saved money on second hand appliances, reusing the door knobs and doing all the work by myself (or with help from my poor friends and family- cheers Dad for helping plumb the sink in!). I’ve never tiled or hung wall cabinets before so this was a steep learning curve, but now it’s done and I couldn’t be happier. I plan to stay in this house for several years, if I ever resold it I would probably have to repaint it to be a more normal color, but this kitchen suits the house. Now I just have to get the rest of the place up to scratch!
Thank you, Tab! You can see more of Tab’s kitchen transformation on his blog the The Fantabulous House.
