
Before & After: A (Mostly) DIY Compact Kitchen Remodel
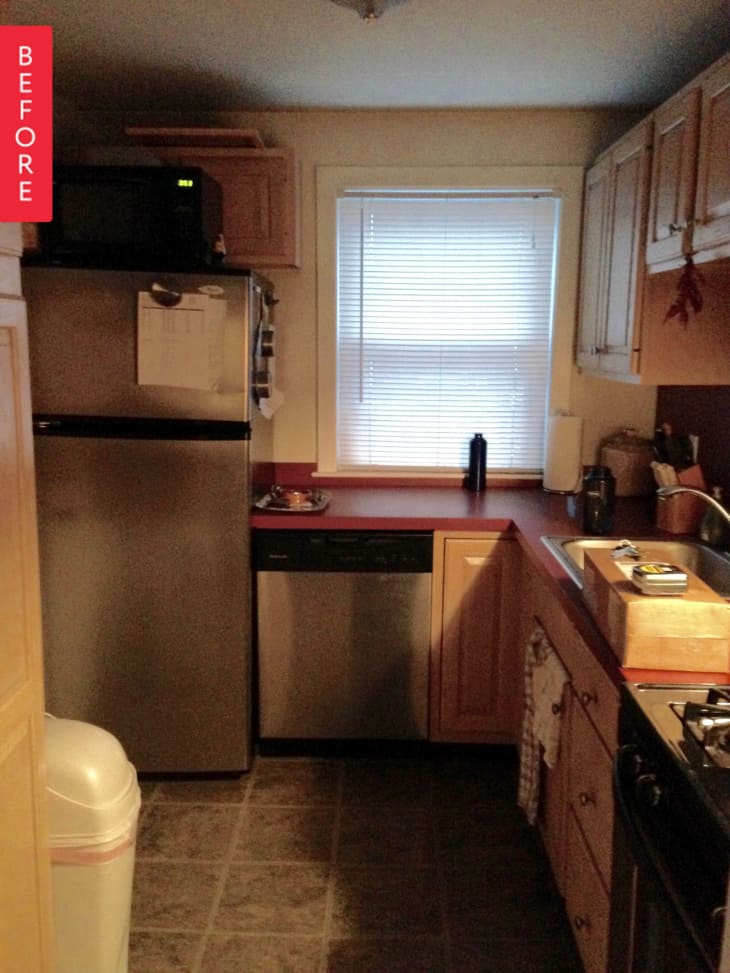
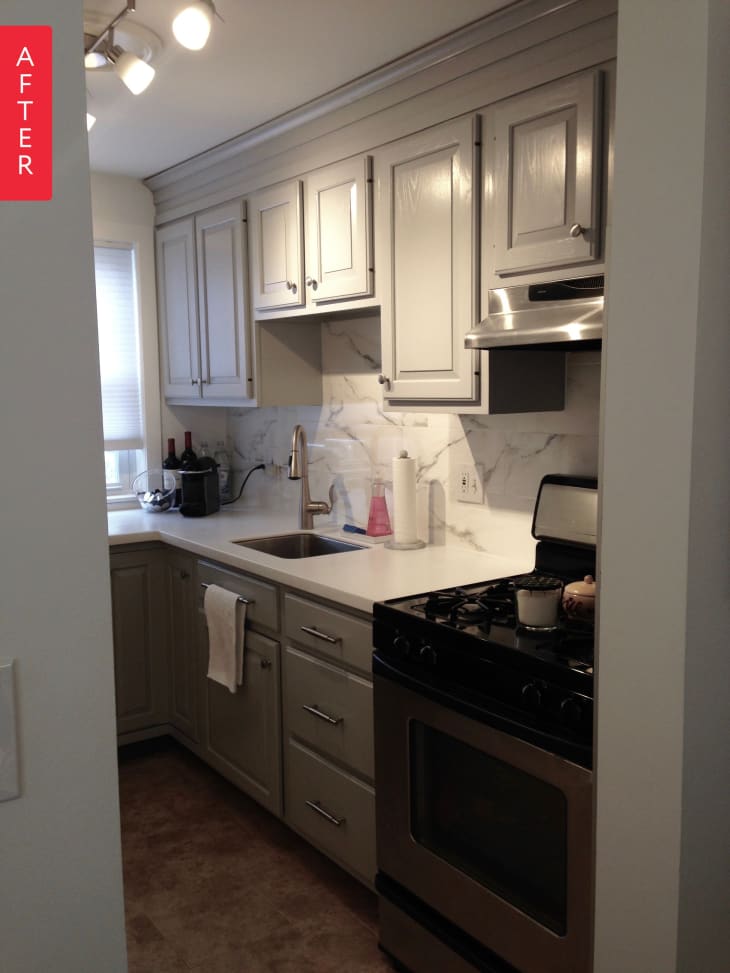
I’m happy to share with you the DIY makeover of my compact apartment kitchen, which went from dark and red to bright and white (mostly). The only thing professionally installed was the countertop, and the rest was a lot of hard work over a few months.
For cost reasons, the layout, appliances, and cabinets are all the same. The details are as follows:
- Cabinet molding: F.D. Sterritt Lumber – needed because I finally exhausted the hood vent outside and didn’t want to see the vent pipe above the cabinets.
- Cabinet paint: BM Advance in Coventry Gray (HC-169), Satin finish, 3 coats over sanded and STIX-primed cabinets. This stuff is amazing – super smooth finish, zero brush strokes.
- Cabinet hardware: Knobs: Liberty Lansford collection, in Satin Nickel; Pulls: Liberty Modern Metal collection in a stainless finish, from The Home Depot.
- Wall and ceiling paint: BM Aura Bath and Spa in Snowfall White (OC-118), Matte finish, two coats.
- Light fixture: IKEA, TIDIG
- Faucet: Moen
- Backsplash: NAXOS Sculpture Marble Hill ceramic tile, from Roma Tile in Watertown, MA
- Countertop: Hi-MACS solid surface in Arctic Granite, via The Home Depot.
- Flooring: Peel-and-stick tile (forget brand and color), from The Home Depot.
If I had to do it again:
1) I’d pick a different flooring, but given that I tore up the old floors myself and didn’t trust myself to lay a level subfloor and the apartment doesn’t actually have any semblance of right angles, etc., this is what I went with.
2) I went with a solid surface product for the countertop because although I live here now (and own it), the place is fundamentally a rental, so wanted something economical and relatively sturdy. Had I had a larger budget, I would have gone with a quartzite.
Thank you, Adele!