
Before & After: A Pared Down DC Kitchen
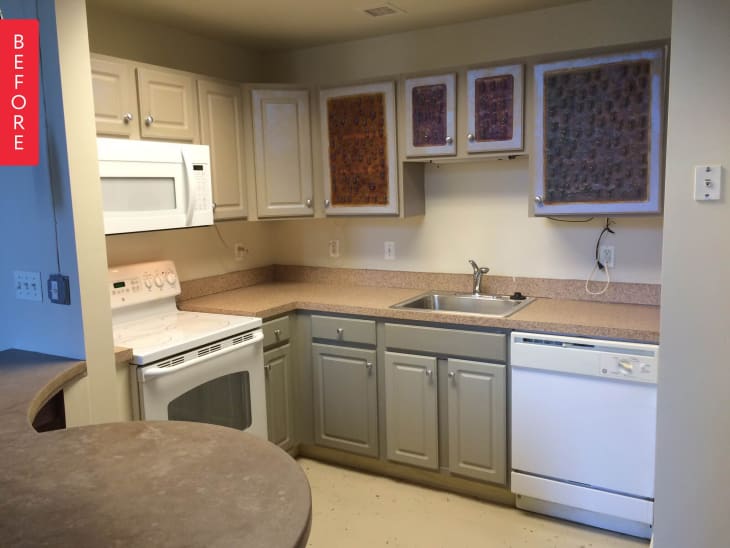
I just purchased my first home, a one-bedroom loft condo in DC’s Chinatown neighborhood. It’s a great location in a beautiful building, and most of the other units have very high-end finishes (and sell for $$$). Several of the units, including mine, were done with builder-grade finishes and sold at below-market prices to local artists about 13 years ago.
The previous owner had “personalized” the condo quite a bit, so it sat on the market for a while before I came along and I think I got a great deal. Mostly, it just needed fresh paint EVERYWHERE (doors, trim, even the ceiling beams) and some paring down – removing a faux brick wall and textured plaster in the bedroom, a carpeted platform dividing the living room in half, etc. For the kitchen and the bathroom, I would love to do a full renovation down the road, but I wanted to make a few more affordable changes immediately.
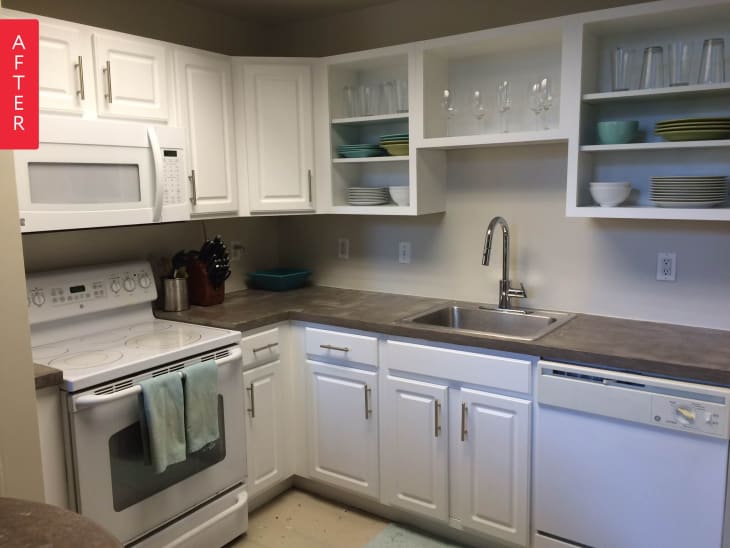
In the kitchen, I removed some of the upper cabinet doors that the previous owner had customized with decorative glass, and I kept them as open shelving (which would not have been my first choice, but it was free). I also removed the under-cabinet lighting to get rid of all of the cords plugged into every outlet. I covered the laminate countertop in a DIY concrete finish that I had read about here and here.
The extra step that made the biggest difference was removing the 4″ laminate backsplash lip, I think they look much more like poured concrete without the tell-tale backsplash. I just pried it off and patched the paint on the wall behind it. I had the cabinets painted white to make the white appliances blend in more, and added new handles. The biggest expense was the new faucet, which I installed into the existing sink and will hopefully be able to reuse one day when I do the full renovation. The other big expense was having a professional plumber come and fix everything I had done almost-but-not-quite-right, but it saved me a lot of money to have him come for a single hour-long visit and check everything in the kitchen and bathroom all at once.
Overall, I’m really happy with the toned-down, streamlined look. I’m proud that I was able to do most of it myself, and now I can enjoy it while I’m saving up for the dream renovation!
Thank you, Hillary!