
Before & After: A Refreshed, Repurposed DIY Bedroom
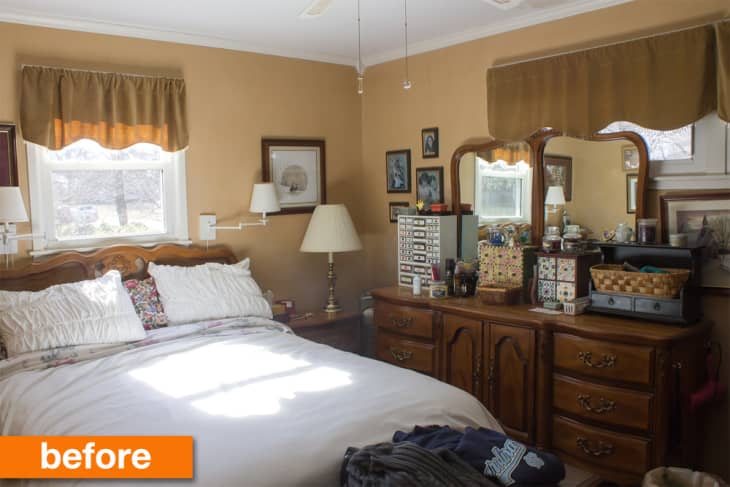
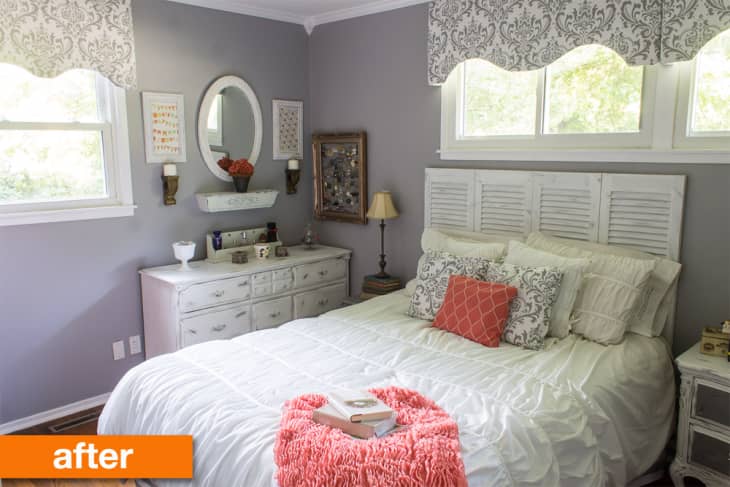
Twenty-three years is a long time to sleep in a room that looks the same, but that’s exactly what this couple have done. Until recently, of course, when their compact bedroom got a fresh makeover and a much-needed new look!
From Marty:
We had lived with the same furniture arrangement in our bedroom for 23 years. Yes, that’s right. 23 years. That’s a long time to wake up on the same side of the bed! To achieve this makeover, every detail has been painstakingly reworked or repurposed with my own hands (or those of my DIY hubby). To those with larger bedrooms you may not know the huge obstacles you can face between practical and beautiful. Our new bedroom now has both! Except for one or two items, everything (and I mean EVERYTHING) is either a DIY project, a yard sale find or a hand-me-down.
First my husband painted the room a light shade of gray and then we moved the bed from under the long standard window to underneath the high, wide windows.The new arrangement made the biggest difference! Our dark bedroom furniture was then chalk painted and distressed. We made over a large wardrobe by painting and then covering the inserts first with a fabric that just didn’t work. We then ended up choosing the fabric that was intended for cording around the window treatments but worked better for this piece of furniture.
My husband built me the headboard out of louvered closet doors and I worked my magic with distressing. We installed closet doors that opened instead of sliding which was an amazing change!
The fabric we chose for no-sew window treatments, bed skirt and pillows allowed for a pop of coral with the gray. I’m totally thrilled with this gorgeous fabric. I now have a grown up bedroom that I adore!
Thank you Marty! See more angles of the after bedroom plus find out more about DIY projects on Marty’s blog.