
Before & After: Rita’s From Rusty to Cherished Cart
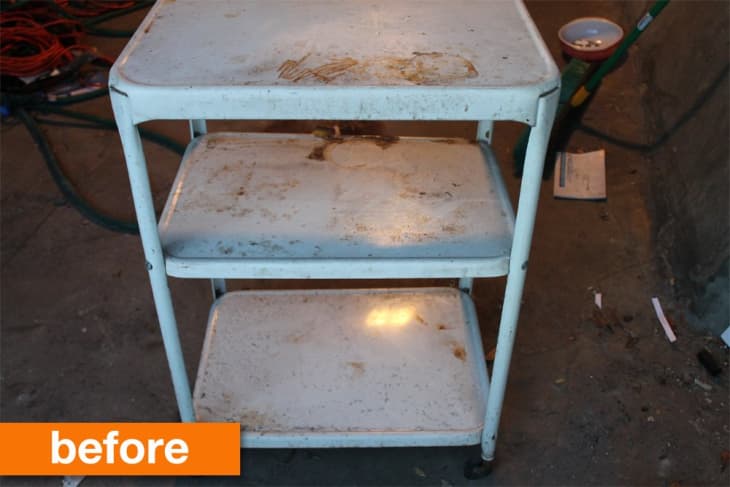
Rita was on the hunt for a project where she could turn something unloved into something that could be used, cherished and enjoyed. Rita knew an old, rusted kitchen cart that once belonged to her great-grandmother (that had just been collecting dust in her basement) was the perfect project to tackle to give her space that extra something special.

From Rita:
I started by using WD40 on the wheels before applying Jasco’s Rust Converter and sanding it down. Once that was done I used Rustoleum’s 2X Paint and Primer, it only took one can to get the job done.
For the pattern I bought a gold leaf starter kit off Amazon and an additional order of 25 sheets. I’m glad I did because I used close to 40 sheets on this project. Instead of using painter’s tape alone, I used a combination of Scotch washi tape and Scotch Blue painter’s tape to achieve different widths and give the cart a little more dimension.
I also found a very useful DIY affixing a wine glass rack with magnets. “Super magnets” which are about the size of a pea but hold up to 7lbs each! I used 5 which was more than enough. I spray painted the wine rack and wheels with Rustoleum metallic gold as a finishing touch.
See more of this transformation on Rita’s blog.
Thank you Rita!