
Before & After: Two Mid-Century Chairs Get Rescued from the Landfill (& Vamoose Vinyl!)
Vinyl aside, these chairs had a certain je nais se quoi. Stephanie snatched them up from the salvage yard and gave them a loving and era-appropriate upgrade.

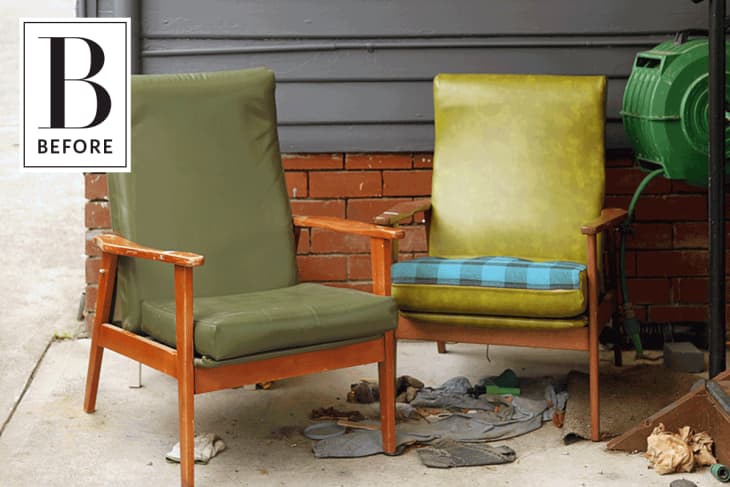
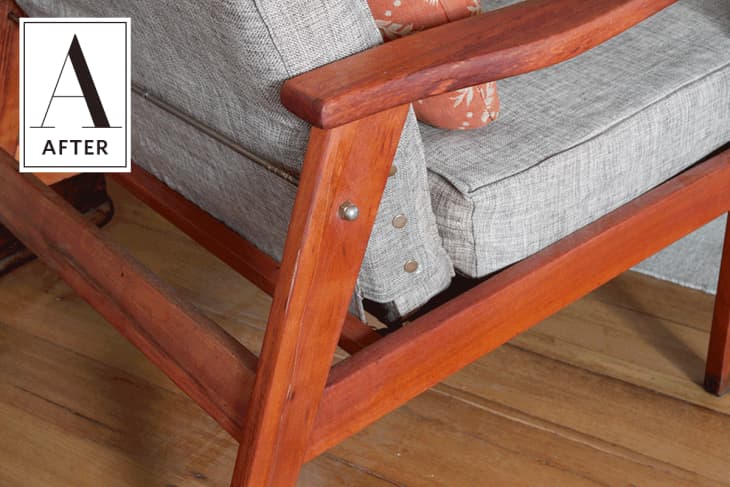
From Stephanie: These Australian-made mid-century chairs came from the salvage yard at our local landfill. The colors and finishes are different, but I noticed their matching frames under the worn vinyl and busted lacquer finish. Both also had a pivoting metal under frame – so they weren’t just regular armchairs, but recliners!
These chairs are brothers from other mothers, and I wanted to update them to reflect that. I gave them both new upholstery, since I’m not a fan of having vinyl cushions for people to sit on. Although, I might have considered keeping the original vinyl if they were BOTH mottled lime green with blue buffalo plaid, who knows?
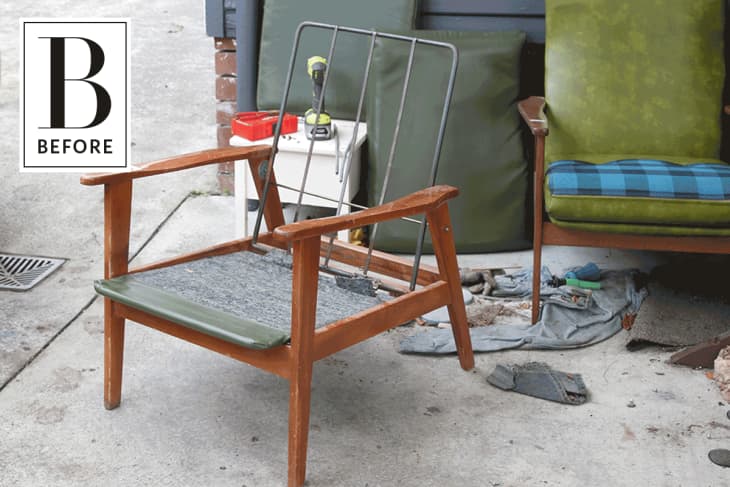
The wooden frames needed the most attention. A few joints were wobbly and the finishes on both were in bad shape, doing the chairs no favors. I knew that an oil finish would show off the natural warmth of the timber.
My project took several weeks of work, and they cost me about $149 USD in materials (including the chairs themselves).
The metal reclining frame in each chair is non-removable, unless you take apart the chair and all of its glued joints, so I had to work around it while stripping the original plasticky lacquer finish. I gave them two rounds of paint stripper, cleaned the residue, gave them a light sand, and then oiled each one with two coats of Danish oil and a topping of Feed n’ Wax.
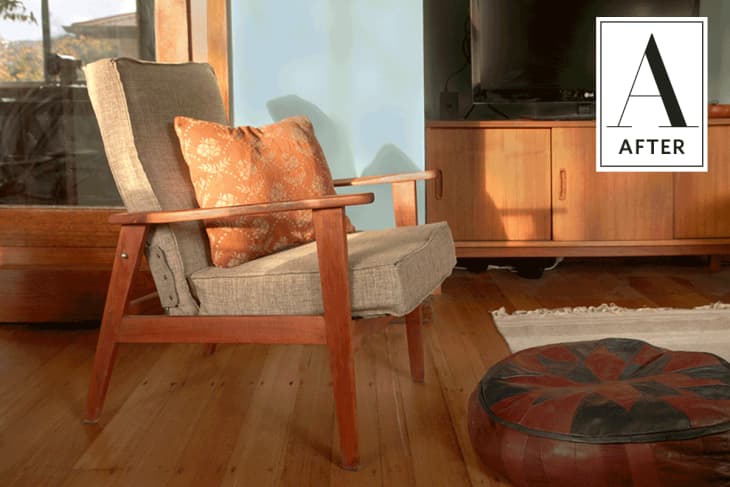
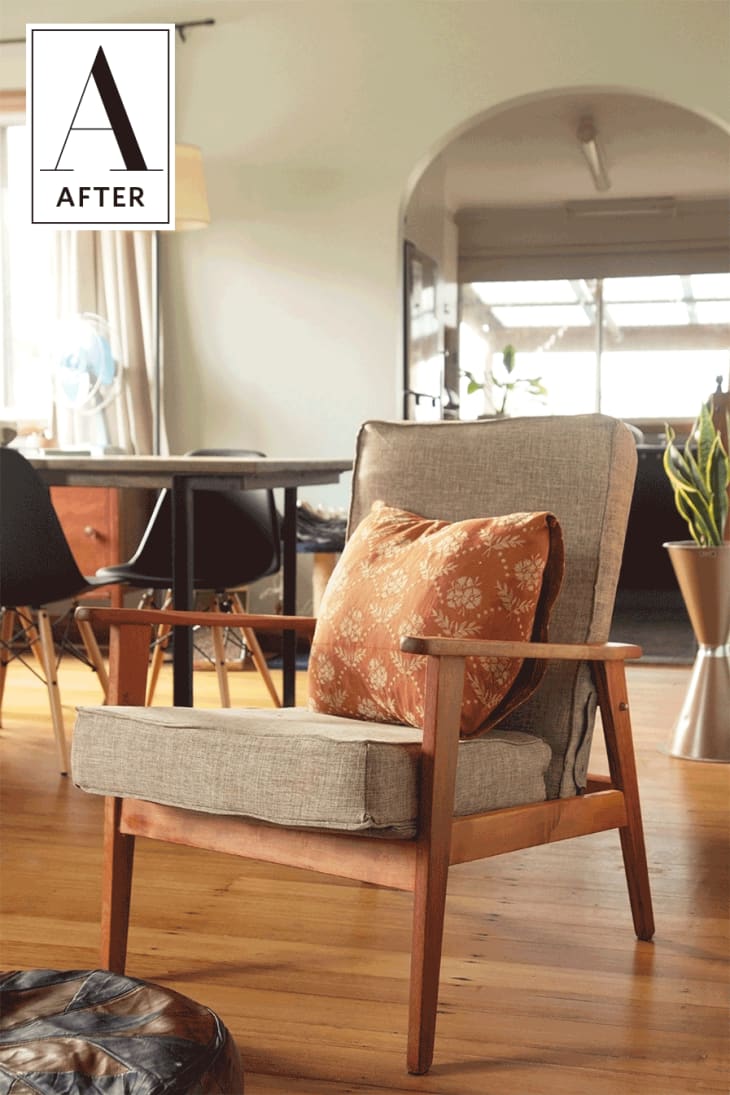
As for the upholstery, the original cushion inserts were still in good shape so I reused them. I made box cushions to fit both, using a linen-weave upholstery fabric. Making upholstery for the back cushions, which slide over the pivot points in the metal frame, was the most challenging aspect.
The most surprising part of this process was after I stripped the finishes and realized that chairs were made of different timbers. One is Tasmanian oak, a non-specialty hardwood, and the other is blackwood, a specialty timber which takes on a red luster. The Tassie oak chair got a very light coat of stain to make it look more like its blackwood brother, who never should have been stained in the first place.
My worst setback had to be when when we discovered the hard way that there was another loose joint, and one of the back legs split lengthwise. I was gutted about my chair being ruined, but luckily my brother-in-law is a tradie who does window restoration, and he had some industrial-grade epoxy that repaired the timber. The only evidence of the break is a thin white seam, and that leg is now as solid as they come.

I love the linen-weave fabric against the rich timber tones, and I love the fact that I extended the life of two 1960s Australian-made chairs.
I made a couple of rookie mistakes with my upholstery job:
1) I put my upholstery fabric through the laundry, which you don’t need to do with upholstery fabric that’s been stiffened and fire-treated and whatnot. It got so badly wrinkled that even the dry cleaners couldn’t press it completely flat again, and I couldn’t afford to get brand-new fabric so I just had to make the best of it. Most of it looked fine when the cushions were in place, but there are still wrinkles in places.
2) I regret putting piping on the cushions! I thought it would give the cushions a more finished look, but I wish I hadn’t used it.
My upholstery job isn’t professional by any means, but I’m still happy with the result.
Stephanie’s words of wisdom:
- Plan to put in the time to do it right. Any DIY project takes 4x longer than what you expect, or at least it does if you’re me.
- Look at the framework and construction of potential rescue furniture, not the colors or finishes. Those can be easily fixed.
- Think simple for a timber finish – a beautiful old chair doesn’t need loads of gunky poly coating on it.
Thank you, Stephanie! You can see more on Stephanie’s blog, Saltbush Avenue.