
Before & After: 1 Weekend, 1 Dresser and 1 Fabulous DIY
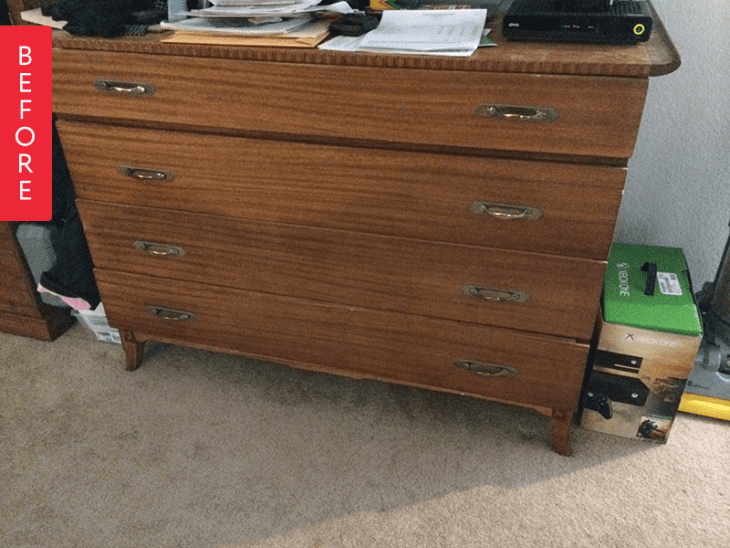
DeaAnna found this dresser at a yard sale for $35. It had some fun details and the drawers were all in working condition so she decided to give it some much-needed love. It turned out so well she couldn’t stand to hide it in the bedroom anymore.
DeaAnna and her husband recently swapped out their formal dining room set in favor of a more casual table and chairs but they were still missing storage.
From DeaAnna:
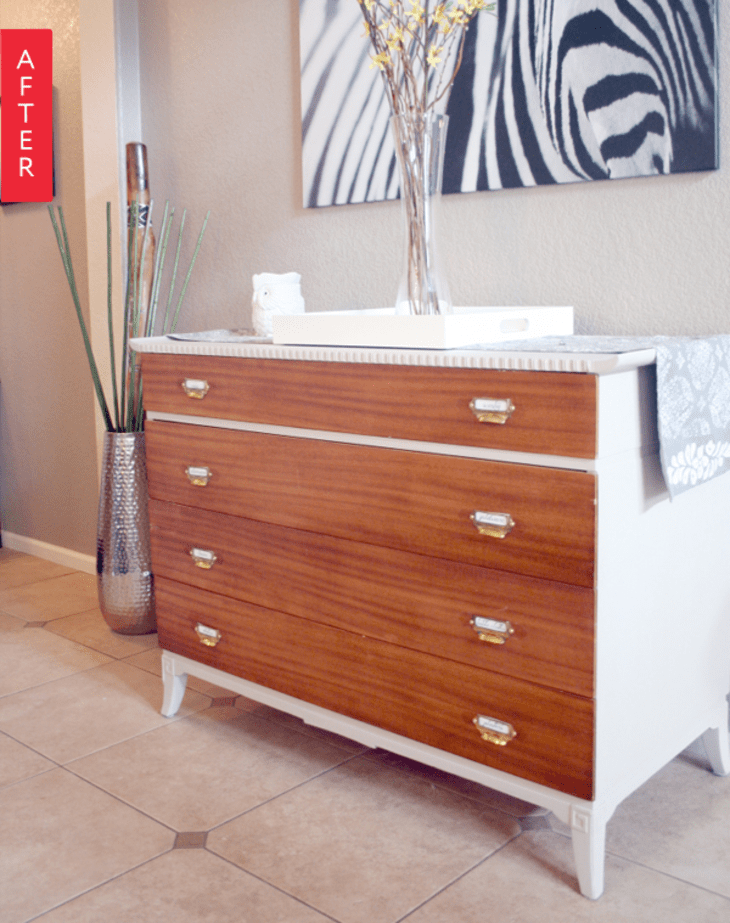
I decided to repurpose it as my dining room buffet. I loved the existing color of the wood and and wanted to show off the pretty grain on the drawers, but the top was in really rough shape. I decided to do a two tone finish —paint the top and sides (where most of the wear was) and leave the drawers the stained natural wood. I also wanted to put some vintage style brass apothecary handles in lieu of the southwestern style handles that were on it to give it a bit more of a vintage look.
I bought Americana Decor Chalky Finish paint in Primitive and the Creme Wax to put over the finished paint to seal it. Since chalk paint has a very flat finish, sealing it with creme wax or polycrylic extends the life of the paint job. I wiped down the dresser with mild soap and water, then finely sanded the top of the dresser. I applied 2 coats of the chalky finish paint to the top and sides of the dresser, and also the exposed drawer style and the feet. I applied a generous coat of the creme wax the next day and buffed it out to make it really smooth and give it a bit more sheen. I found some great brass apothecary handles on Etsy that would be large enough to cover the existing holes.
The whole project cost me about $70 (including buying the dresser) and took me a weekend (once I had my handles delivered). It ended up being so much less expensive than buying something similar new or refurbished at a store, and we are super happy with the outcome.
See more at Salt Design.
Thank you DeaAnna!