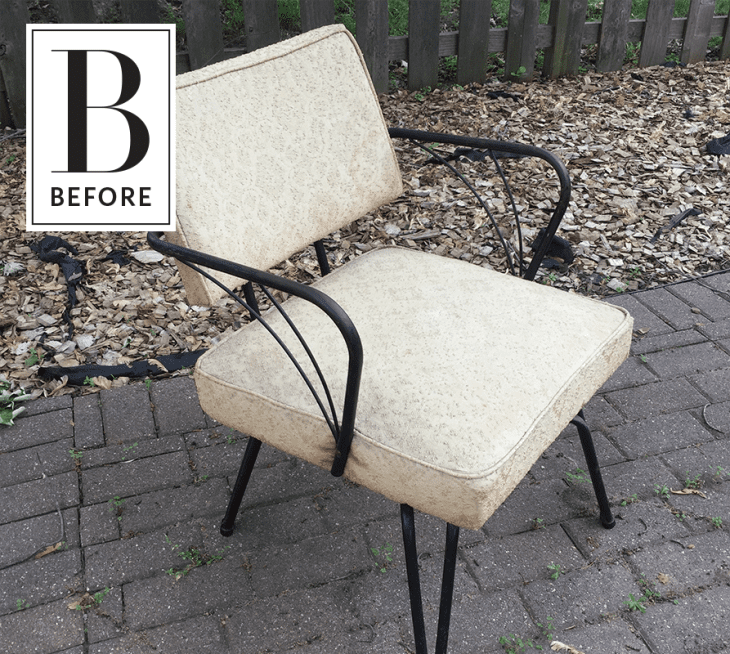
Before & After: A First Time Upholsterer Dresses Up a Garage Sale Find

In my personal experience, “first time’s the charm” doesn’t always apply to DIY projects. It usually takes me about three tries to create something presentable, but not Kayla! She was drawn to this chair at a garage sale, pulled in by the mix of metal and fabric, and figured this would be the perfect opportunity to dive into the re-upholstery pool. The resulting chair looks much spiffier, comfier and more put together than the original find, so job well done!
From Kayla: I found this chair at a garage sale and found myself repeatedly circling back to it. The brocade was old and matted, with visible rust on the armrests and fabric. But I was drawn to the overall shape and design of the chair, and loved the mix of metal and fabric.
Even though I had no experience with reupholstering, and basic sewing skills at best, I decided to jump in and give it a shot.
I completed this project over the span of a few weeks, working on it here and there. I’d estimate I spend at least 10-12 hours on the project. The work included sewing and attaching the new fabric, adding new foam to the seat cushion, and spray painting the metal arms and legs.
I love that the houndstooth plaid adds just a touch of pattern, while still letting the bones of chair draw the most attention.
If you look closely, you can see some minor craftsmanship issues, like crooked piping. But ultimately I’m very happy with the result of my first attempt at upholstery.
Thank you, Kayla!
Are you the proud owner of a lackluster chair? Looking for a little inspiration? Well take a seat, we’ve got you covered. From spray painting upholstery to chalk painting a cain-chair, plenty of intrepid DIYers have tackled chair upgrades so rest assured that you can too.
