
Before & After: An Outdated Kitchen Bids Goodbye to Blue
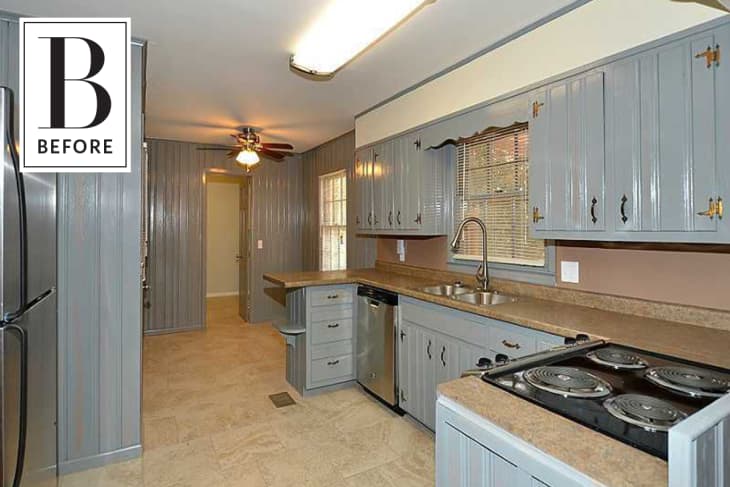
Bridgett’s old kitchen sure was something. Which makes her 100% DIY transformation of the space even more mind boggling. Updating the space not just for looks, she added an office nook to the kitchen to maximize the usability of the space. The kitchen is modern and clean, miles away from the blue and beige kitchen they started with.

From Bridgett: Our house is old (1963) and the blue stained wood paneling that was floor to ceiling throughout the house totally dated it. The space was a little too small to accommodate our semi-large family (four children and two adults), so we knew we needed to utilize the small square footage we were working with. Since our house doesn’t have an office, we decided a kitchen desk would be the most practical choice for our little nook.

The old kitchen nook was completely unusable. It was narrow, oddly shaped, and would serve no purpose. We live intentionally and practically, so our house doesn’t allow for empty spaces that go unused. Now it’s an open and minimalistic walkway, and as of now, my favorite part of our small house. It’s now an area where I can edit my sessions as well as blog for This Minimal House.

The kitchen nook also transformed as we were in the midst of our complete kitchen gut. It wasn’t until recently that we transformed it into my new office space. Overall, this current after photos of our kitchen nook took roughly three days from start to finish.
We utilized what we had on hand (The IKEA countertop that we cut to fit used to be in our laundry room before we added more storage, along with the desk legs, also IKEA). We measured and purchased the tile, grout, mortar, and tools for roughly $200 from Home Depot, which was easily the most expensive part of this whole project. We scored the lights on Amazon Prime for $48 total.

We did not bring in outside help. We take so much pride in our house and the vision we have for it. My husband hardwired both lights and we teamed up on the tile job. The only issue we ran into was with the imperfections of our walls in the house. The wall the calendar is on is bowed, and it’s obvious on parts of the wall where it appears to have an intentional brick staggered look. (At least that’s what we’re going with).
I love that we now have 100% use of this space. Before it was a wall covered in blue paneling, then a piece of drywall that was sporting a huge hole from the garage door for months on end, to now a beautifully white subway tiled wall that completely opens the entire nook up. At this point I’m not sure I would’ve done anything differently. I couldn’t love it more!
Bridgett’s words of wisdom: I hope this renovation inspires you to tackle a space that you might not necessarily love in your home. Let your vision surpass your current reality, because with the right materials and ambition, your house can be whatever you want it to be.
Resource list:
- Lights: Amazon
- Black mesh letter organizer: Target
- Letter Board: Walmart
- Wall tile: Home Depot
- Wall color: Behr
Thank you, Bridgett! You can see this project and more on Bridgett’s blog This Minimal House.