
These Kitchen Cabinets Are Unrecognizable After a $600 DIY Makeover
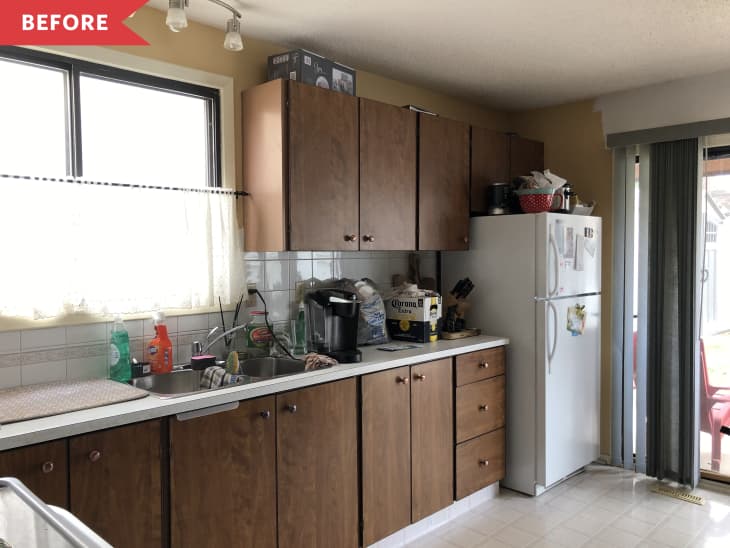
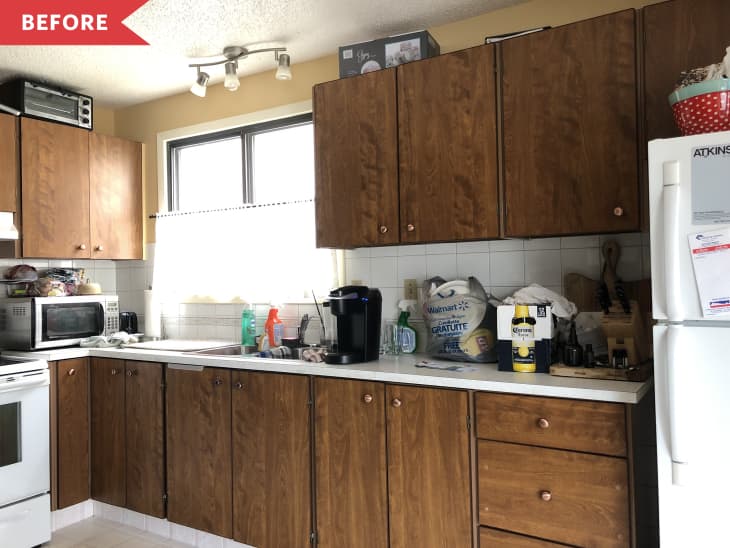
Courtney Hierath had a lot to love about her little bungalow, but the kitchen, with its buttermilk-yellow walls and dark wood cabinets, wasn’t on the list.
“I despised it from day one,” says Courtney. “But the idea of tackling this huge project was daunting, so I kept putting it off as long as I could.”
She Jumped at the Chance to DIY Her Kitchen When She Finally Had Time Off
Fast forward three years, and Courtney found herself with a little time off work — so she leapt at the opportunity to finally give her cook space a much-needed design facelift.
She Started the DIY with Peel-And-Stick Backsplash and Cabinet Trim
In addition to refreshing the cabinets and walls, Courtney knew she wanted a new backsplash (“the gray and dusty rose pattern will forever be embedded in my brain,” she says), snappier lighting, and a faucet with a little more presence. The challenge: DIY it all on a budget of about $600.
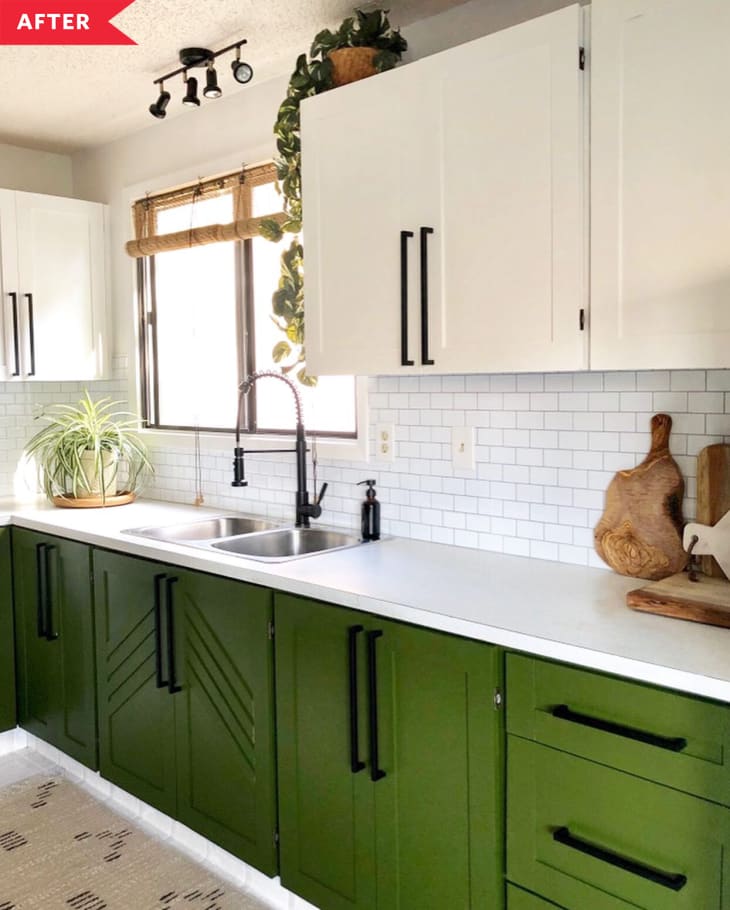
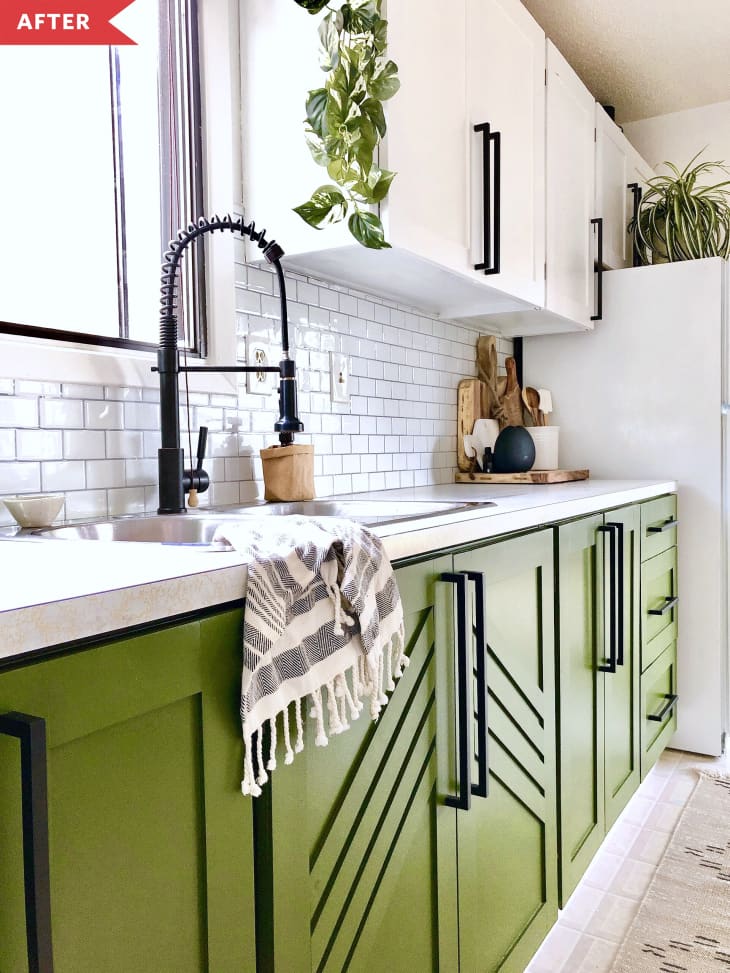
Courtney started with the backsplash, opting for super-easy peel-and-stick tile to save on time and money. The current cabinets were in fine shape, so to give them a new look on the cheap, Courtney removed the old hardware, filled the holes, and then refaced the cabinet fronts by gluing on pine trim to create a Shaker-style look.

New Fixtures and a Pop of Color Finished the Makeover
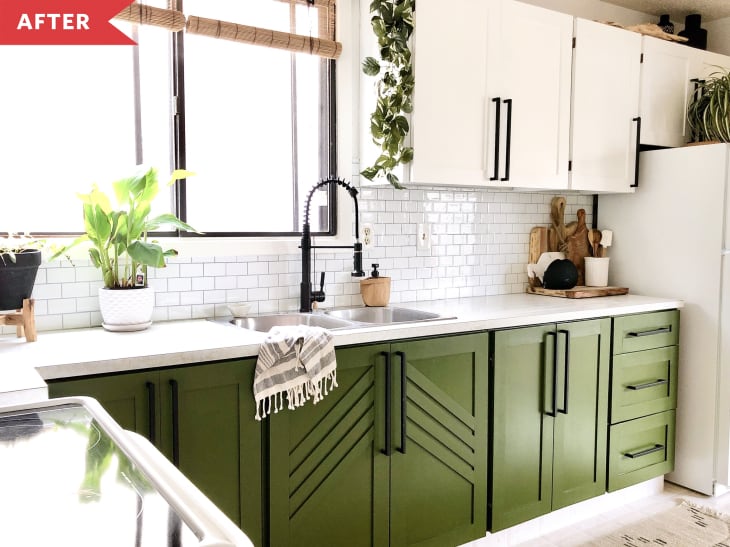
The cabinets under the sink got an extra flourish with a cool chevron pattern, also made with pine trim. Inspired by two-tone looks she saw on Pinterest, Courtney chose a white-and-green color palette. The white upper cabinets match the wall for an airy, seamless look; the green base cabinets (Behr’s “Eastern Bamboo”) look bright and springy year-round.
“I wanted something bold and fun that would complement all the white,” says Courtney. Next up: statement hardware with a sleek, industrial vibe.
Then, Courtney switched out the dinky old faucet for a commercial-style one with a super functional pull-down spout. Finishing touches: new track lighting in black to match the hardware and faucet, and groovy bamboo blinds.
The Transformation Was Only $600 and Lots of Sweat Equity
“What I love the most is the feature cupboards under the sink. I wanted to do something different that I hadn’t seen done before,” says Courtney. “I also love the bold green that I chose and how crisp and clean the overall appearance is.”
Total cost? Just $600 (plus plenty of sweat equity). We’d call that a DIY win! Click below to see the transformation again in all its glory.
Inspired? Share your own project here.