Before and After: A $170 DIYed “Marble” Mantel Adds Major Character to a Nashville Bedroom

When Nashville-based artist Elle Yount moved into her 1940s home, she knew she wanted to weave cozy elements into her space, but her first instinct wasn’t fuzzy blankets or shag rugs. Instead, she turned her attention to molding and mantels. “I’ve always been so drawn to architectural details, especially European ones,” Yount says. “I really wanted to incorporate that into our bedroom to add extra character.”
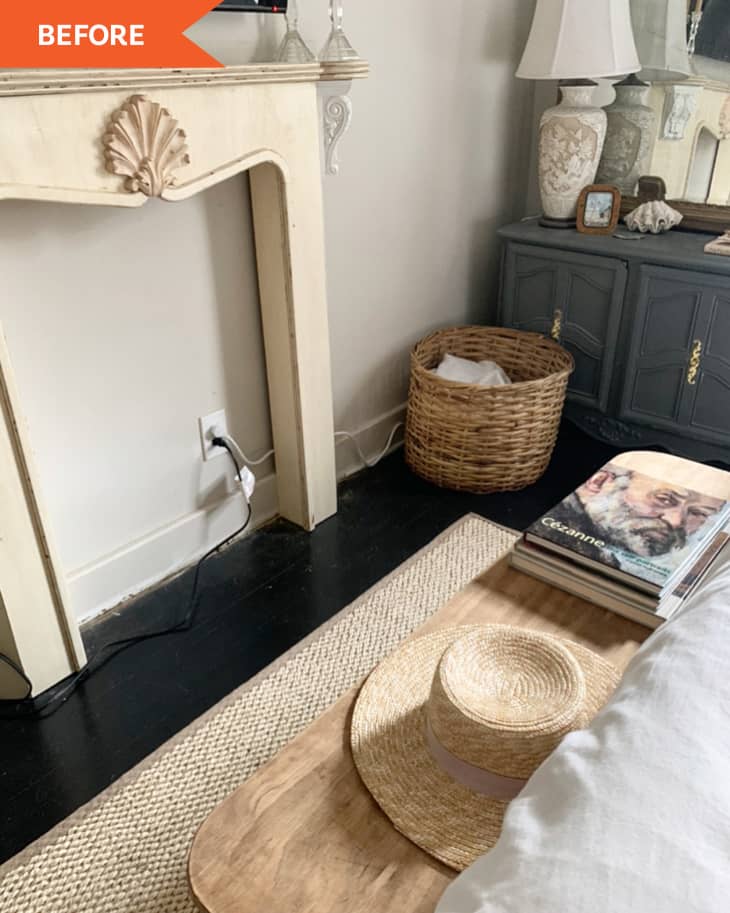
After looking around town and online for an antique mantel, her husband suggested they make a piece instead. She pulled a few pictures for inspiration, and then couple went shopping for pieces of inexpensive, stock wood. “My husband used a router to achieve the curved lines in the piece as well as the architectural pieces on either side of the mantel,” Yount explains. Yount then found a shell-shaped medallion to set off the middle of the mantel, which her husband added to the faux fireplace with wood glue. She also purchased architectural corbels for either side of the mantel for just $16 each and glued those on, too. To ensure the mantel remains stable, Yount and her husband used 2 by 4s to screw the piece into the wall for support. Then she hung a gallery wall-style arrangement of pictures around it and topped if off with a television.
After the piece was “finished,” Yount felt like it still needed a bit more intrigue. “I originally just painted the mantel white and lived with it that way for a bit, but more and more, I felt like the room needed some interest,” she says. Yount coated the piece in PPG’s Solstice, a soft, warm gray with a slate undertone, but the change of color still didn’t seal the deal for her. Suddenly, the perfect makeover idea came to mind, and it involved a faux finishing technique — only modernized for the 2020s. “I have always been so obsessed with marbled pieces and just the overall look in a Parisian flat,” Yount says. “Just months prior, I had actually played with painting a decorative bowl, giving it a marbled look. This got me thinking that I could at least try it on the mantel. Worst case, it’s just paint, and I could always start again.”
To create the marble-like finish, all Yount used was a thin-edged paint brush, white acrylic paint, and a cup of water. “When looking at marble, you notice that none of the veins are the same; they go every which way and vary in thickness,” Yount says. “So after looking through many different marbled mantels on Pinterest, I found the one that spoke to me most. I used that photo [as a reference] to somewhat copy the lines.”
It took Yount some trial and error as she sought to create the perfect faux marble finish. “I noticed when I made the lines too perfect, it didn’t seem to give off that desired look,” she notes. “Trying to figure out how to make the veins more believable was the most challenging part.” Eventually, Yount realized that adding a bit of water to the paint to help smear some of the lines was the answer. “None of the lines needed to be straight but [rather] somewhat blurred and curvy,” she adds. “I added a bit of water to the paint brush, and over the line I had painted with the white acrylic paint, I would press down hard against that line on the mantel to rub the paint in a bit, almost smearing the line. This definitely crushed the brush and once this project was done, my paintbrush was, too, but honestly, the look was so worth it!”
All in all, the painting portion of the project only took Yount about one hour to complete — and she notes that it probably would have taken even less time had there been less experimentation involved. To complete the look, Yount and her husband placed a large, antique mirror behind the mantel in order to make their room appear bigger and fill out the firebox, since obviously this isn’t a functional fireplace. She then styled out the front of the unit with a bust, stacks of old books, and an oversized white vessel vase. A swag of greenery atop the mantel adds an extra natural and festive touch to the setup, too.
All in all, the entire project cost Yount and her husband just $170, with wood making up $70 of expenses. “Of course [the cost] all depends on what size of fireplace mantel you are looking to build, but for us, we wanted it to appear as though it were a piece we found in a small Parisian flat,” she explains, noting that the mantel is 50 inches wide by 47 inches tall. Yount is incredibly pleased with how much the piece has changed her bedroom. “Now, it feels so incredibly cozy in our room, and the mantel also works as a beautiful focal point for us at the end of our bed without taking up much space,” she says. “The mantel worked almost as the link that helped tie in my vintage lamps and nightstands with our modern, upholstered bed, thrifted art, and my own artwork as well.”
