
An IKEA HEMNES Shoe Cabinet Got a Shaker-Style DIY Redo for $130
Hallways and entryways, especially in smaller spaces, can be tricky to shop for. Any furniture you put in a high-traffic area has to be somewhat small to stay out of the way, but it also typically serves as a drop station or storage for keys, coins, cards, and more.
Finding the perfect, compact furniture for a hallway or entryway is a win, whether that’s a shelf, a shoe rack, a console table, or some sort of hybrid. DIYer and homeowner Bailey Powell’s (@bailey.at.home) shoe storage/console table in her hallway worked fine, but she wanted to make it a bit more sophisticated.
$130 Gave It a Custom Look
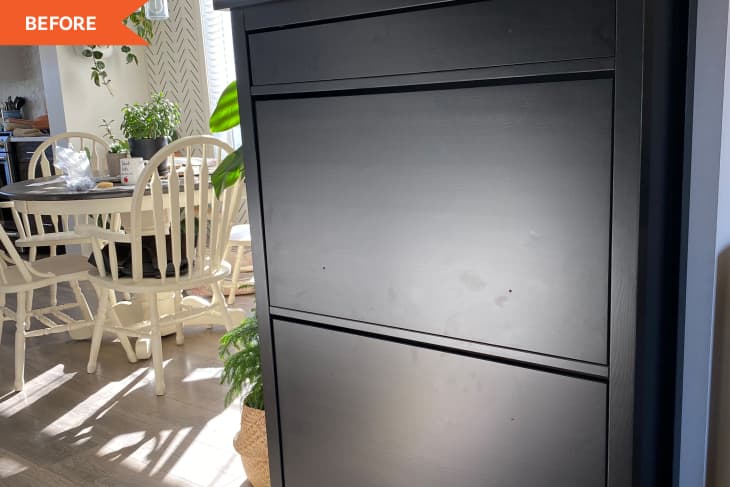
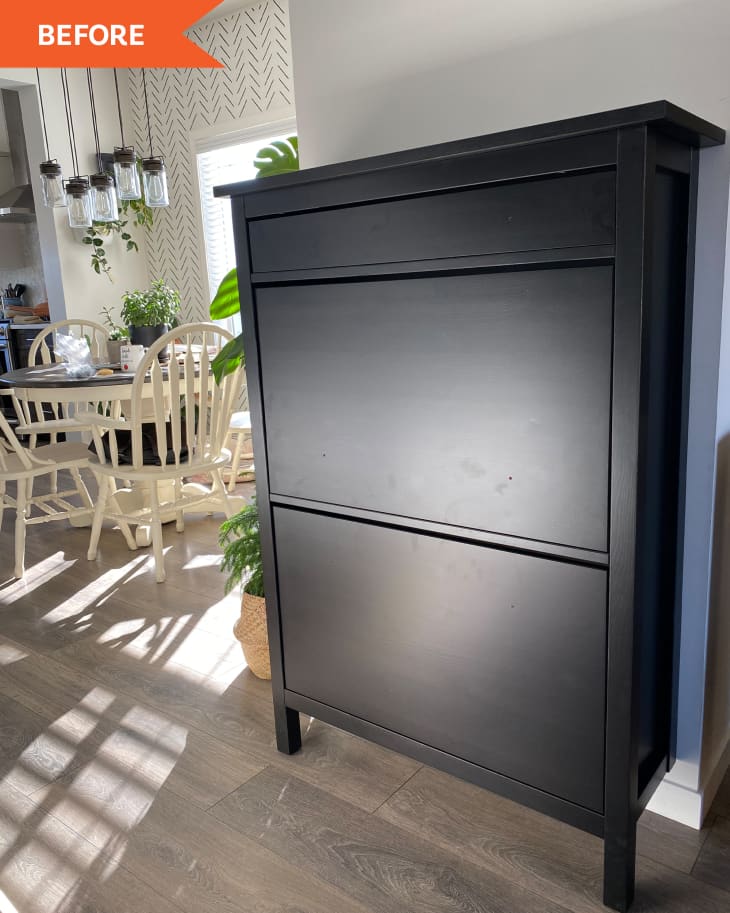
The “before” “had plain silver knobs and a simple profile,” Bailey says of the IKEA HEMNES (now discontinued; the GULLABERG is a close replacement). She spent about $130 making it look a bit more custom.
It Was a Fairly Simple Project to Add a Shaker Profile
“This project was fairly simple,” she says. First, she removed the knobs and painted the entire cabinet black — a darker, matte alternative to its black/brown stain before — using a shellac primer.
Then, she got to work giving the cabinet some texture. “I created a Shaker profile by adding a slim piece of PVC trim around the perimeter of each door with some wood glue,” she says. “I filled the space inside the trim with fluted pole wrap, which I also painted black.”

A Slight Hiccup Meant She Had to Take an Extra Step
She did experience a slight hiccup with the pole wrap, though. “One lesson that I learned is that you need to sand the pole wrap before painting it,” she explains. “I thought it looked & felt completely finished and smooth, but I found that it was snagging when I wiped it with a cloth. I had to lightly sand down, repaint, and seal the cabinet front to get rid of the fuzz left behind.”
Bailey gave the whole piece a matte top coat for protection, and lastly, she added tab-style drawer pulls, which she painted to get the perfect aged brass look.

It Became a Statement Piece and People Can’t Believe It’s IKEA
Bailey says she loves that the “after” is “a statement piece rather than just another piece of furniture.”
“It’s also a great conversation piece because people can’t believe it’s IKEA!” she says. “I love that it is still fully functional and has a huge amount of storage, but doesn’t look like a utility piece of furniture.”
Inspired? Submit your own project here.
Shop This Before & After


Get all the IKEA UPDATES
Sign up for The IKEA Edit, our twice-weekly newsletter with the latest IKEA finds, deals, and hacks.