
This Living Room Felt Cold — Then They Tried This Unexpected Paint Color
If you’re having trouble landing on the perfect paint color for your living room, borrow interior designer BaSharia Middleton’s (@bash_made)’s advice: First, make an inspiration board with all of the colors and textures you plan to use in the room (BaSharia used Pinterest for hers), then get a paint swatch and actually put it on the wall in the room you’re looking to paint, and leave it there and live with it for a few weeks before officially pulling out your paintbrush.
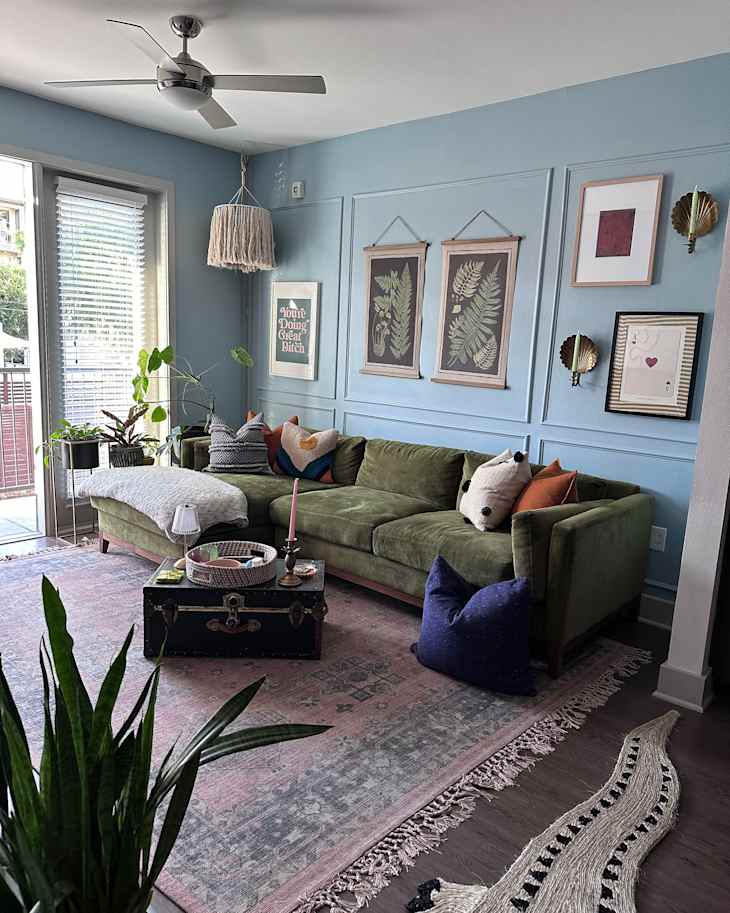
That’s how BaSharia landed on the perfect blue hue in her living room makeover.
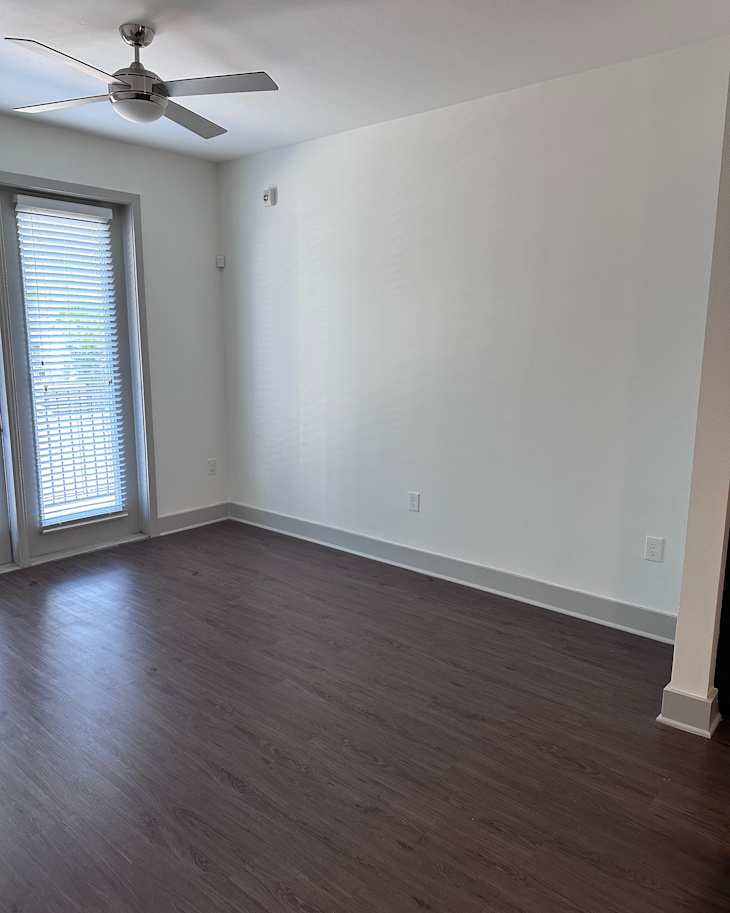
Paint warms up the space.
“Before I moved in, the apartment had the clean, modern look typical of newer spaces,” BaSharia says. She liked that the living room layout worked well with her beloved velvet sofa — ”a non-negotiable,” she says, but she also says the room felt “cold and impersonal.”
“Overall, the apartment needed my personal touch to truly feel like home,” she says, and paint was the perfect way to add a bit of personality. BaSharia wanted the perfect blue to complement the green velvet couch, so she made sure to find inspiration photos that had both colors. She landed on Backdrop’s The Early Stuff. “The colors tie together effortlessly,” BaSharia says.
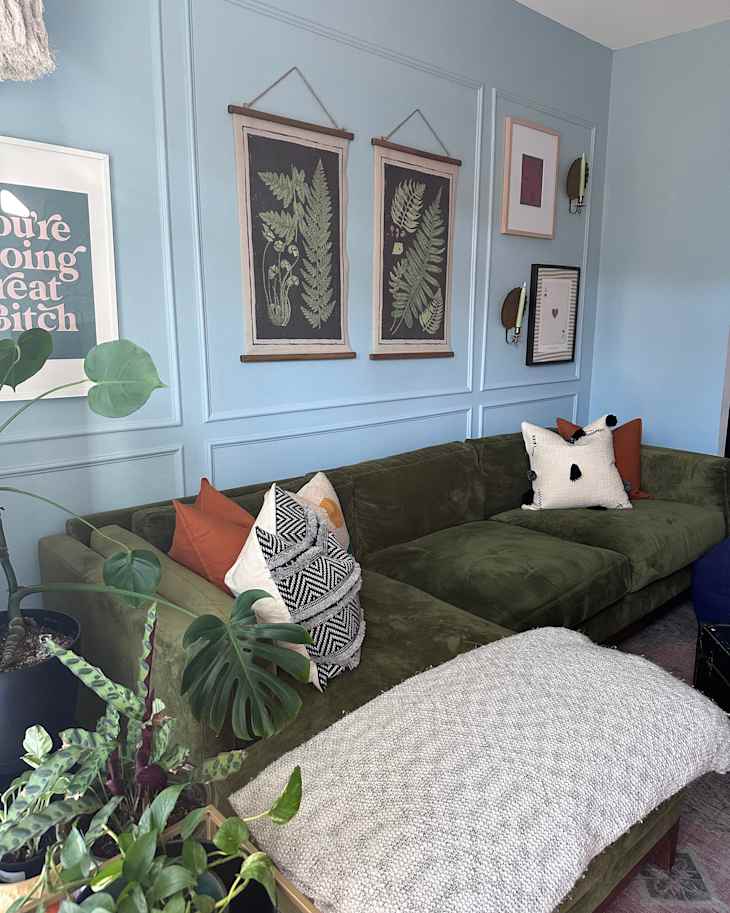
Rental-friendly wall molding creates the perfect frame for artwork.
She also added wall molding to make the apartment feel a little less cookie-cutter. It was a first-time DIY project for her, and her mom helped her.
“It was a mix of trial, error, and teamwork,” BaSharia describes. “We used a miter cutter for precise angles and 3M tape to secure the trim, then caulked and painted for a seamless finish. It was a learning curve, but I’m thrilled with the removable, polished look we achieved.”
BaSharia says taking the DIY route and enlisting the help of her mom not only made the project cheaper, but also more fun. And choosing pre-primed MDF was also a time- and cost-saver.
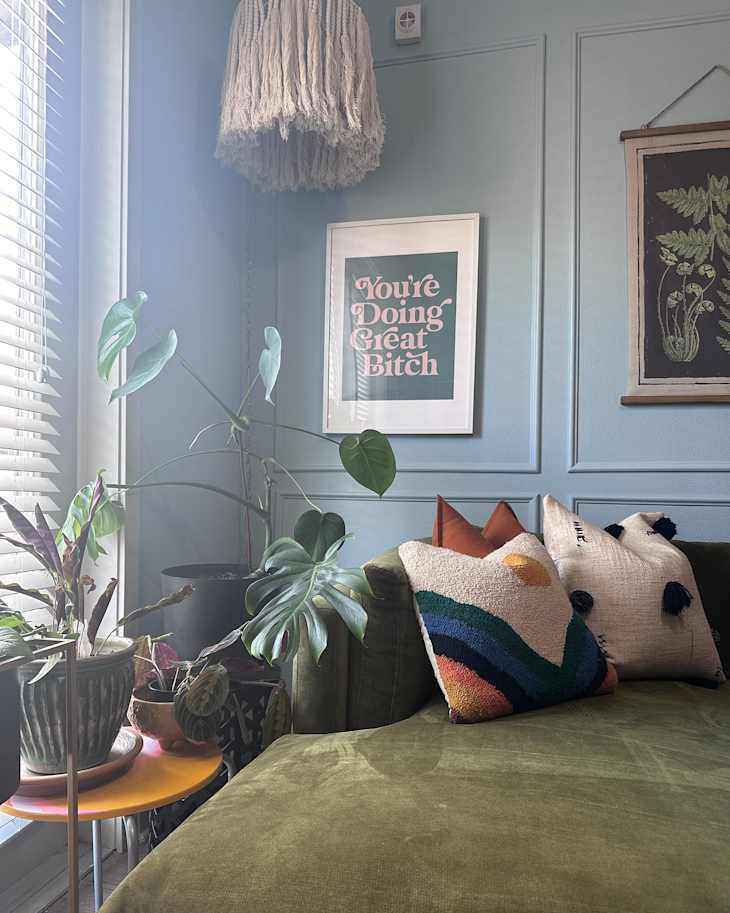
Artwork and accessories completed the cozy vibe.
BaSharia’s DIY advice is threefold. First, keep a drawer stocked with nails and tools as you’re working on projects; this keeps everything within reach but decluttered, and you can work on the project when you have little pockets of time. Second, make a to-do list to help with time management and prioritization. Third, stretch your budget by shopping your own home, looking for sales, and thrifting.
BaSharia’s couch is from City Home, the vintage trunk-turned-coffee table in the room belonged to her dad, the rug is from World Market, and the artwork is from Society6 and thrifted.
“What I love most about the living room is how cozy and seamless everything feels,” she says. (And you can see the other side of the room here!) Best yet, “I only had to make a few small changes to achieve this harmony,” BaSharia adds.
Inspired? Submit your own project here.