
Before and After: A 1970s-Style Bathroom Gets a Fresh Look — And Its 100-Year-Old Floors Back
Perhaps you might be familiar with decade dabblers, people and homes with decor and accessories pulled from their favorite decades. A decade dabbler might, for instance, sit on a blowup chair from the ’90s in front of a mid-century coffee table with tapered legs they scored at a local vintage shop atop a shag rug from the ’70s all while wearing some ’80s-style dolphin shorts.
While mixing and matching design inspiration from different decades can create a cool, collected, throwback vibe, it can also drag a space into “dated” territory.
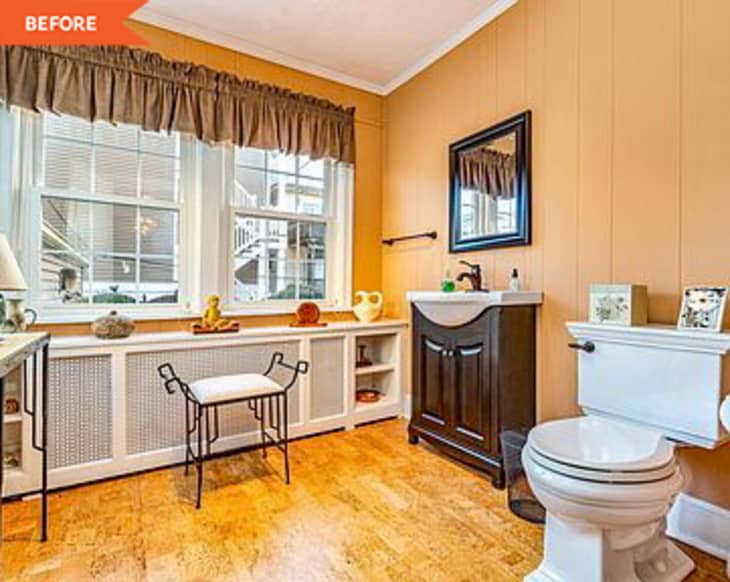
For example, Therese Taraschi’s (@the_surreyrenovation) home is over 100 years old, and its “before” attributes spanned many decades thanks to hodgepodge updates over time. “Wood paneling was installed over the cracked plaster walls sometime in the ’70s and was painted a spice color,” Therese says. “The plaster ceiling was cracked, and texture was added at some point to cover up the cracks. The fixtures and vanity were also extremely dated … I grew tired of looking at the dated downstairs powder room.”
Therese adds that the room was ripe for a redo because it’s a good size and gets lots of use. She decided to revamp it during the Spring 2022 One Room Challenge with the goal of giving it a more “coastal style.”
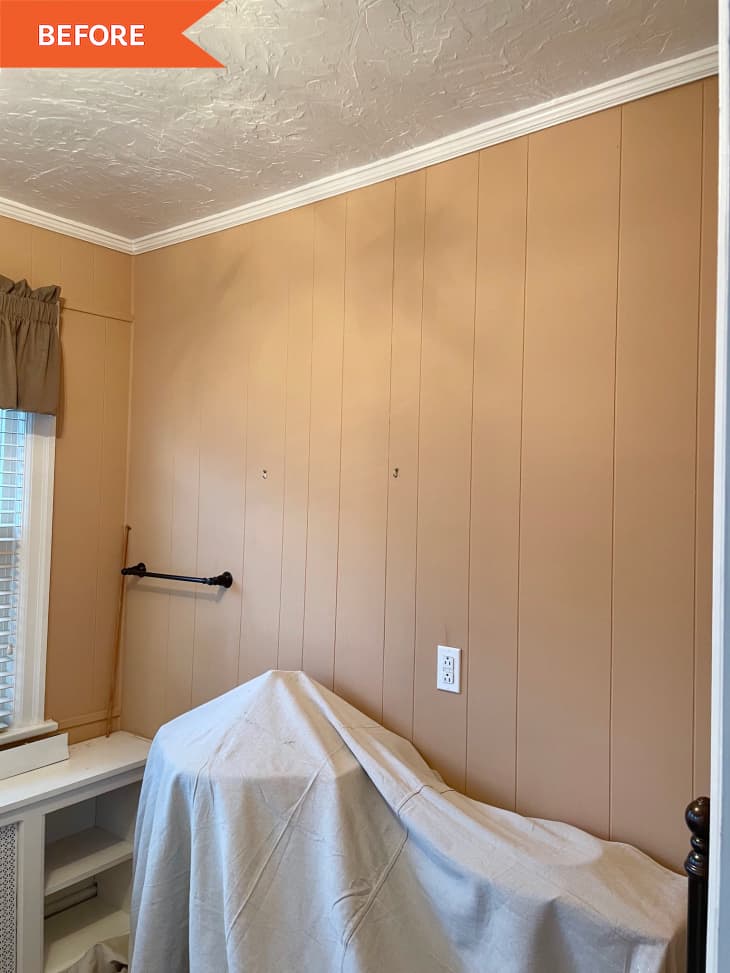
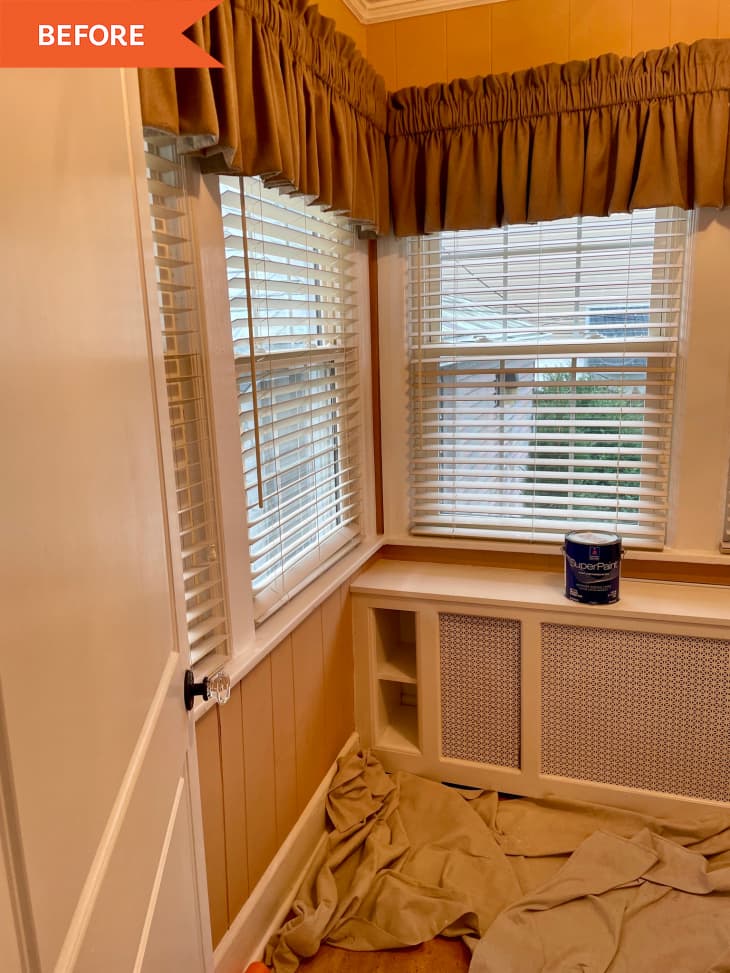
“We started with painting the wood paneling, ceilings, and trim,” Therese says. “I would have loved to remove the paneling but received advice from a contract not to do so because we do not know how it was secured, and it could be opening a can of worms.”
Instead, she used paint to transform the space “and hoped that painting it white would give it the appearance of vertical shiplap.” She used Sherwin-Williams’ Pure White for the walls.
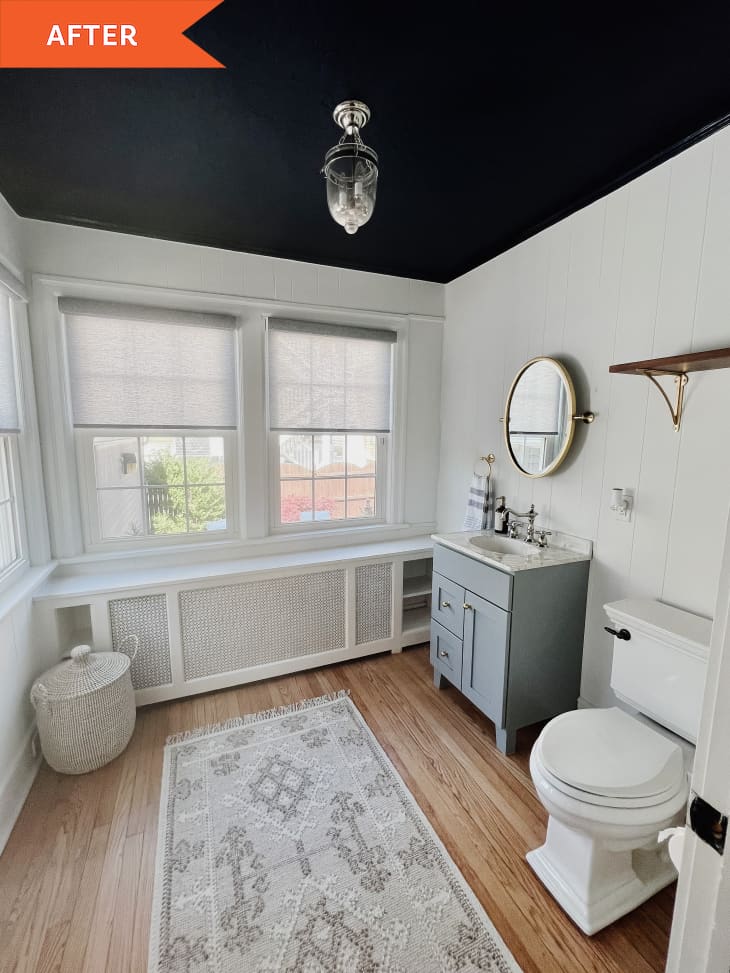
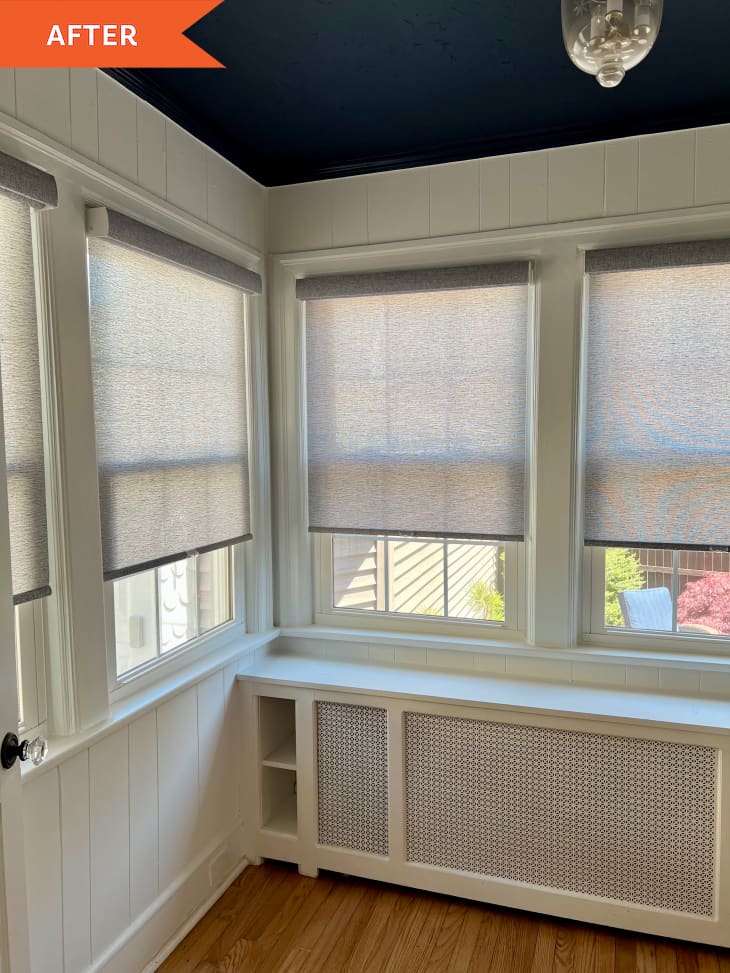
For the ceiling, she decided to go with something bold that would mask the texture without bearing the expense of new drywall. Her final choice? Sherwin-Williams’ In the Navy. “I tend to like more neutral colors and do not take risks when designing a room,” Therese says. “I almost abandoned the dark ceiling after the first coat, but I’m glad that I stuck with the plan because it turned out great.”
Now, the daring color is her favorite part of the room. Her advice to others when it comes to paint? “Don’t be afraid to try a bold color or pattern in a smaller space,” she says. “Take the risk, odds are it will work out.”
Another pleasant surprise for Therese in the space was how easy it was to upgrade the flooring. She was pretty confident that there were original hardwoods under the vinyl because that was the case for the rest of the house. When she pulled up the floors, sure enough: There were the original over-100-year-old hardwood boards. She hired professionals to remove the vinyl, sand the hardwoods, and apply two coats of clear polyurethane. “I was so fortunate that the hardwood was in great shape,” she says. “It turned out very well.”
Installing the new vanity wasn’t as easy because some new plumbing lines had to be added, and Therese had to wait for weeks to find a plumber who would work with her vanity and faucet (a low-price vintage find from Kingston Brass).
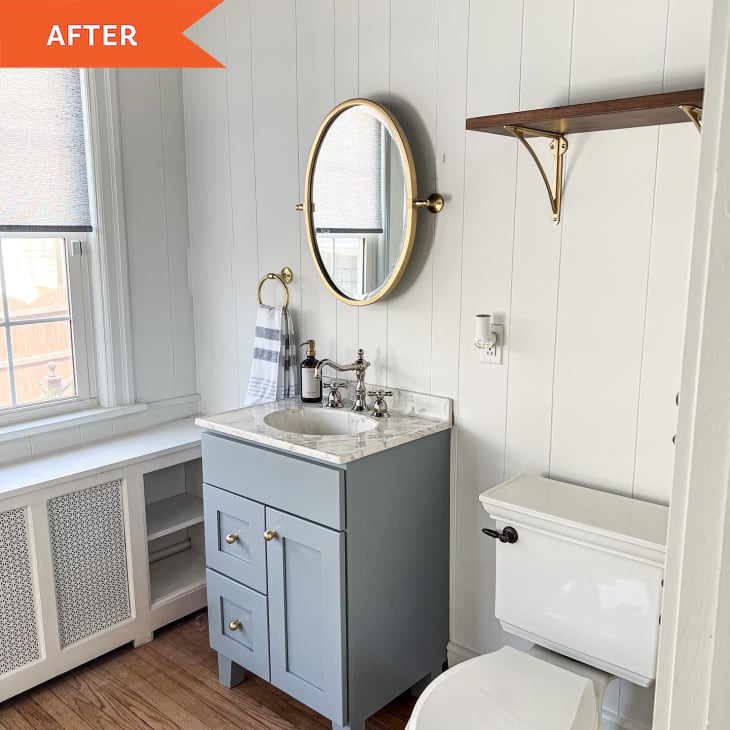
Therese’s dad helped her install the mirror, toilet paper and towel holders, shelf, and artwork. Therese also installed roller shades for privacy, and she loves that their color ties in with the ceiling. A rug and storage basket from Serena and Lily completed the space. “Overall the process took about 10 weeks and cost approximately $10,000,” Therese says. “Much of the cost was related to the unexpected plumbing work and a mandatory minimum for refinishing the floor.”
After this project, her advice is to budget extra time and money where possible, reach out to multiple professionals for prices if you’re hiring any work out, and to take design risks! “My hope is to covert this into a full bathroom in the next five years and give it a complete update at that point,” Therese says. “However, this was a nice upgrade that should get me through the next few years before I’m ready to do so.”
She’s set the stage for an easy transition later, and she’s proud that her coastal-with-hints-of-vintage brass vision came together. “I love that I had the courage to try the dark ceiling and mixing metals for the first with the polished nickel faucet and light fixture and the brass bath hardware,” she says. “I think it gives the bathroom more character.”
This project was completed for the Spring 2022 One Room Challenge, in partnership with Apartment Therapy. See even more of the One Room Challenge before and afters here.
Inspired? Submit your own project here.